Waitlist a Class
Waitlist
The waitlist option is available for most courses filled to capacity and set at 20% of class capacity. The waitlist period mirrors the add period and ends at midnight on the last day to add classes. Waitlist students are instructed to attend the first day of class to receive further instruction from the faculty member. Faculty determine if the waitlisted students continue to attend class.
Waitlist classes are open to all eligible students on a first come, first serve basis. Students registering for a closed class will be offered the opportunity to be put on a Waitlist. When a registered student drops a seat in a closed class, the waitlisted student will be notified by SLCC email. Once notified by email that a seat is available, the waitlisted student has 24 hours to register for the course. If registration is not finalized within the 24-hour period, the student is dropped from the waitlist. The next waitlisted student is notified by email that a seat is available.
Students must meet prerequisites to be eligible for the Waitlist. Waitlisted students with time conflicts are not allowed to register for the class.
If a course is Closed, you can add yourself to a waitlist to be added to the course if a seat becomes available.
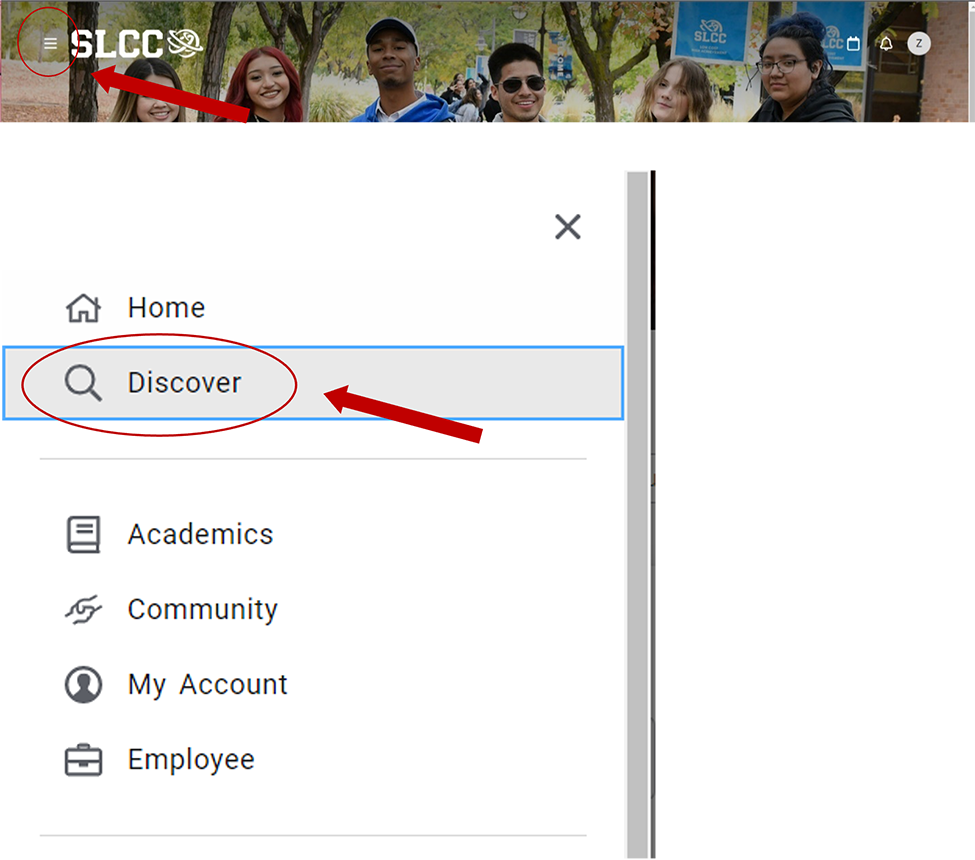
1. Log into your MySLCC page and click the hamburger button in the right-hand corner. Click the Discover search button.
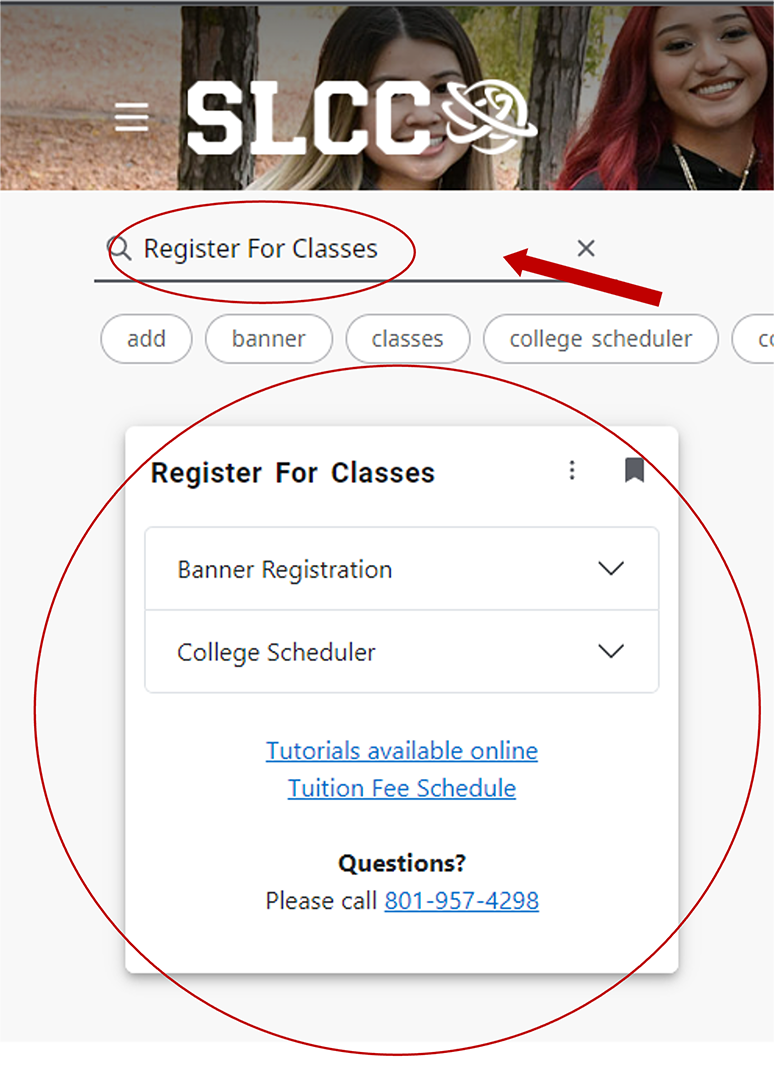
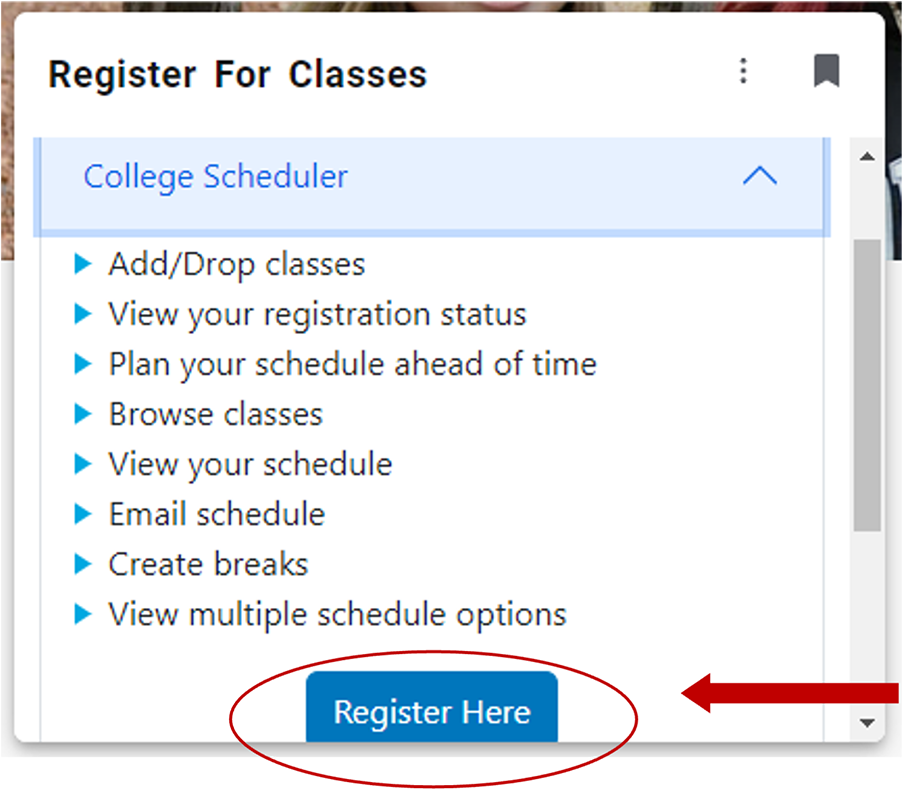
2. Search for the Register For Classes card (You can bookmark it by clicking the little icon in the right-hand corner)
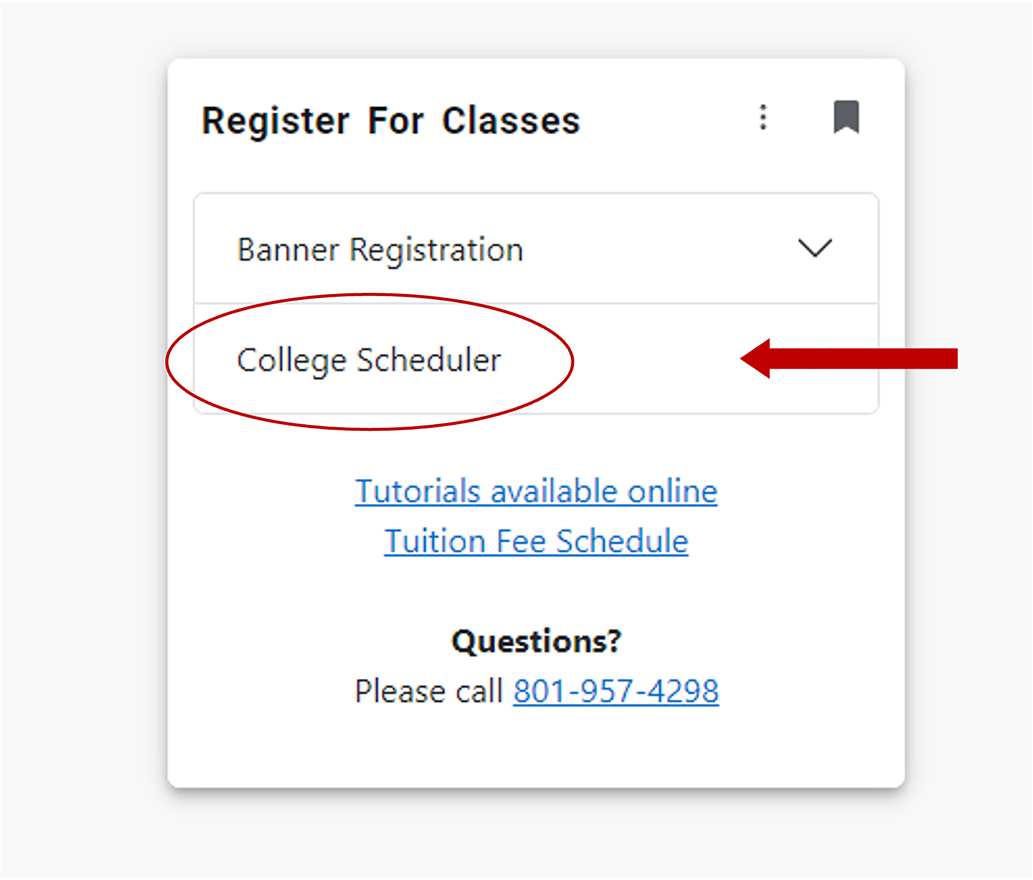
3. Click on College Scheduler
4. Click Register Here
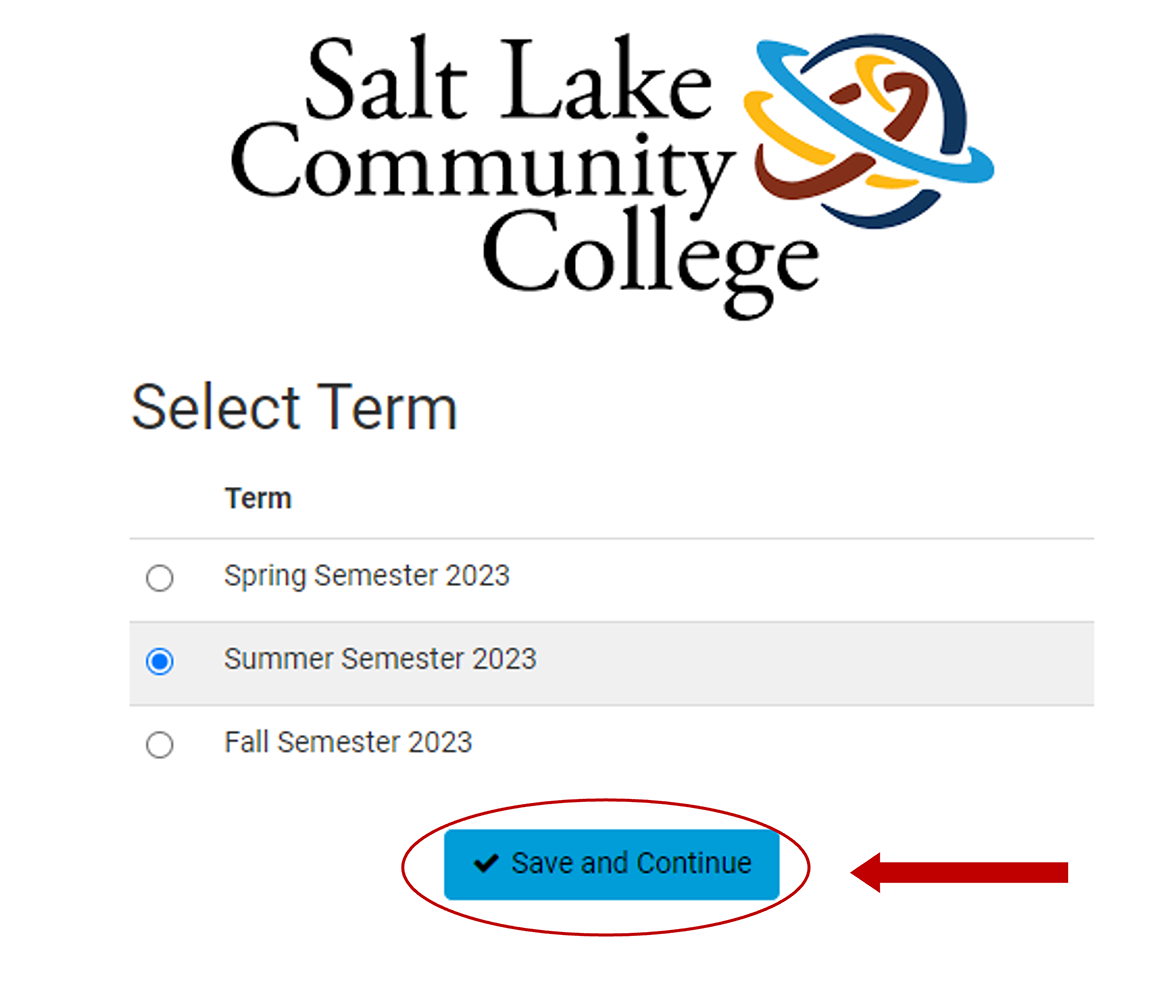
5. Select the semester and click Save and Continue
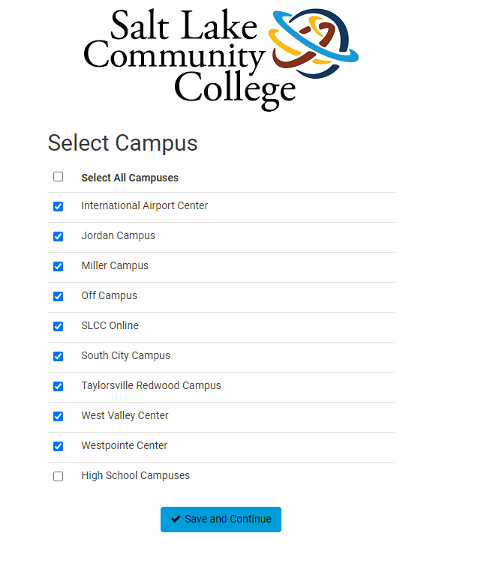
6. Select the campuses where you wish to take classes and click Save and Continue
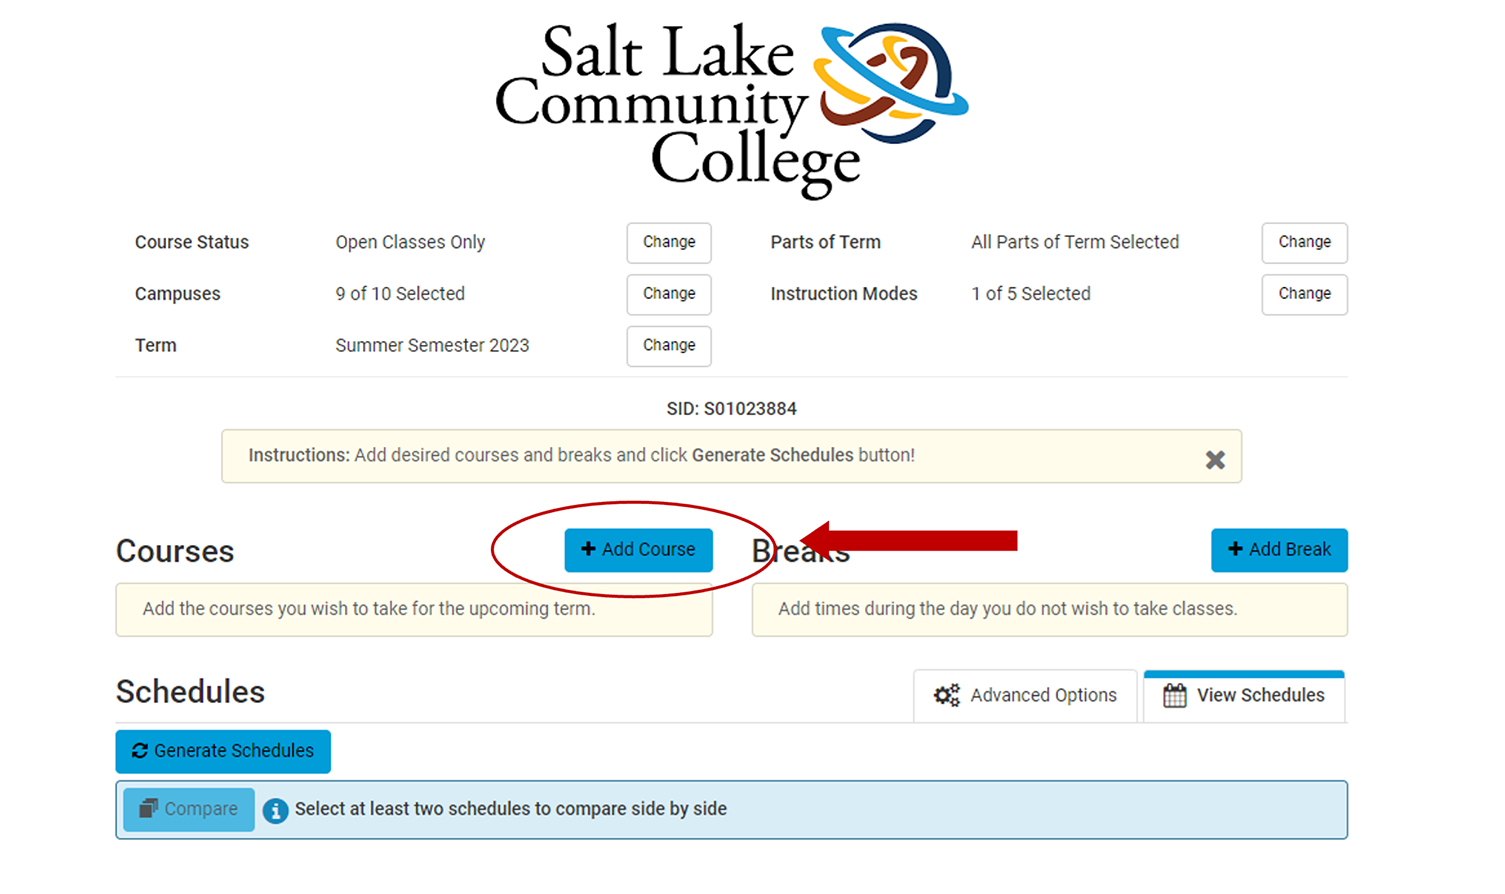
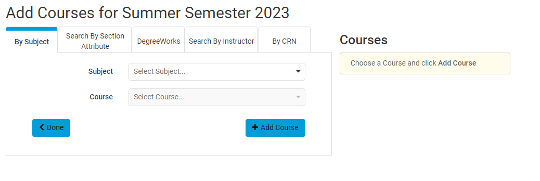
7. To add the courses to your schedule, click + Add Cours
8. Use the various search tools to find the courses you need. (Example: ART 1120; Subject: ART-Visual Art and Design, Course: 1120 Design)
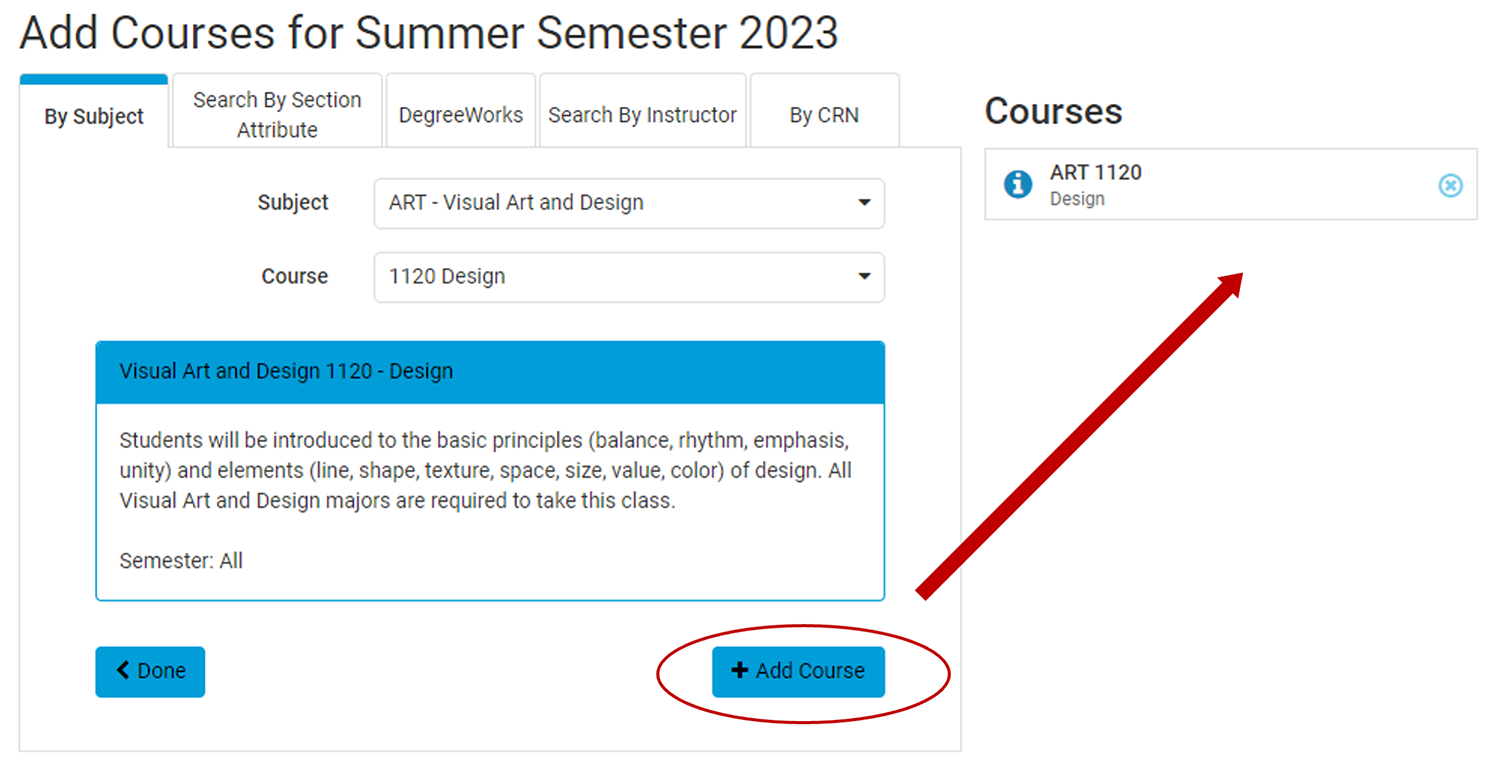
9. When a course is found, click + Add Course. You can see if it has been added if it appears underneath Courses on the right-hand side of your screen
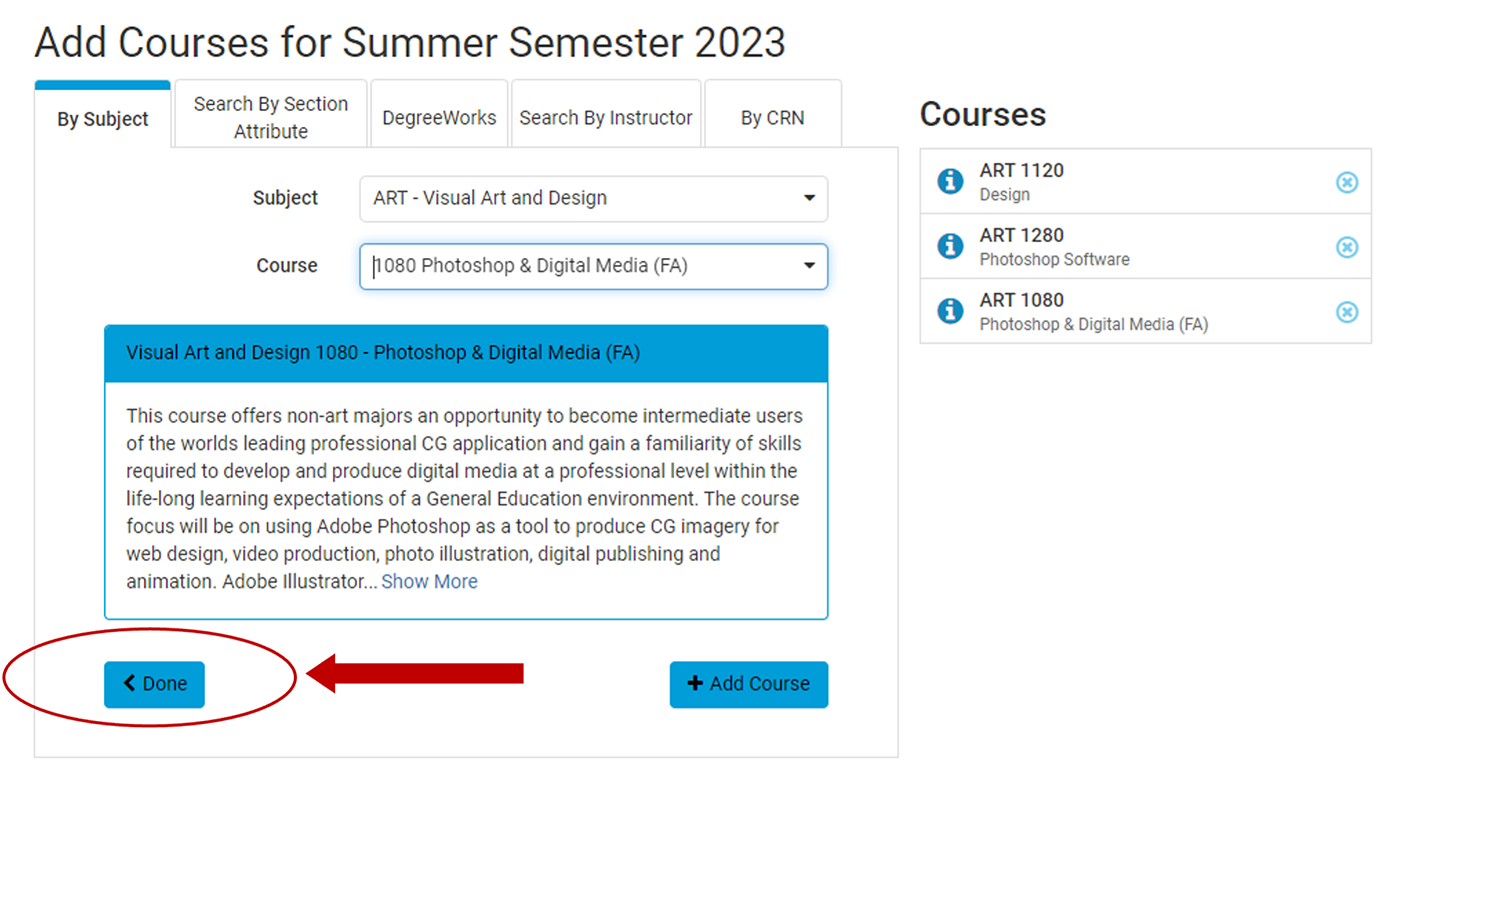
10. When all your courses have been added and you can see them listed under Courses, click Done
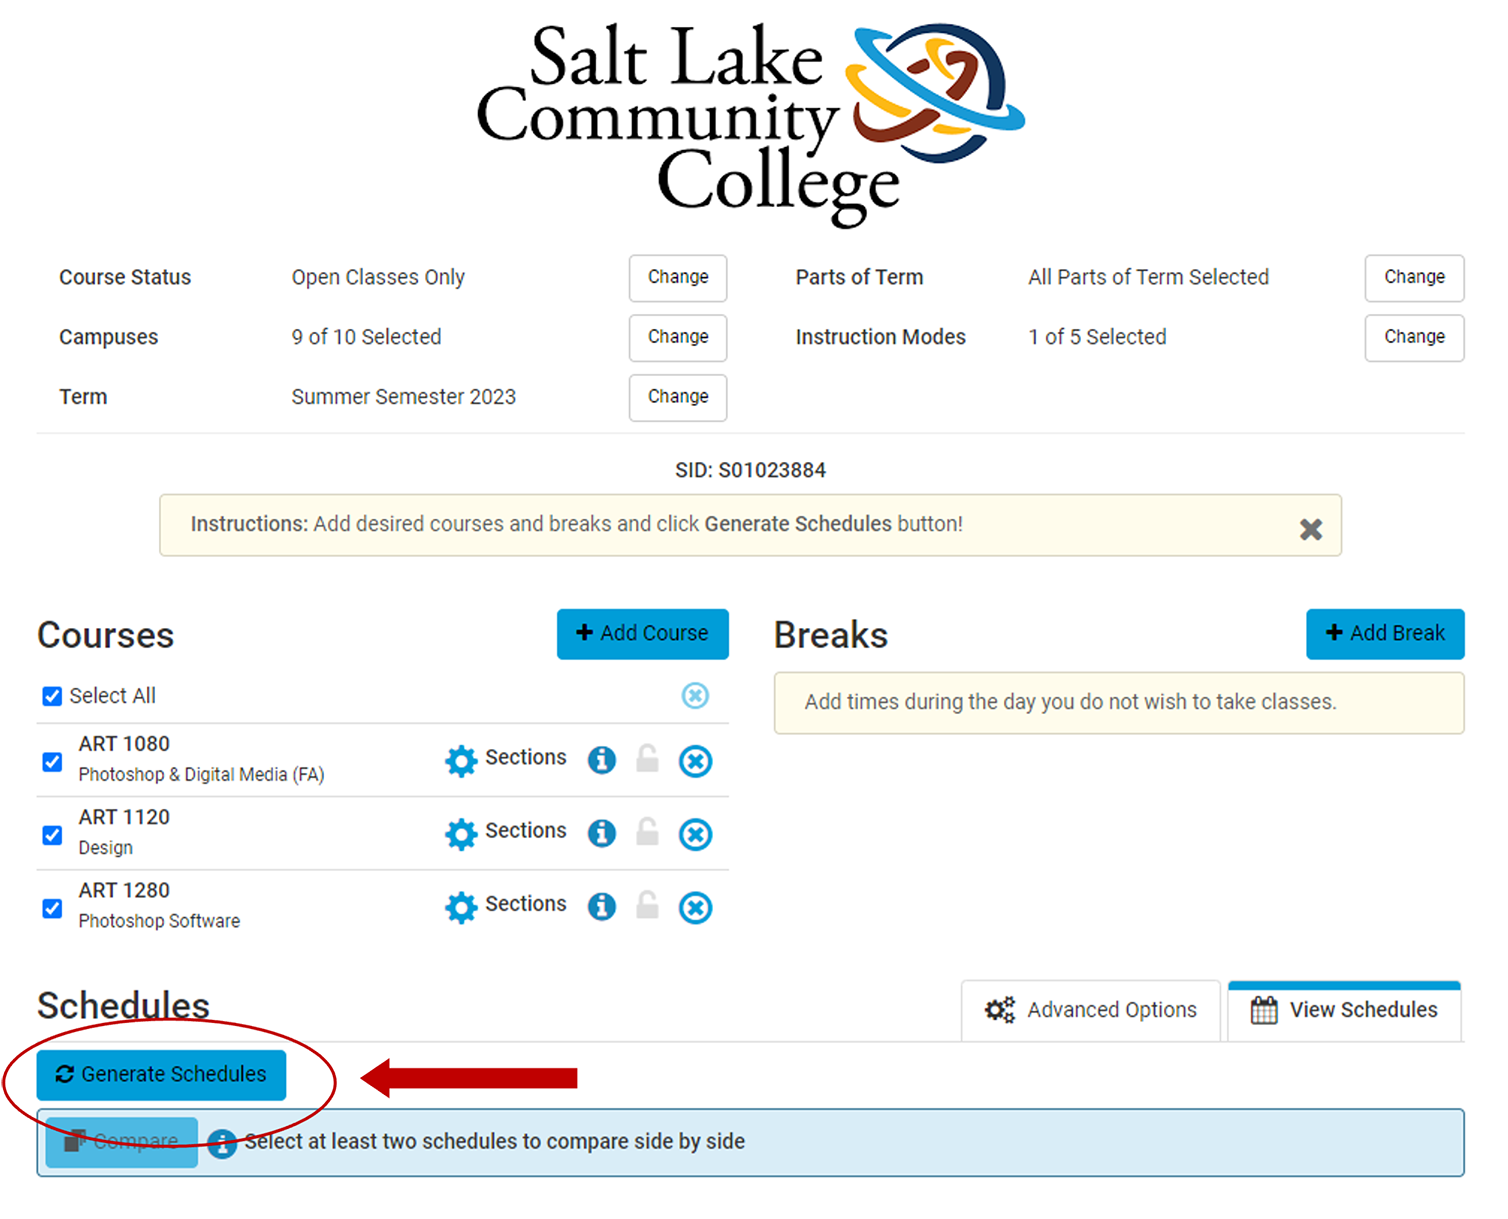
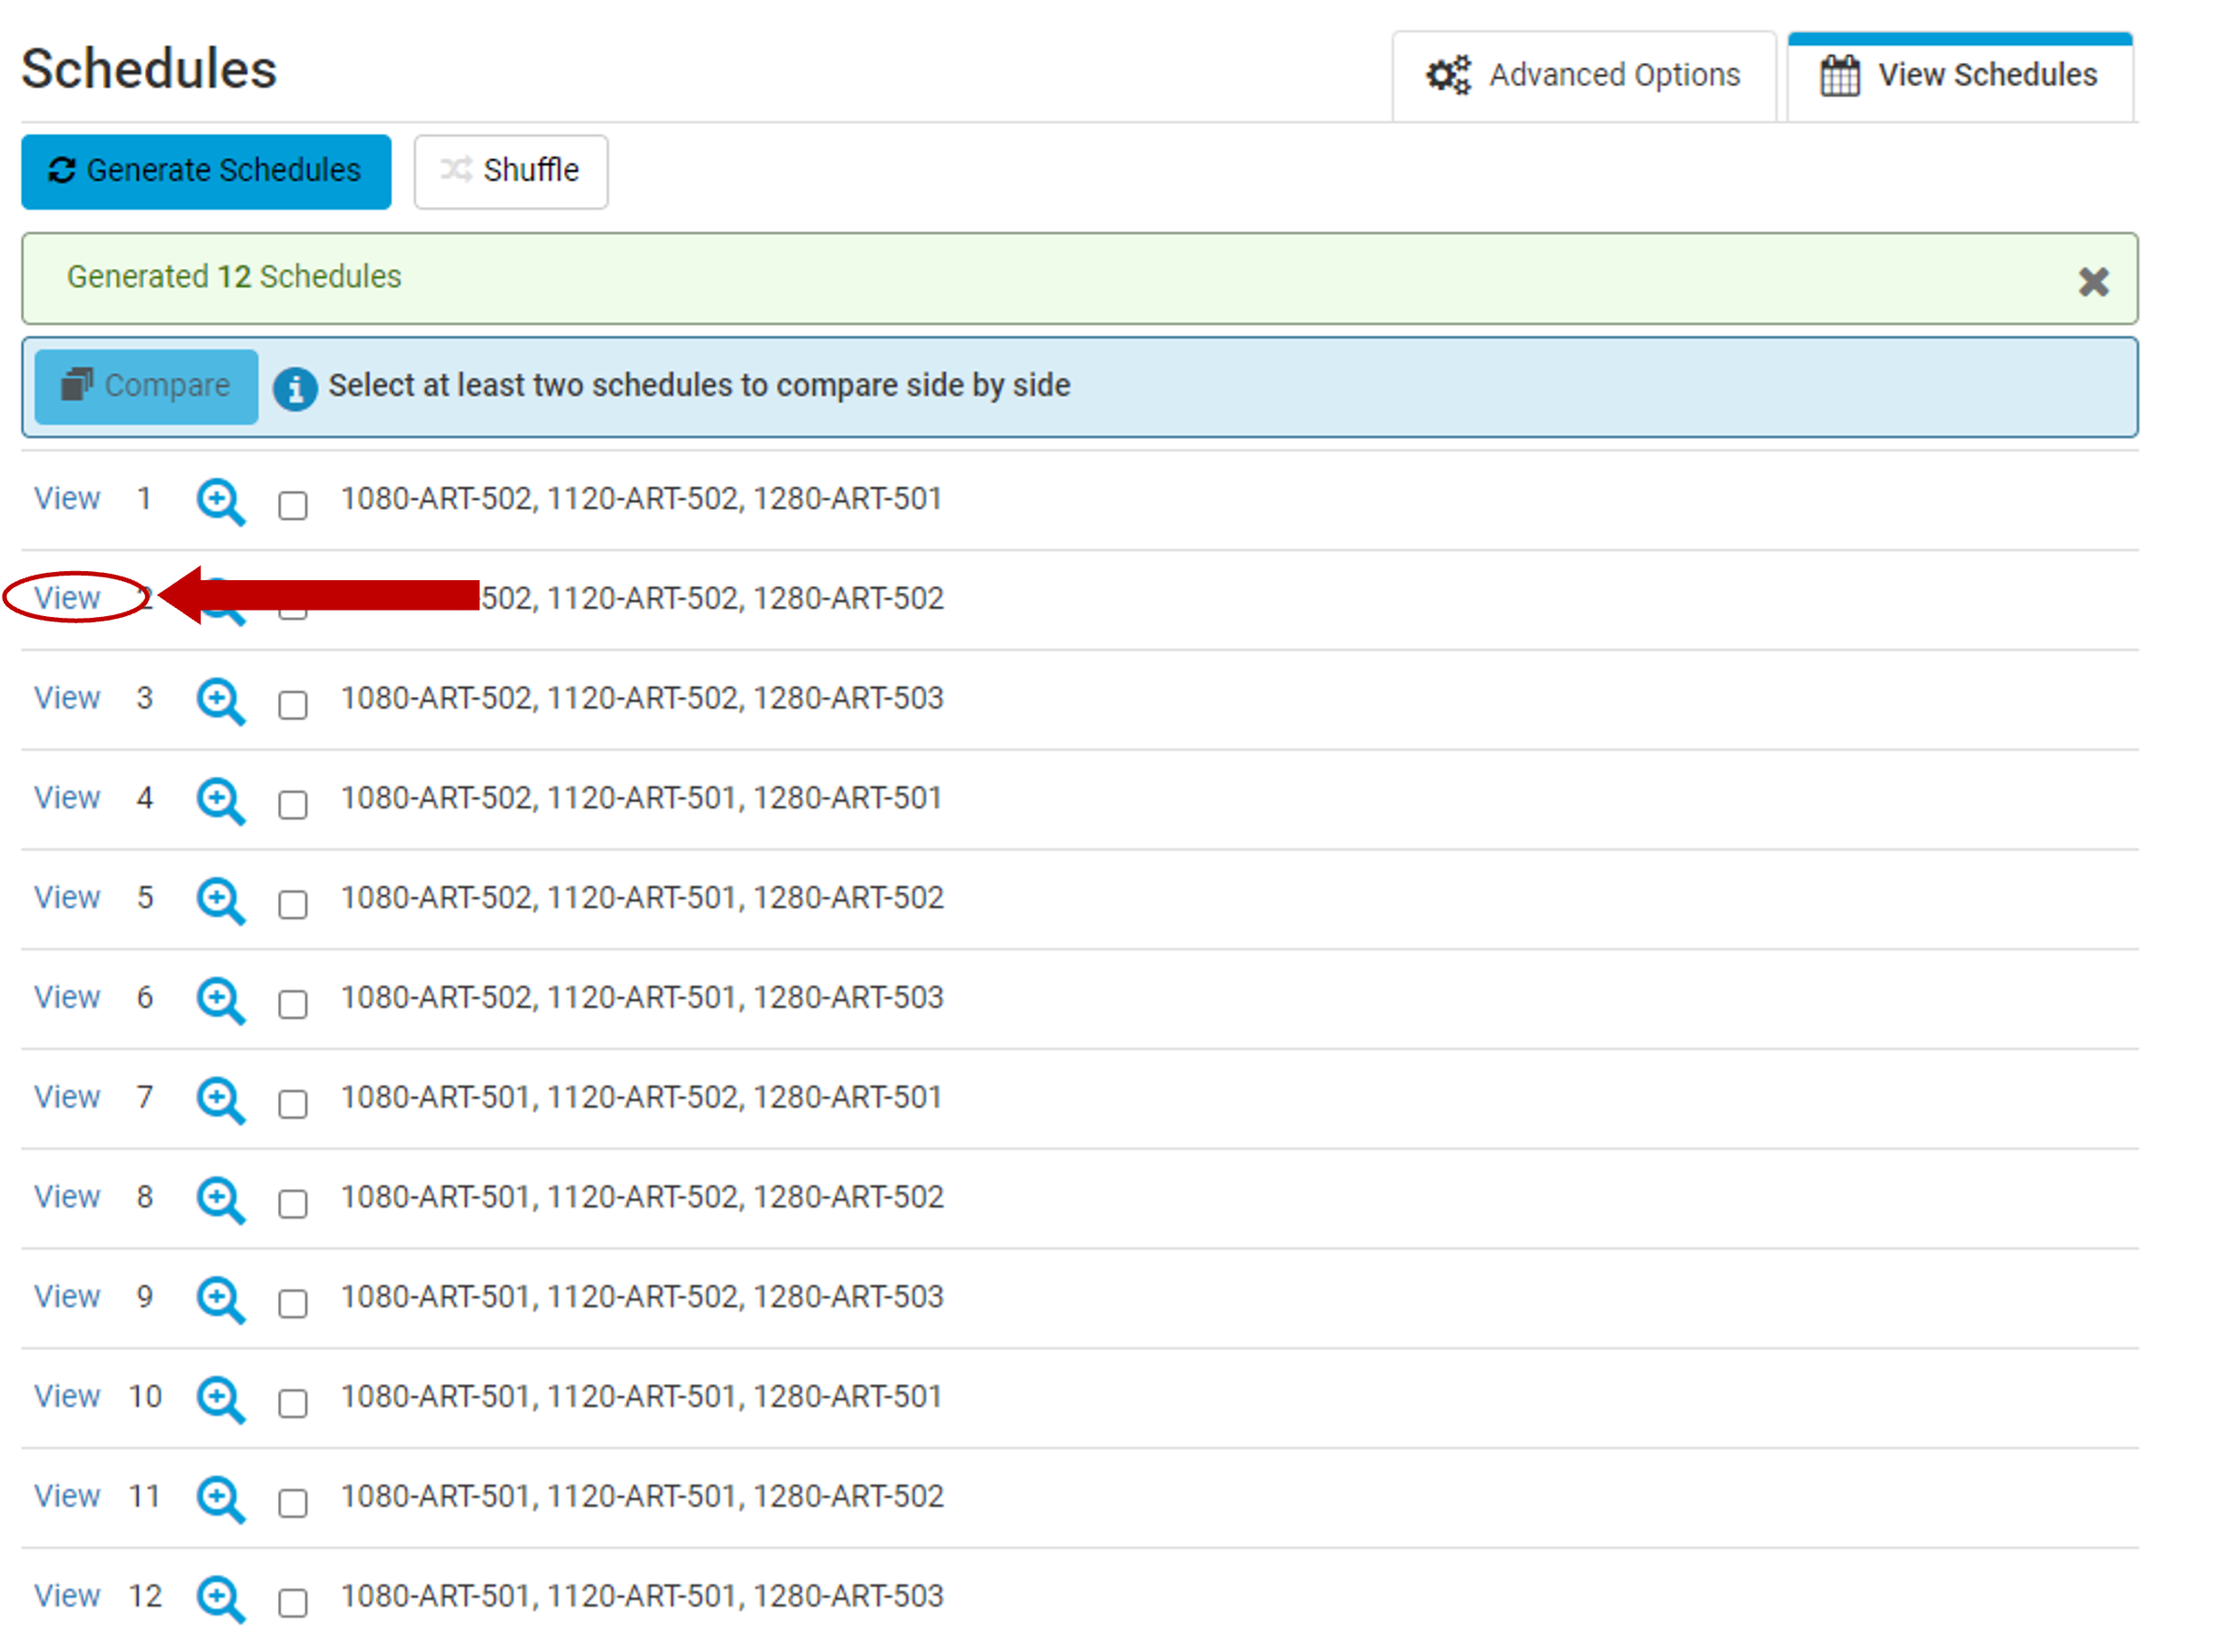
11. With all your courses selected, click Generate Schedules
12. You will now be given a list of all possible schedules. Once you find a schedule that fits your needs, Click View
13. On this page, you will see an in-depth overview of the courses and schedule. If you wish to move forward with this schedule, click Send to Registration Cart

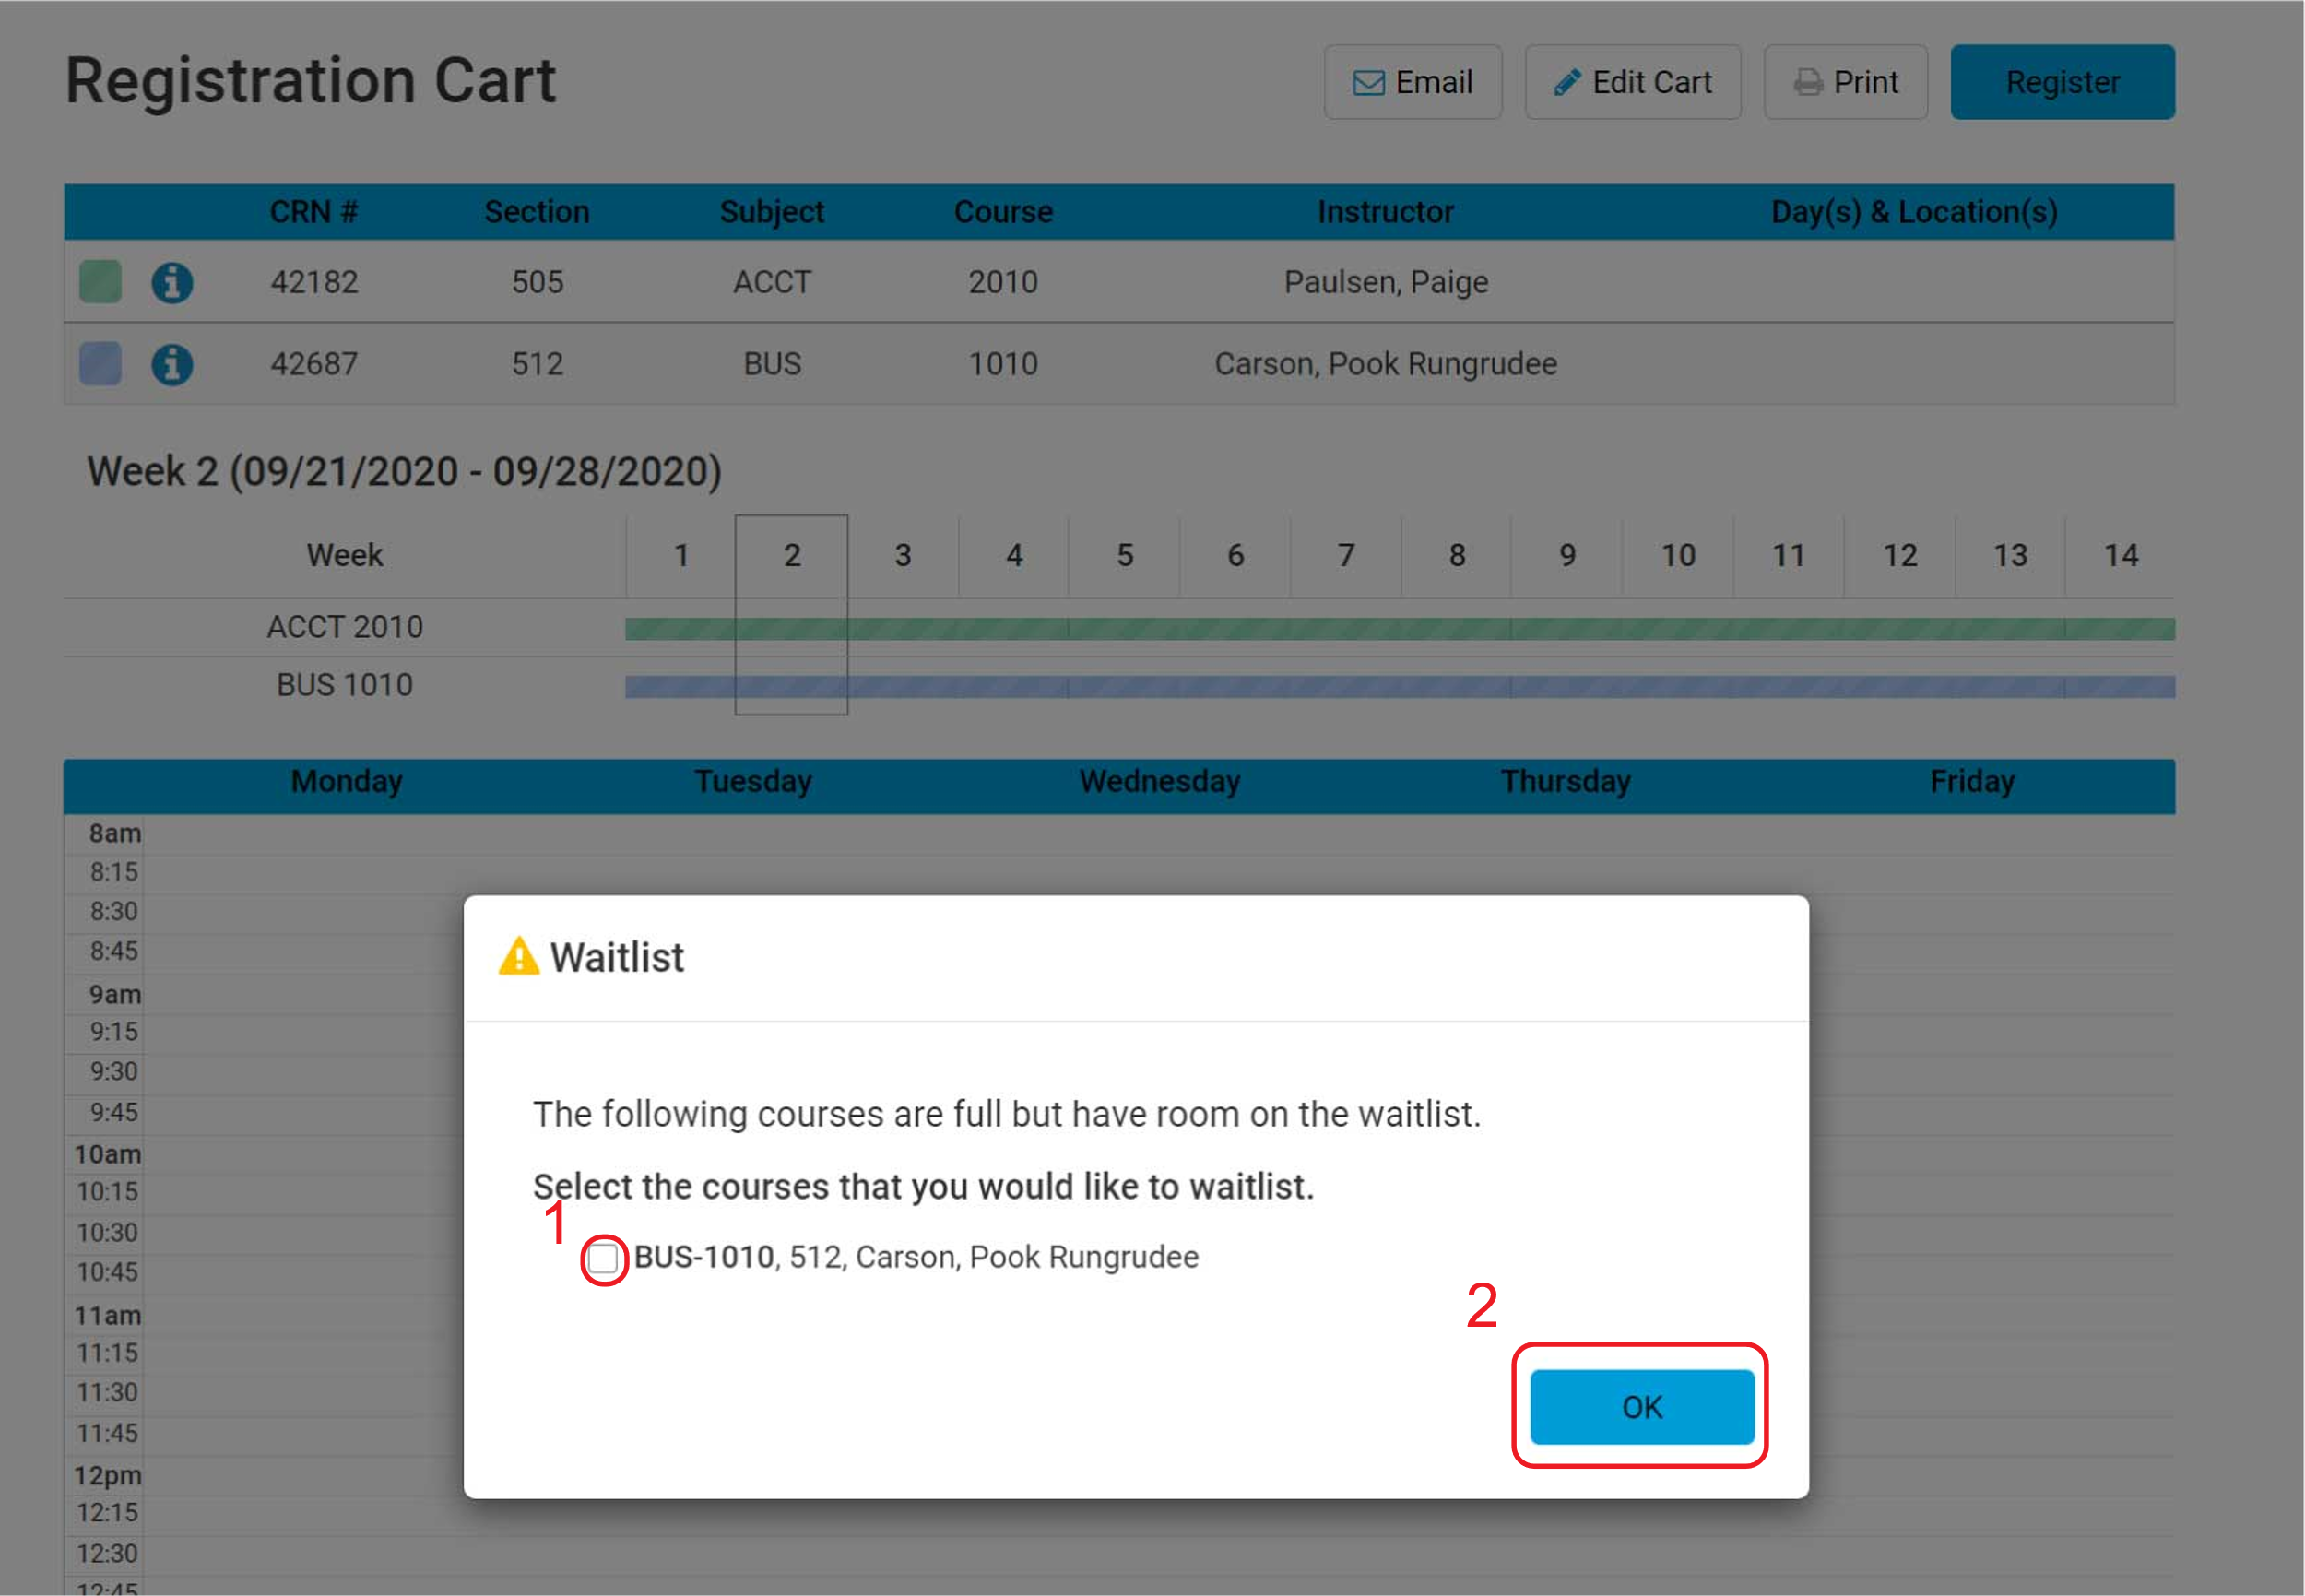
14. This page shows the courses currently in your shopping cart. To register for your courses, click Register
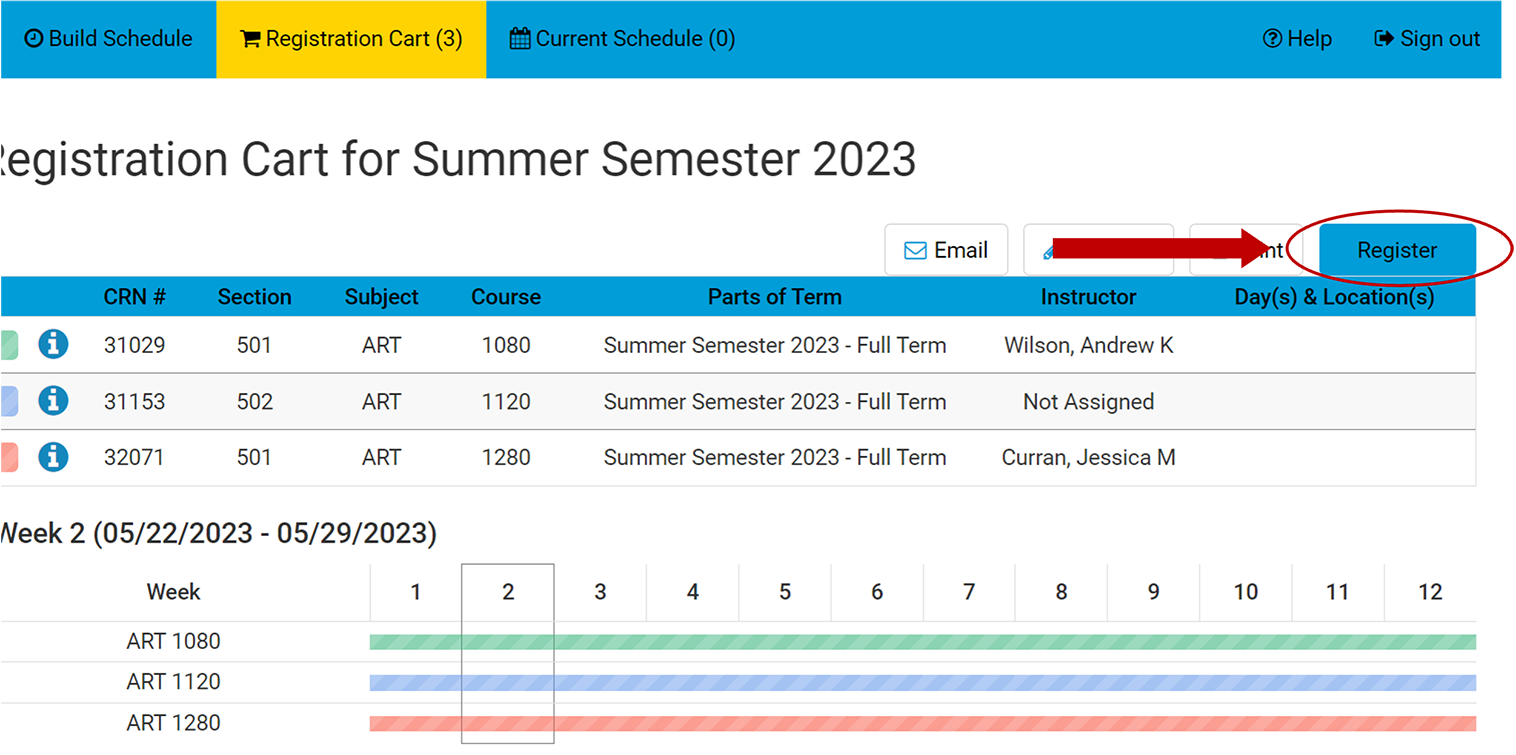
15. If the course is full, a message will appear asking if you would like to join the waitlist. Select the course and click OK. This will put you on the waitlist for the course