Campus Groups
Campus Groups is a platform that offers multiple benefits for both students and the institution, making it a valuable tool for fostering a welcoming and engaged campus community. In Campus Groups, you can find a variety of clubs, campus events, community-based organizations, community engagement opportunities, and work study positions. Many departments & faculty utilize campus groups for events and forms.
Log In to Campus GroupsCampus Groups Basics
Students, Faculty and Staff can login and create a profile using their Salt Lake Community college credentials. If you are an outside partner like a community partner, work study partner or guest you will need to be added.
Having Trouble logging in? Contact the Campus Groups Specialist.
- SLCC staff and faculty wanting to create a “Group” for their departments or classes can also reach out to the Specialist to have a page made.
- Community partners will also need to establish an MOU with the Assistant Director for Community Engagement to have a “Group” for their organization. Please visit our Community Partner webpage for more information.
Campus Groups Tutorials
Depending on your role, Campus Groups tutorials are to help you navigate the platform and learn how the platform works to help you create and manage your event(s) or profile.
- Head to slcc.campusgroups.com where it will take you to the sign-up page. After click to sign-in.
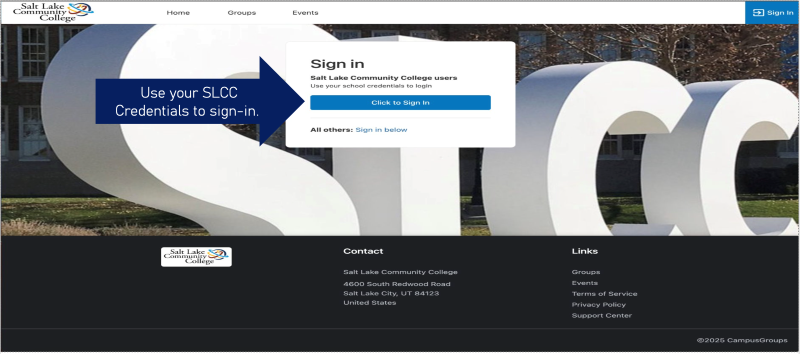
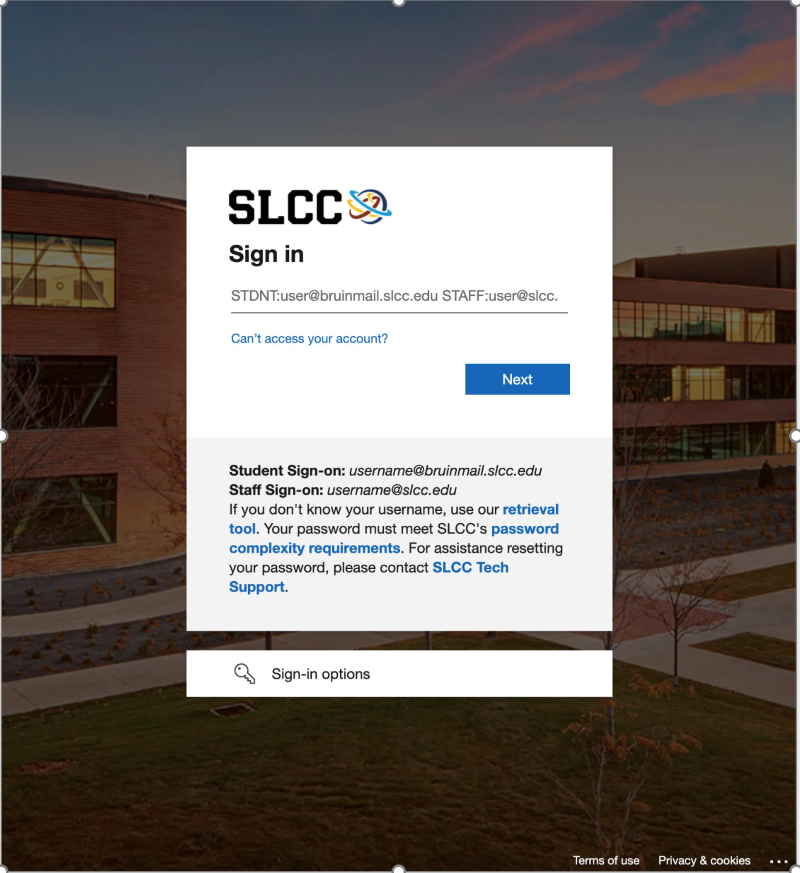
- Campus groups will ask you to sign in using your Salt Lake Community College User Credentials.
- School Email
- Password
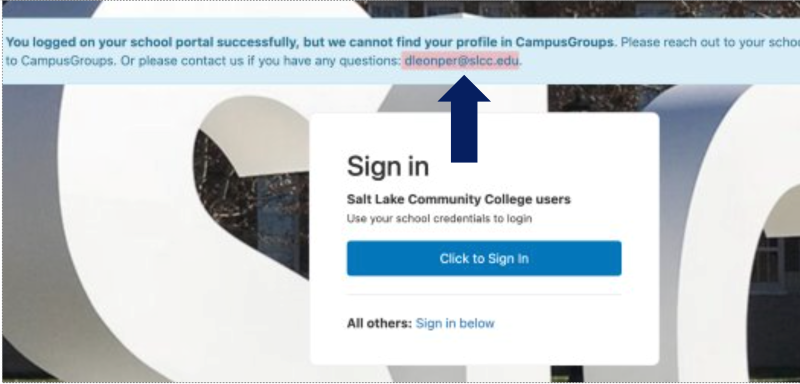
- If your campus groups for whatever reason doesn’t let you log-in, email your Campus Groups Specialist. If you’re a community partner who needs a new account, please contact Student Community Service Coordinator.
- Campus Groups Specialist: Dorisela Leon-Perez, dleonper@slcc.edu.
- Full name
- Student Number
- Identify if you’re a student, staff or faculty
- Student Community Service Coordinator: Savannah O’Sickey, sosickey@slcc.edu.
If you’re a current student, staff or faculty member DO NOT make a temporary account.
- Campus Groups Specialist: Dorisela Leon-Perez, dleonper@slcc.edu.
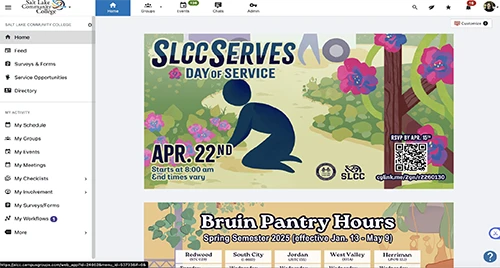
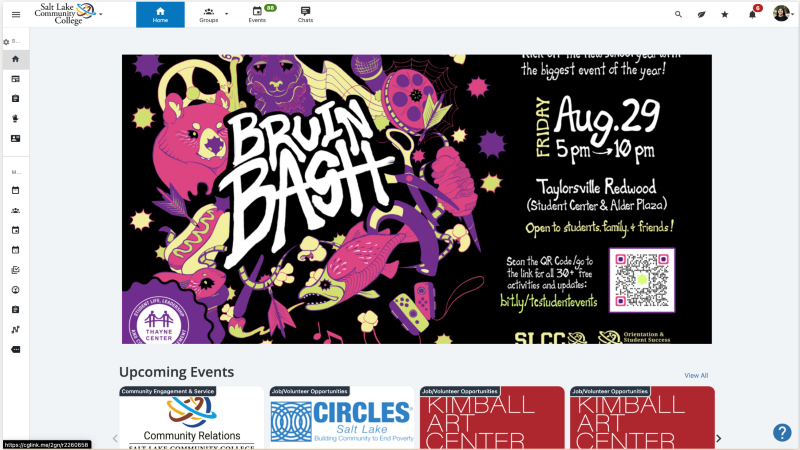
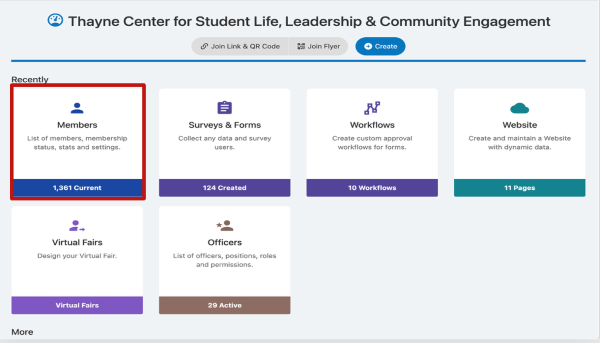
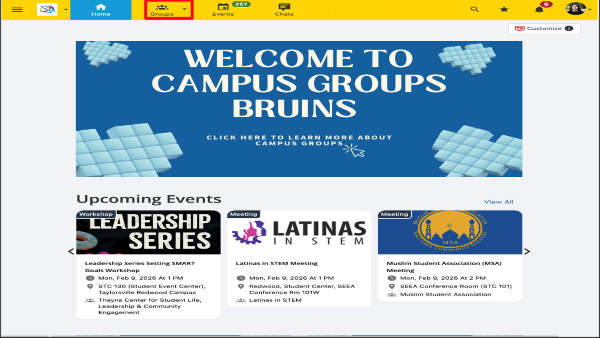
- After logging-in it will take you to the Home page of SLCC campus groups.
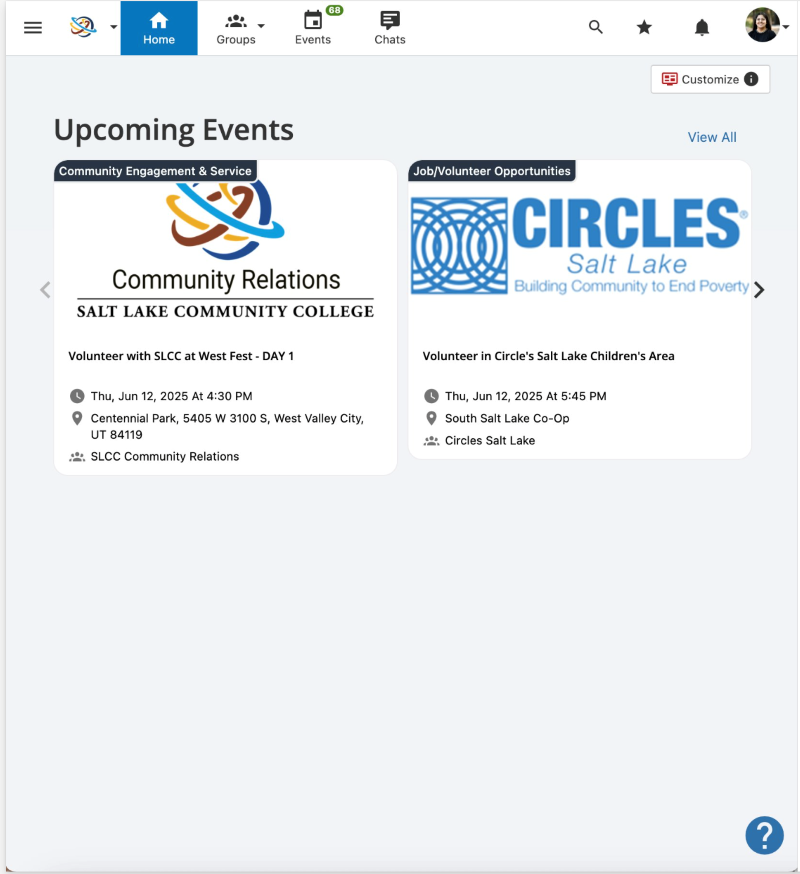
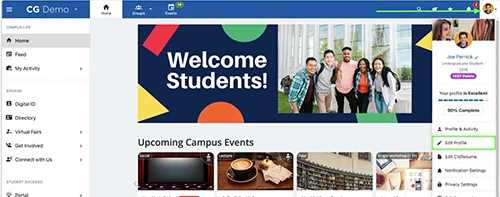
- Welcome to the Home page! Check here for upcoming events, announcements, and to navigate to other parts of Campus Groups. You can always click the "home" button at the top of the navigation bar to get back to this page.
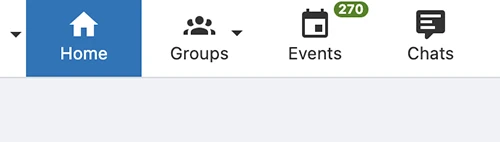
- Navigate to the top of the page where you'll find the necessary tabs to navigate through Campus Groups.
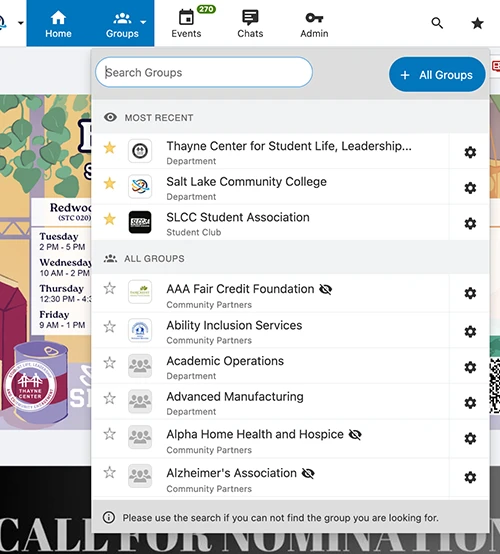
- Navigate to the "Groups" tab at the top of the page, where you can search up any group that’s active at SLCC. This section includes student clubs, various SLCC departments, and even community-based organizations you can connect with. Put a star by the ones you use the most for quick access.
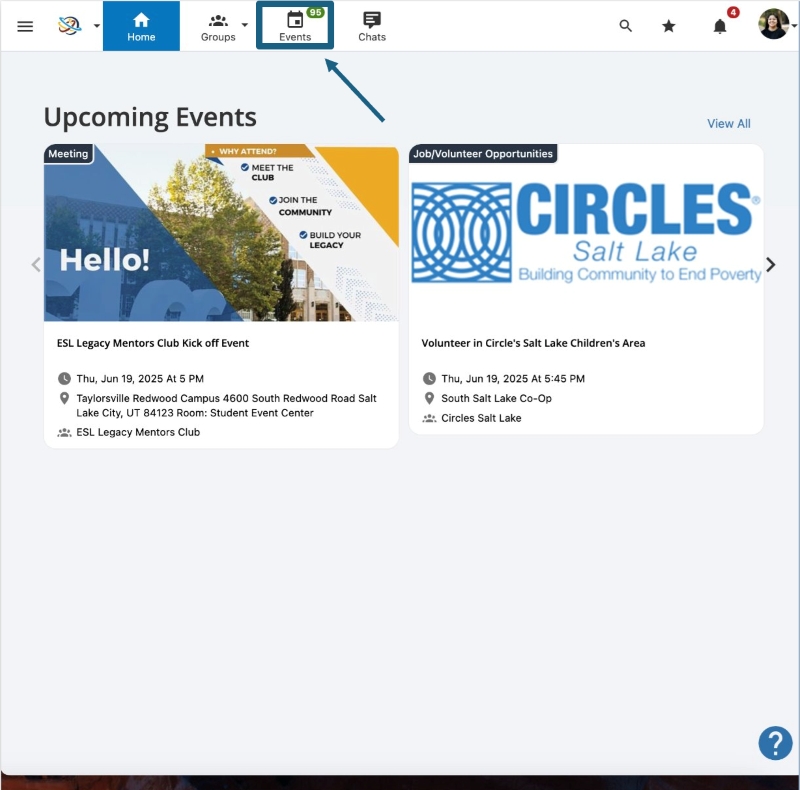
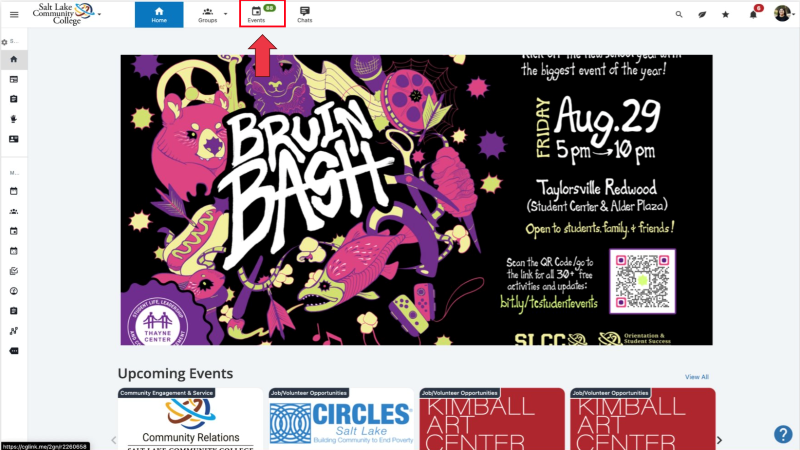
- On the same navigation pane at the top, click on the "Event" tab. This is where you can find all events happening for SLCC students, staff, and faculty. You can find campus events, club meetings and activities, volunteers and service opportunities just to name a few.

- Finally, to the right you will see your profile, where you can edit your primary information and interests. You can add as much information as you want to your personal account to help you connect with people or find campus opportunities. There are a lot of options on this page, so checkout the "Update your profile" tutorial for more information and recommendations.
- Welcome to the Home page. Now, navigate to the Events tab at the top of the page to view all upcoming events.
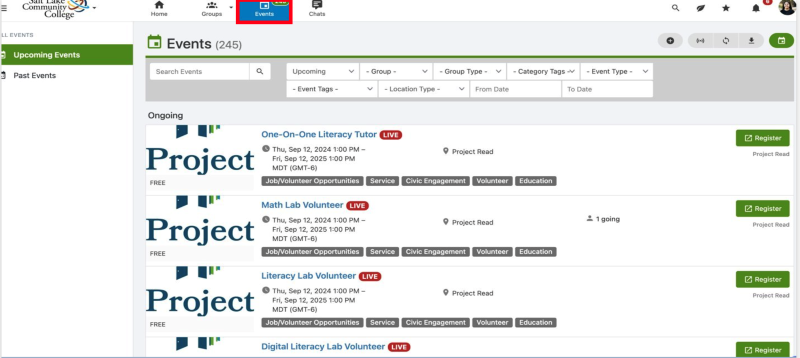
- Similar to the SLCC calendars, campus groups has a tool for creating, managing, and promoting events. Users can easily view and register to attend upcoming events, which adds it to their campus groups schedule.
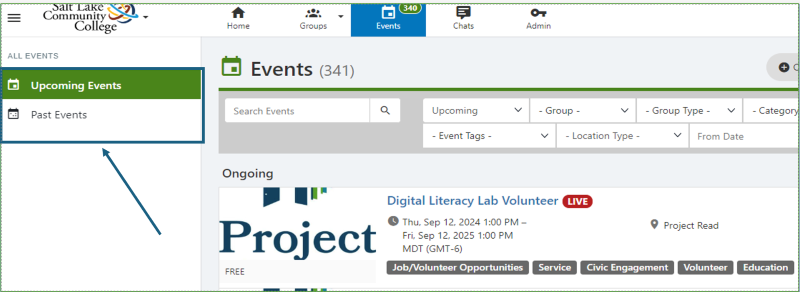
- On the left side of the page, you can view all Upcoming and Past Events.
- If you are a student, “Past Events” are for events you have attended in the past.
- If you are an admin or an officer, you can also view past events you or your groups have created in the past.
Intro
*You must be an admin or an officer to create an event
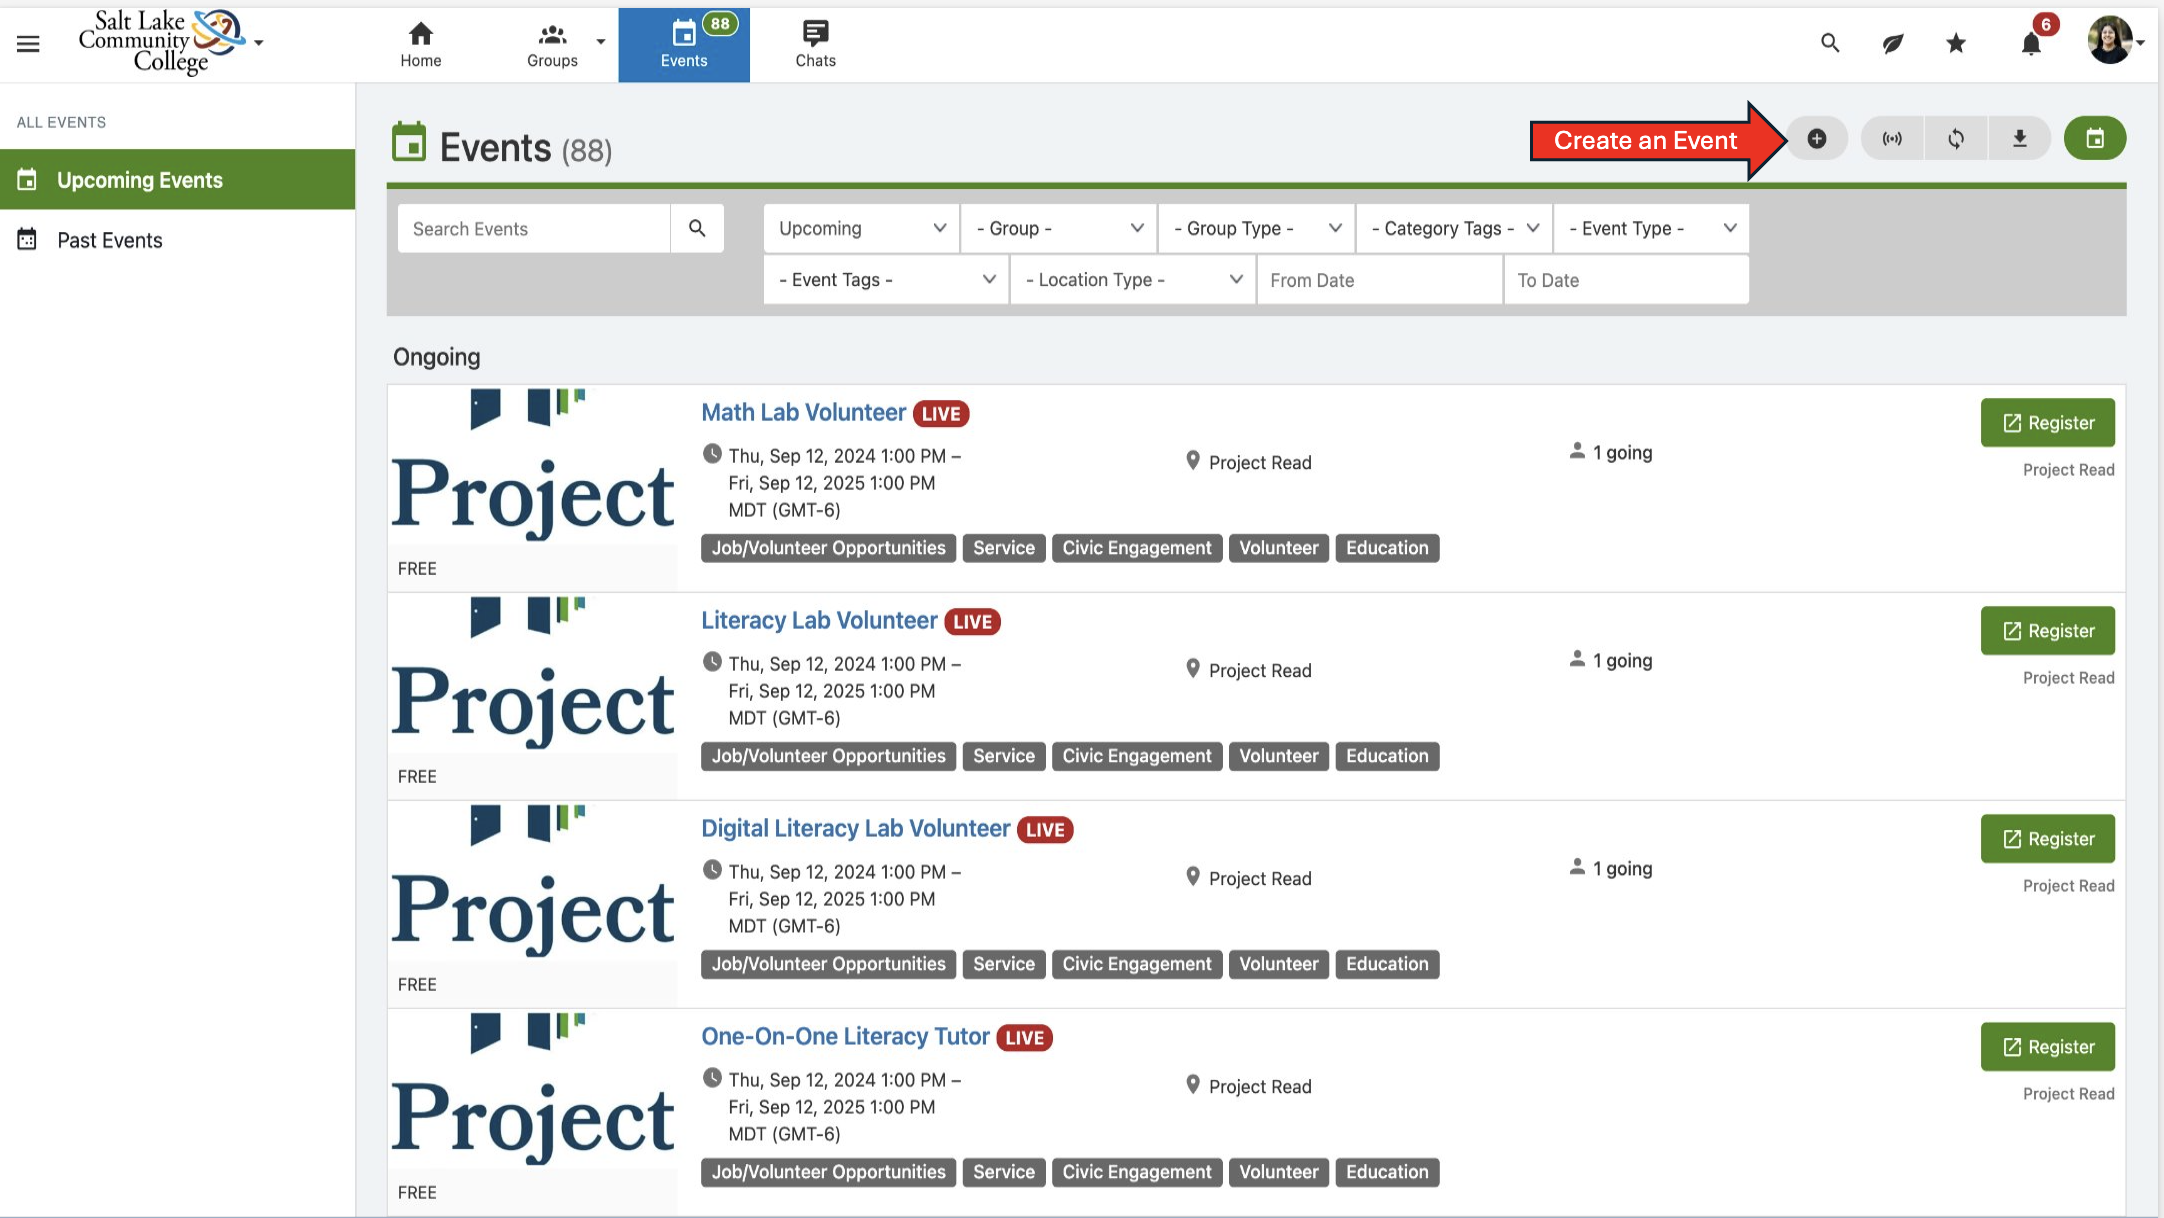
Want to create an event?
Click on "Create event" or the (+) on the top right side to begin to create an event.
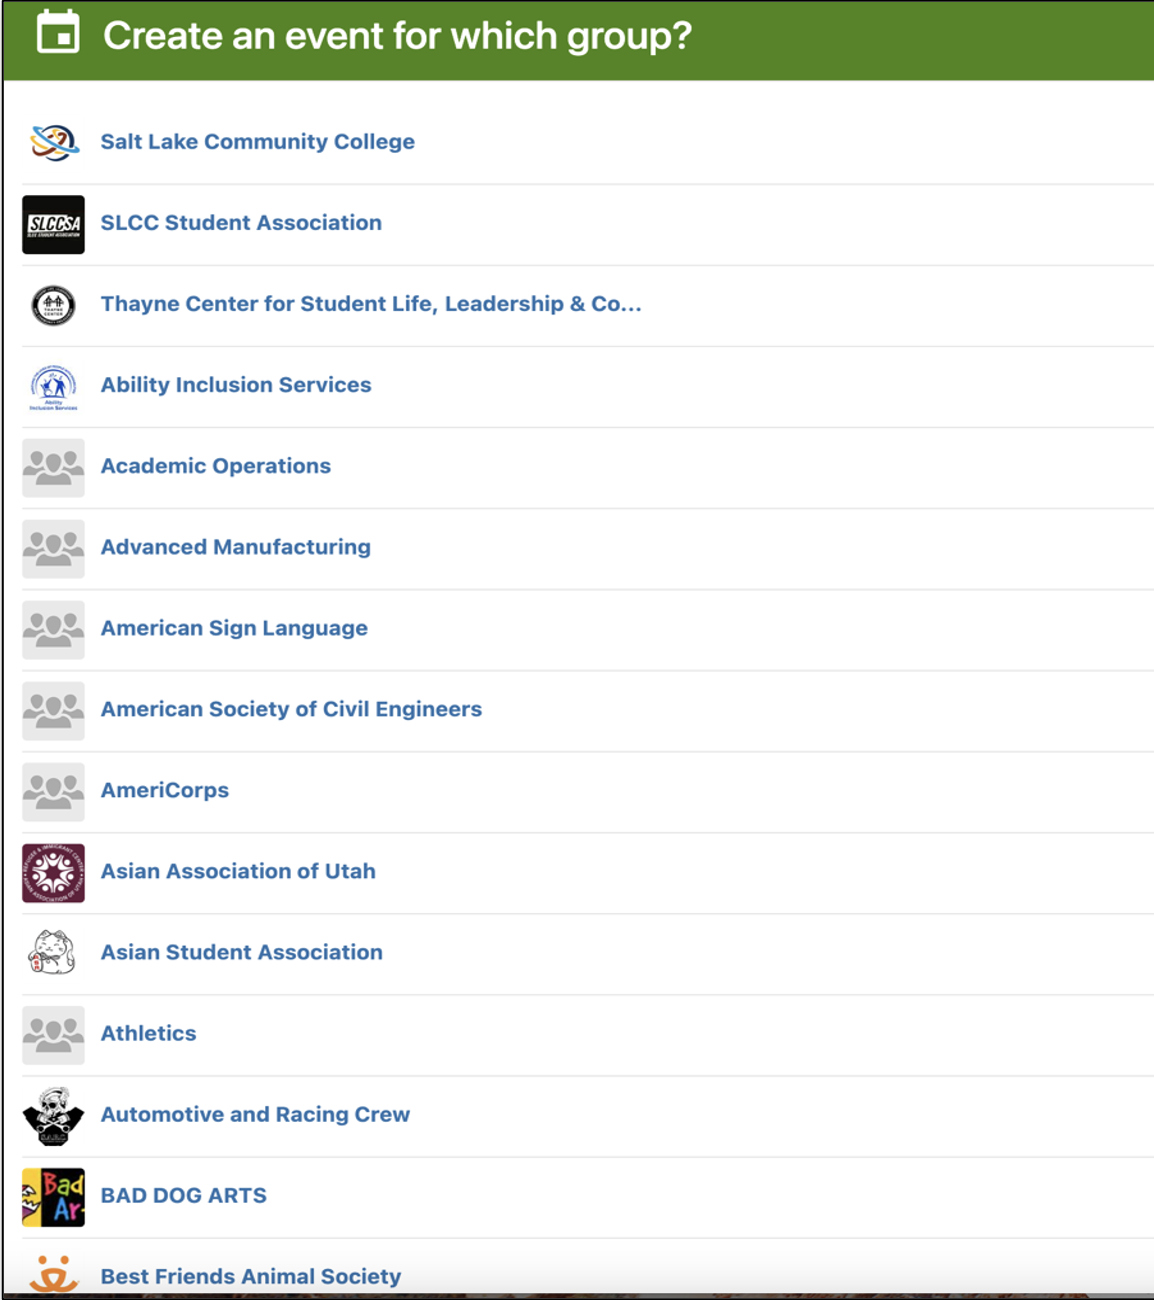
- After clicking the (+), it will take you to Create an event for which group? Where you can select the group, your part of and create the event.
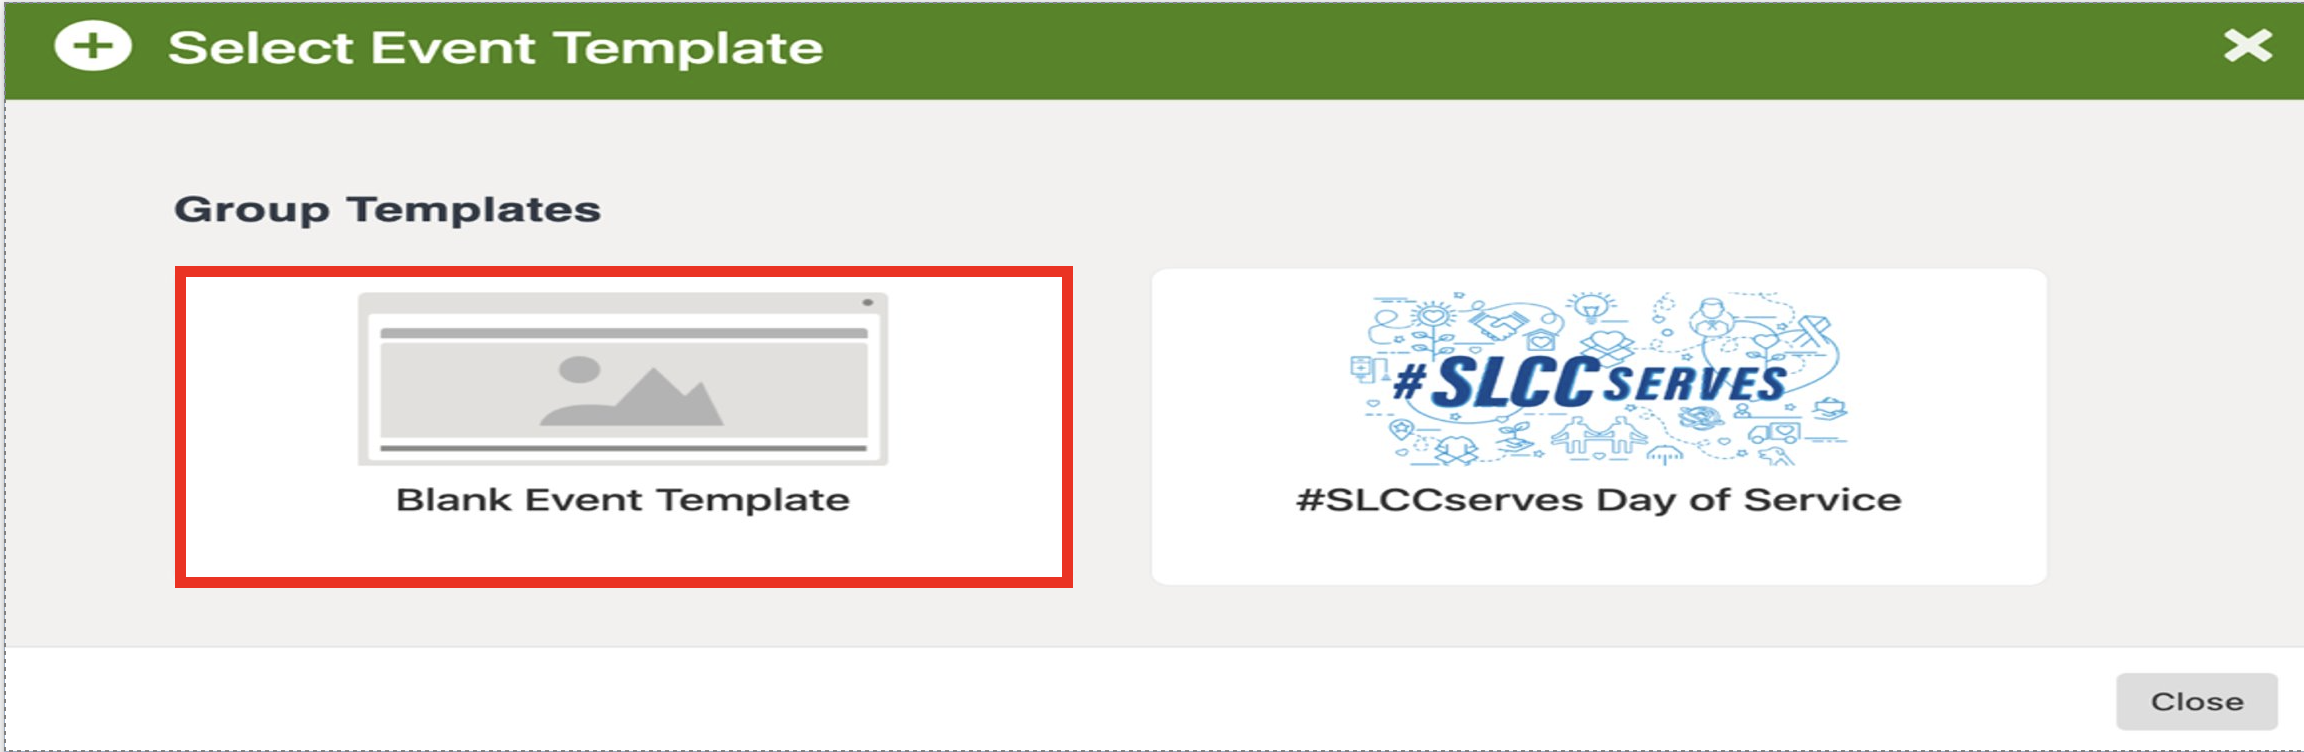
- Once you have selected the group, your part of, you can begin to create your event. It will have you select a template. You would want to start with a Blank Event Template.
- This is where you can also build event templates for future use.
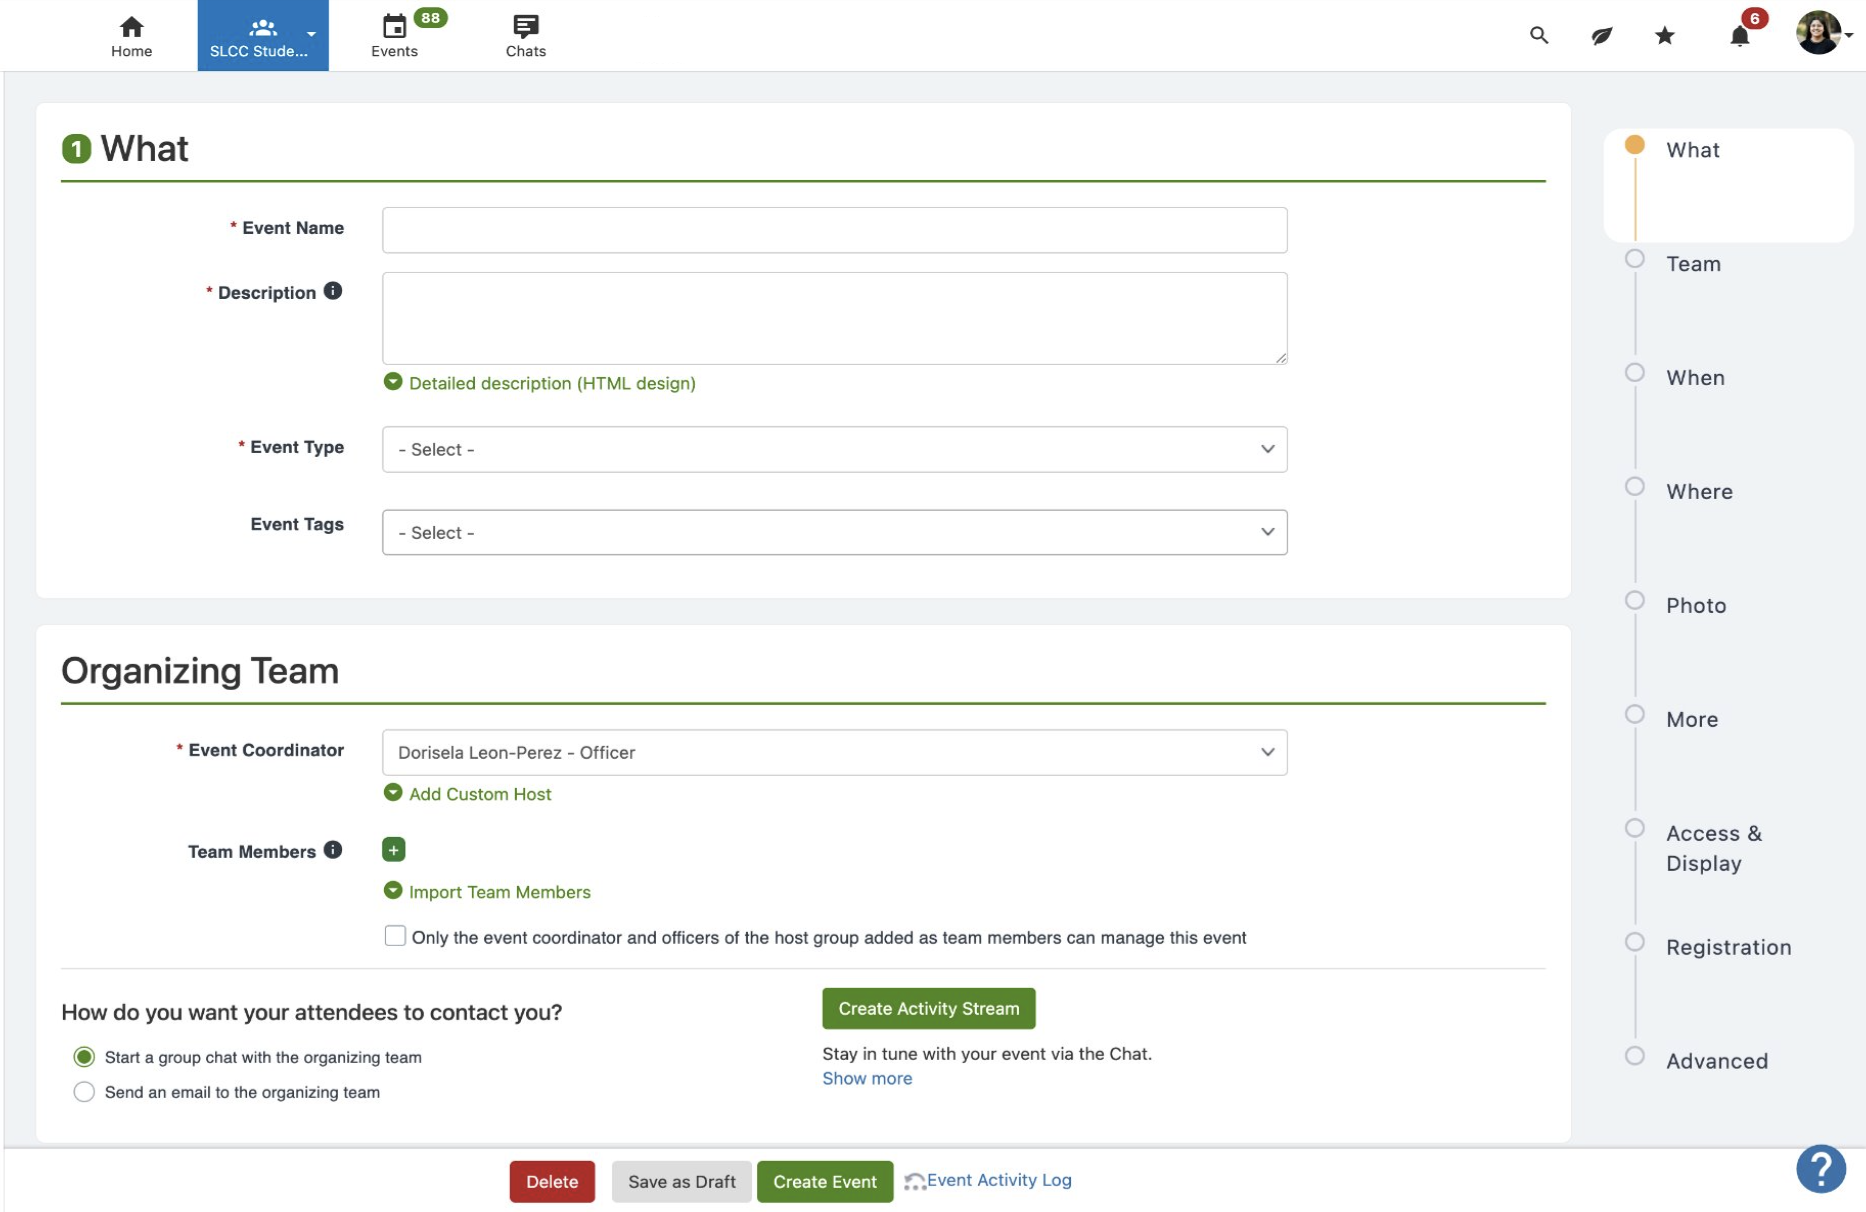
- Once you start a new Blank Event Template, it will take you to the webpage to start creating your event. The page will break down your event in "what", "when", "photo & flyer", "more details", "access & display options", "Registration options" and "Advanced options".
*Every selection will be explained in detail of how to create an event.
WHAT
- Your first step is to complete the "What" selection of your event. As you complete the Create an Event steps, you can follow the tracker on the right-hand side, which corresponds to the sections of this tutorial.
- Fill out the Event Name, this will be visible by all Campus Groups users.
- Add a short Description that helps users understand your event better and explain what your event is about. You can add as much as you want people to know about your event.
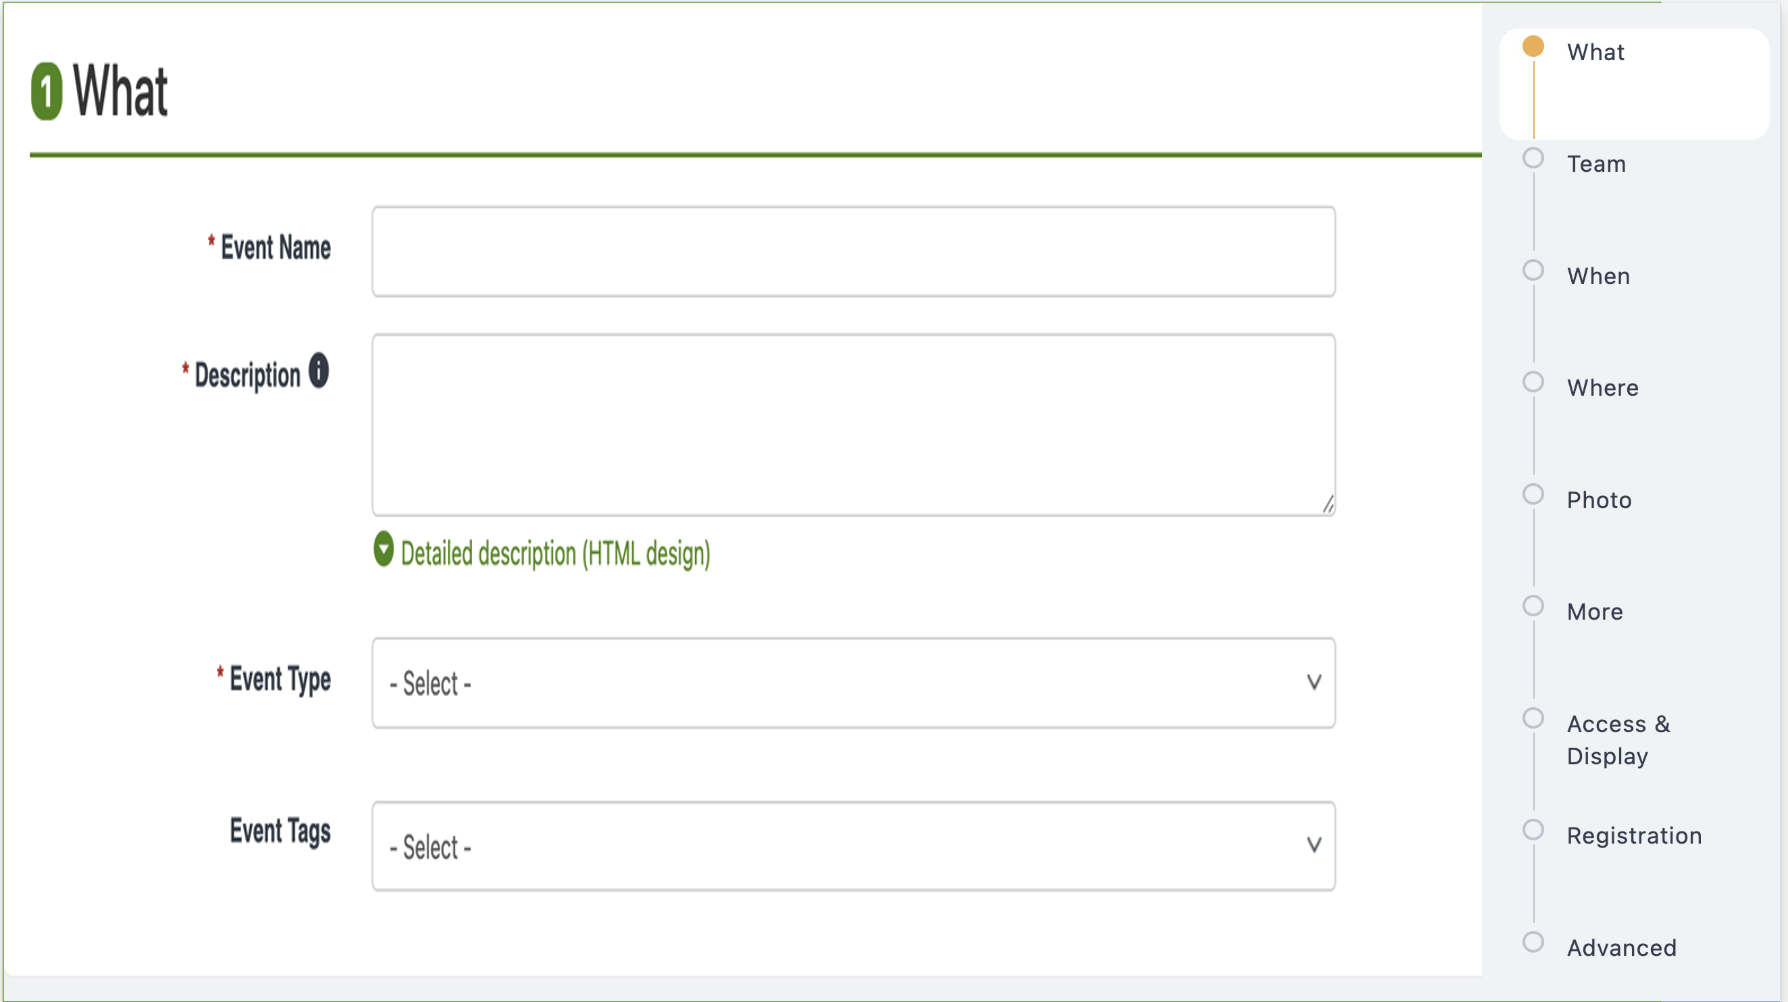
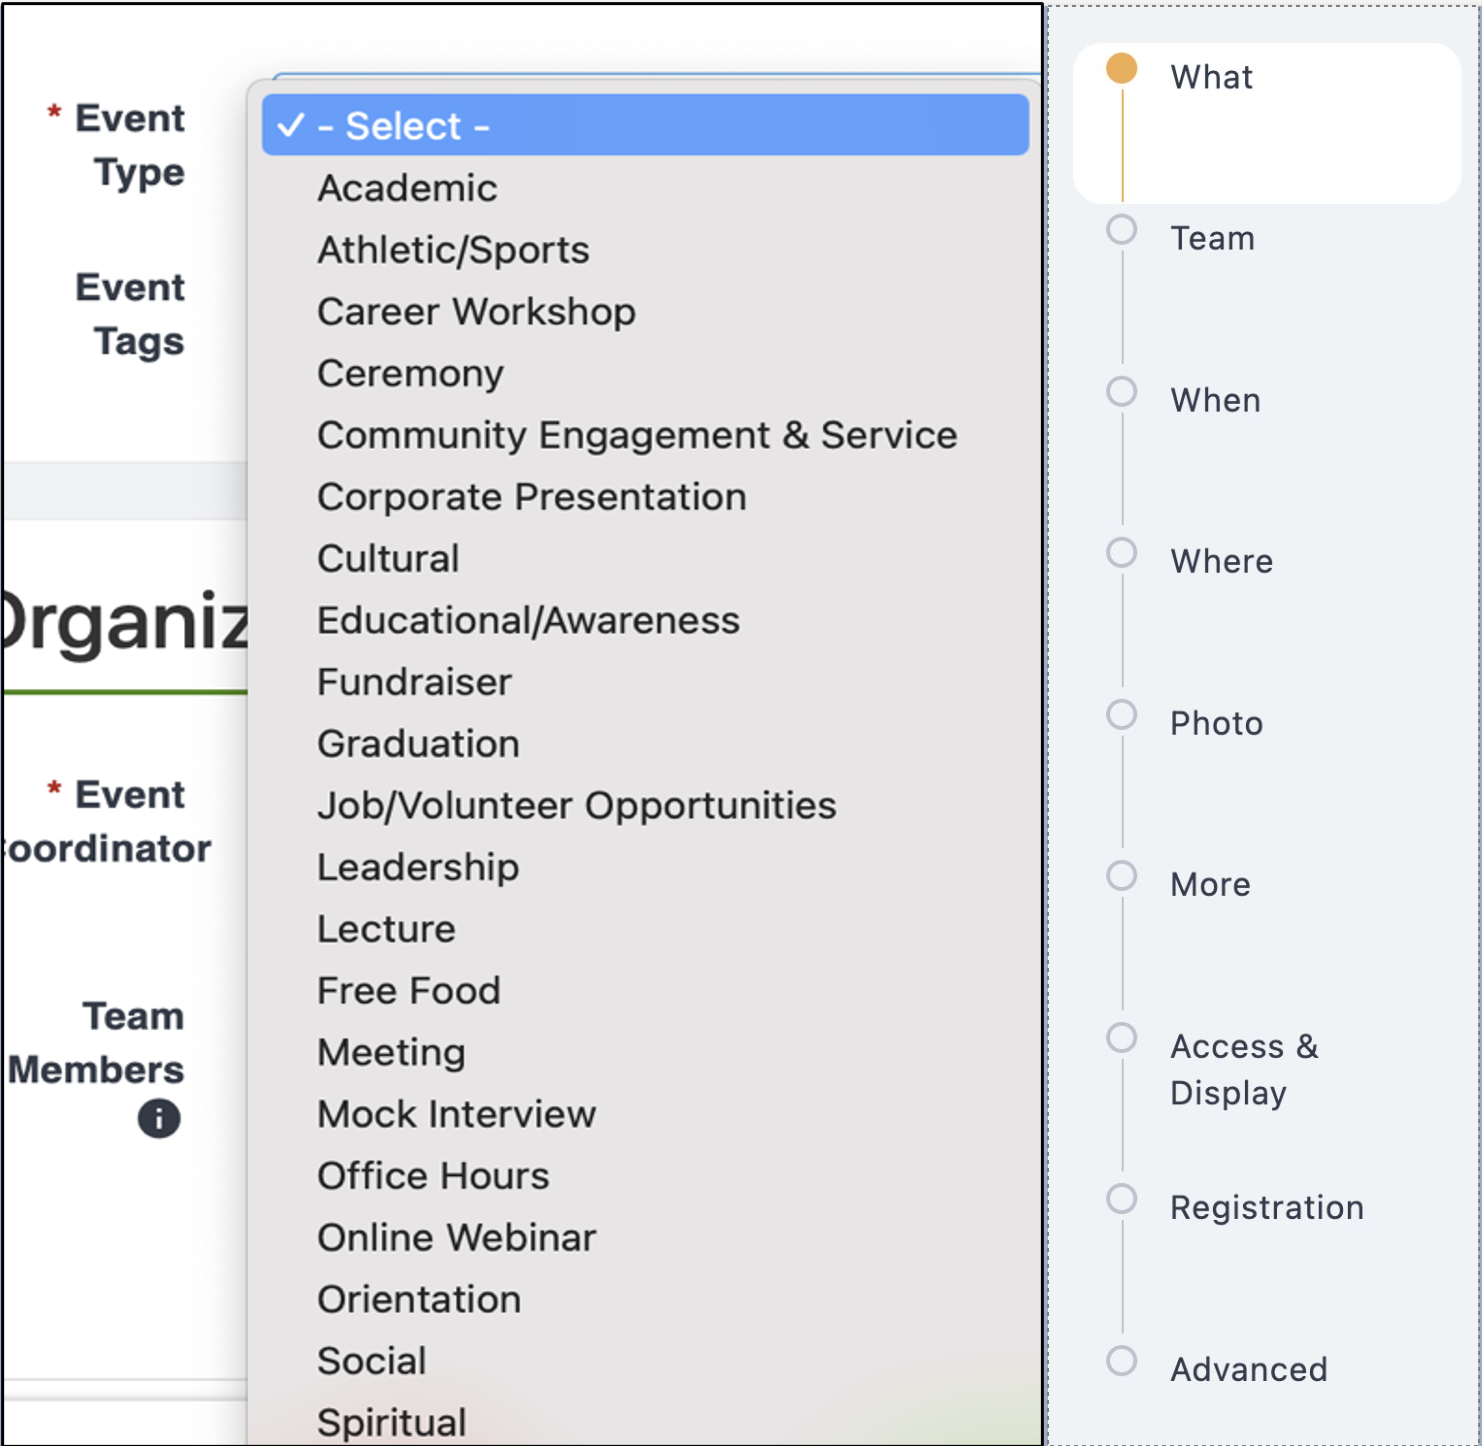
- Select an Event Type, this is a tool for users to search events that may interest them.
- Event Tags you can tag as many as may apply to your event and you can include multiple as many tags that match your event.
- Tags can state who the hosting organization is.
- Acts like a hashtag for users to find your event.

TEAM
- Organizing Team, whoever is the organizers of the event, helps with coordinating the event.
- Event Coordinator section is for the main point of contact for the event.
- Add Custom Host to add names that are not added in the main list of names.
- Team Members add any other members to manage event. You can just select the (+).
*Only the event coordinator and officers of the host group added as team members can manage the event. When filling out the organizing team. Non-group members added as a "Team Member" can make changes to the event unless this is checked off.
How do you want your attendees to contact you?
Starts a group chat or sends an email with event organizer if attendees have any questions about the event.

WHEN
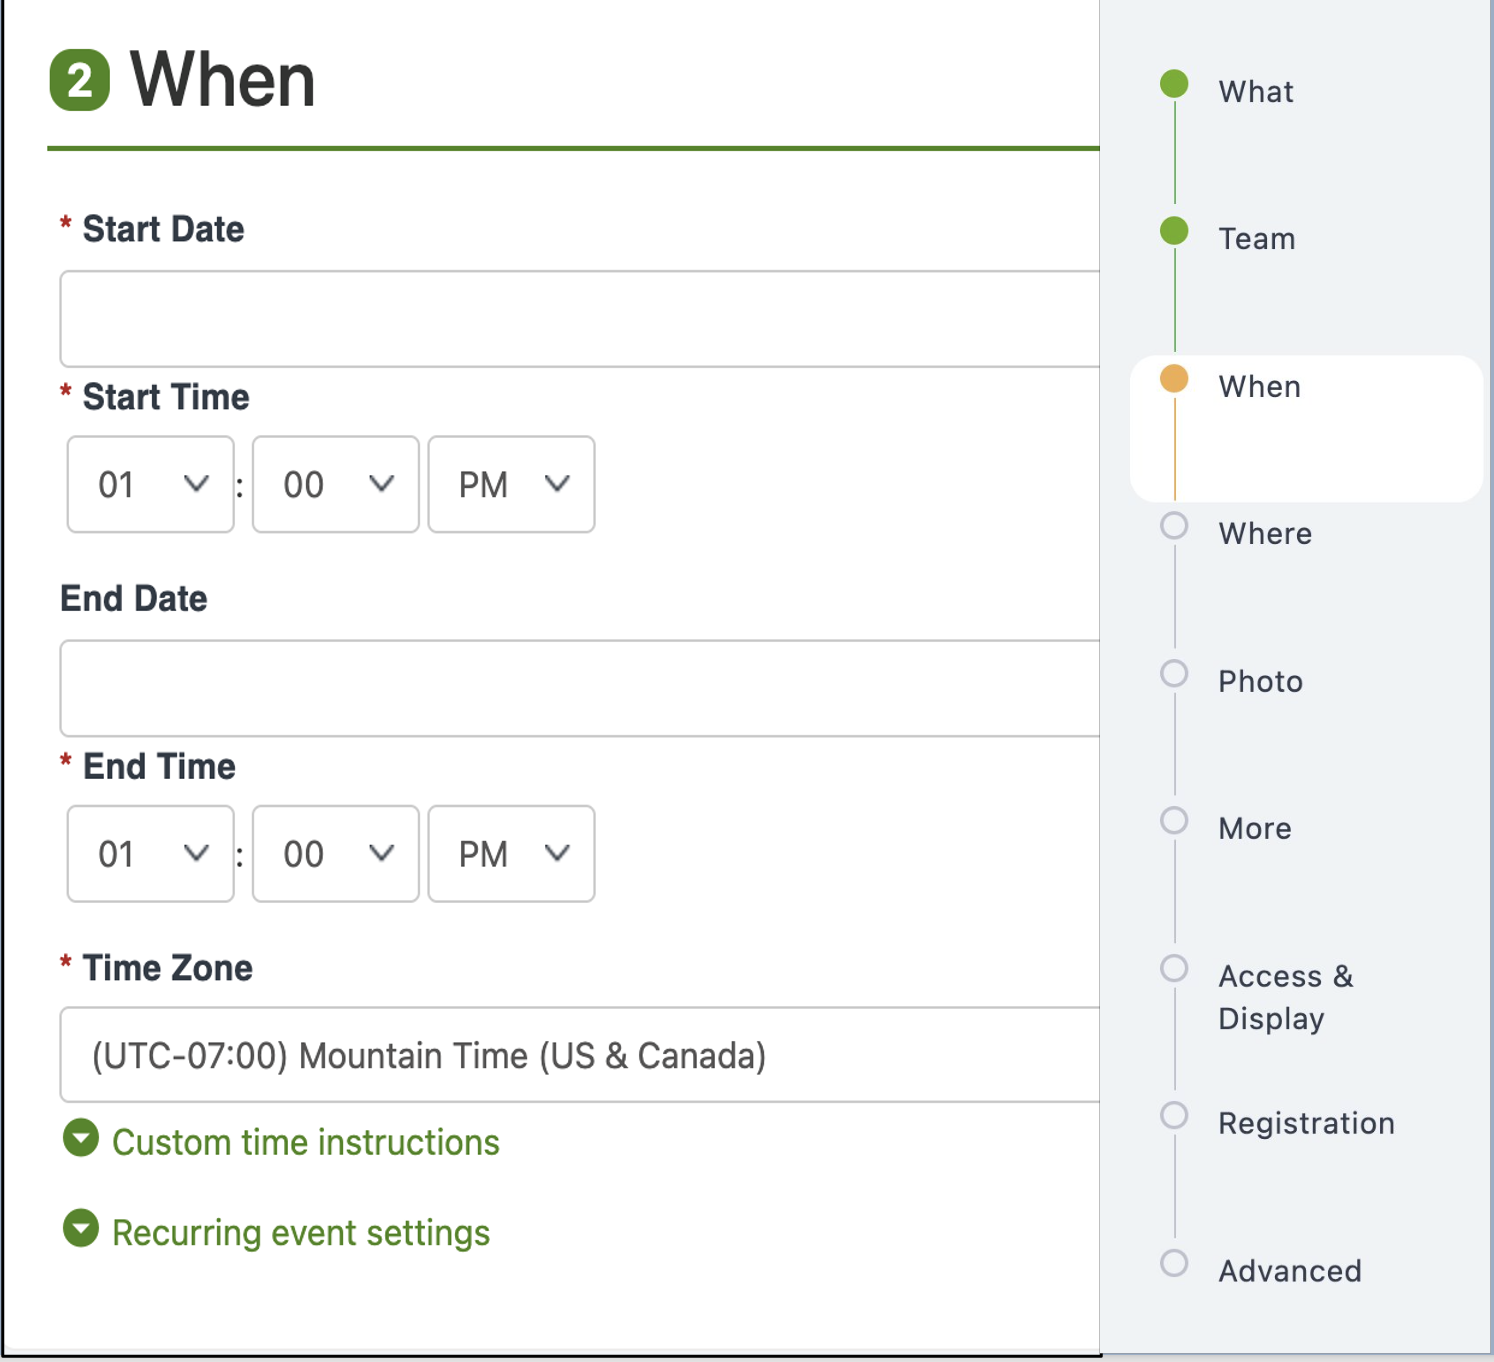
- WHEN is the start and end date and time of the event. It will ask you for time zone which will be Mountain Time.
- If you select the Recurring Event Settings dropdown select the days you would like the event to repeat.
*Make sure to get all the details are correct when creating the event, because if you want to edit something it will require the event organizer to edit on each recurring event.
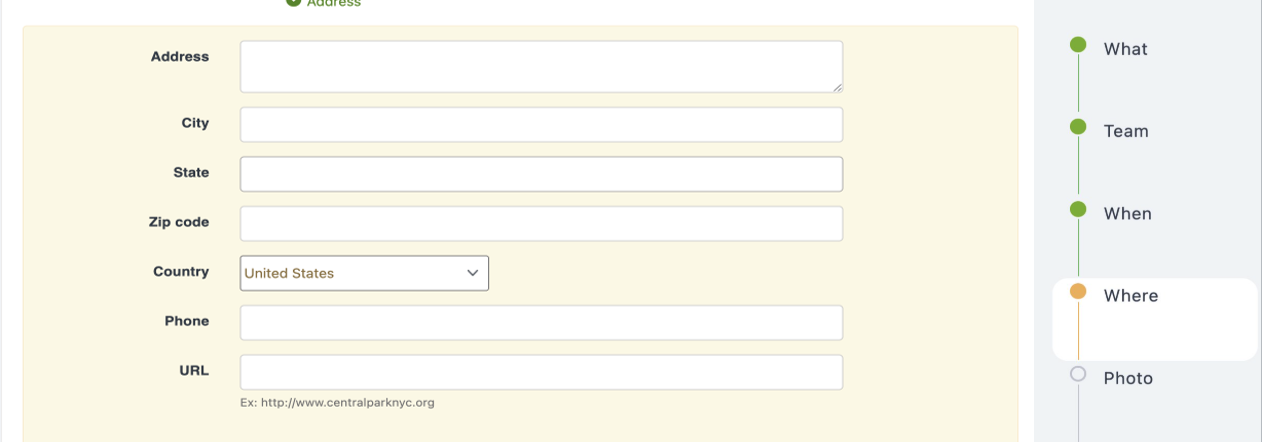
WHERE
*Campus groups is not connected with the campus 29 live system. Still must book things on your own.
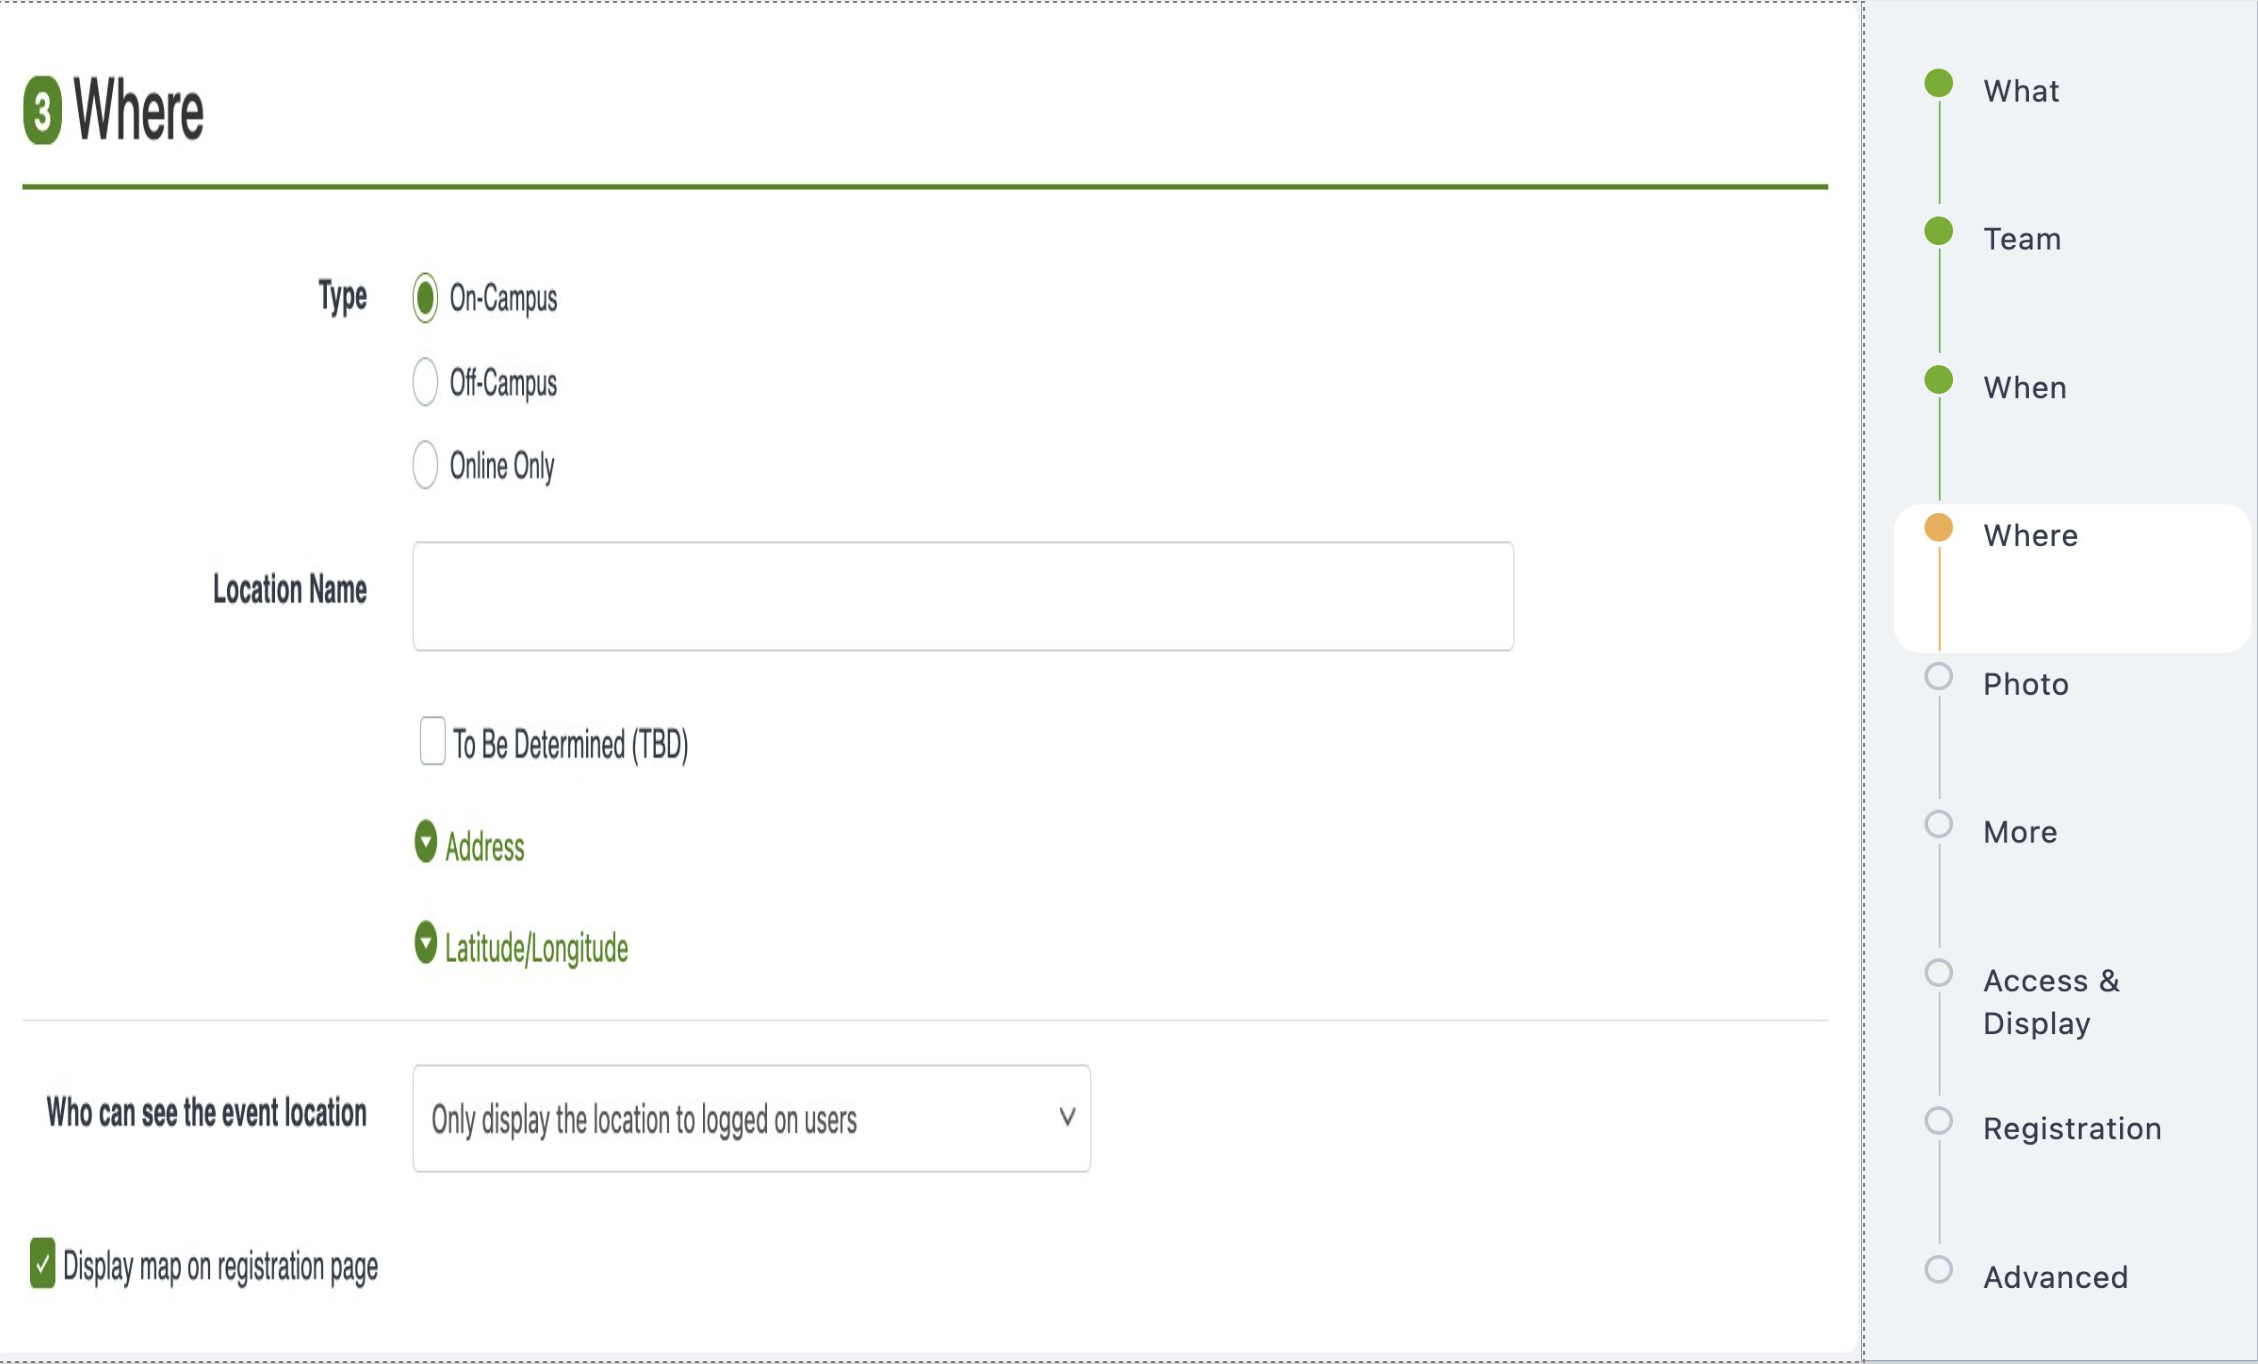
- Type of Event
- On Campus (event happening on campus grounds)
- Off-Campus (Not happening on campus but somewhere else but is still a Salt Lake Community College event).
- Online Only (Hybrid or online event)
Location Name
- Can include the title of the building of where the event will be happening.
- Meeting - For events that are online or hybrid, this selection is to add the link of that meeting. You can add the link if using a different platform or create one using campus groups.

- Address
- You can add the exact location/address of where the event will be happening.
- URL section you can add the link of the location.
PHOTO
- Photo and flyer section is where you can add branding marketing for your event.
EVENT PHOTO
You can upload the photo that best represents your event. It will be the photo to be displayed to promote your event.FLYER
You can upload the flyer that will have all the information about your event. It will be displayed to users on event calendar.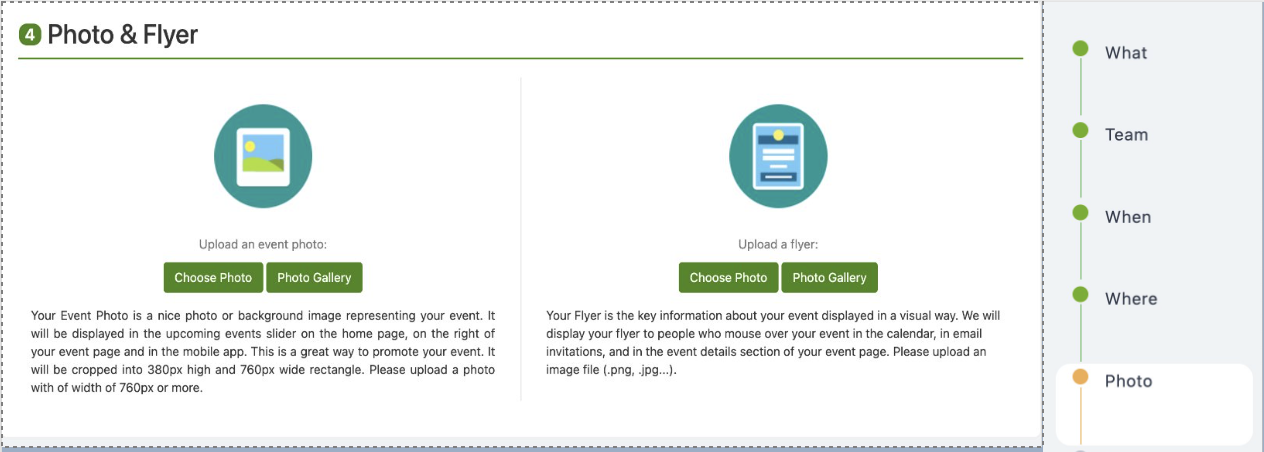
MORE
- More Details
- Select if food will be provided. If you want to add what kind of food, there will be you can add details in the caption.
- You can attach a file if you want to add a menu as well.

ACCESS & DISPLAY OPTIONS
- Access & Display Options
- Give you the option to customize who is allowed to register and who can see the event.

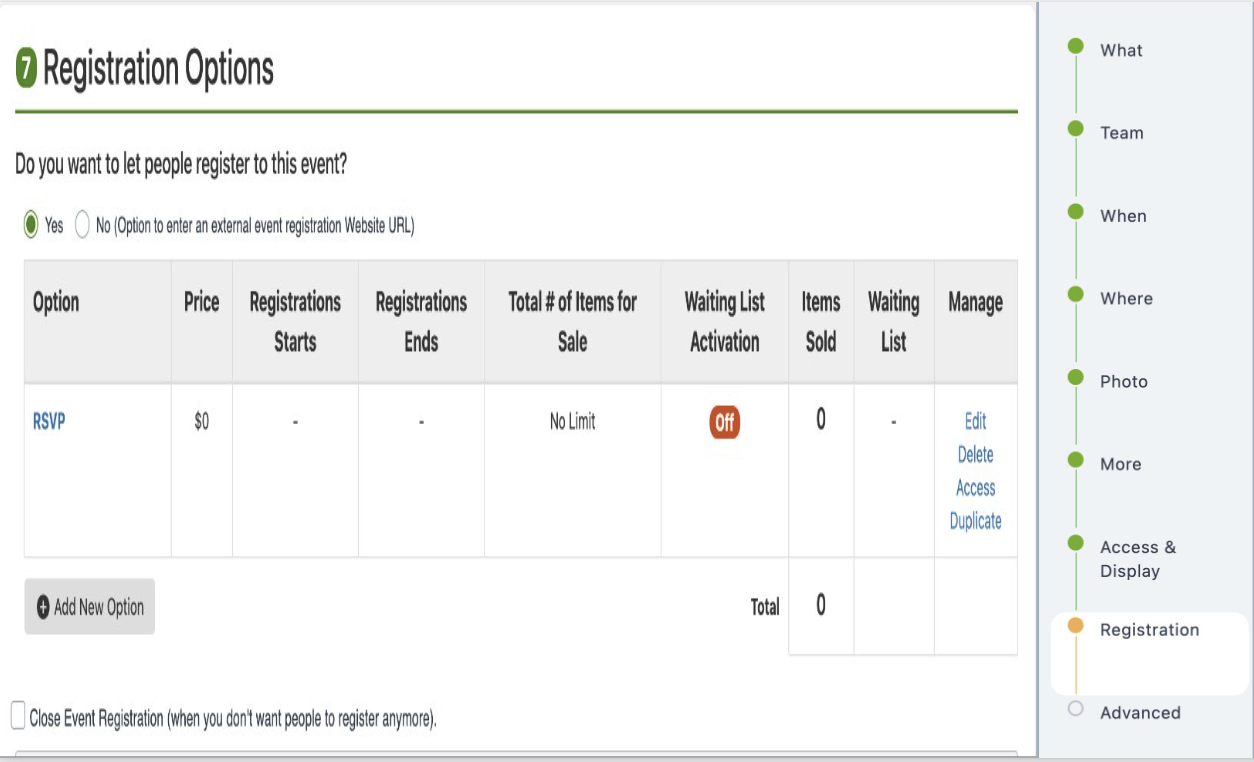
REGISTRATION OPTIONS
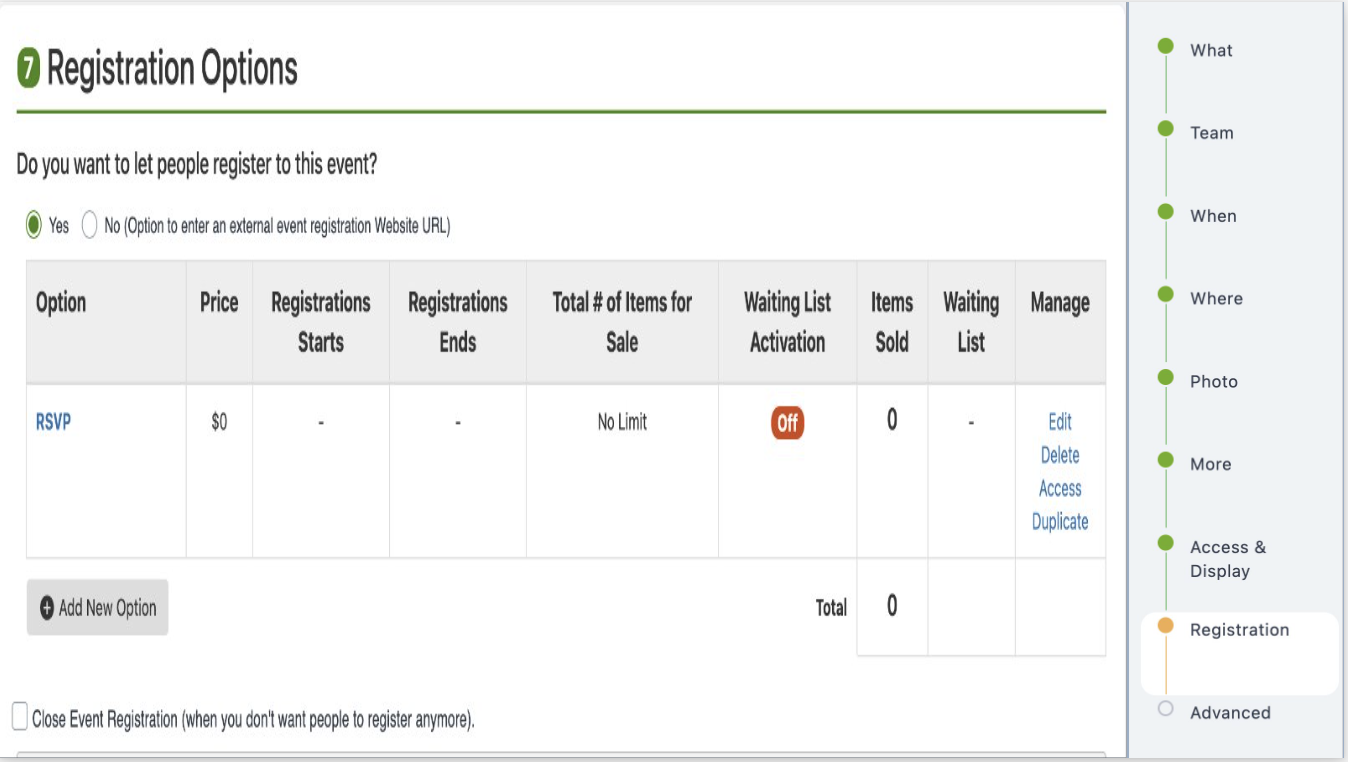
- Registration options, allows the event organizer to customize many aspects of the user's registration.
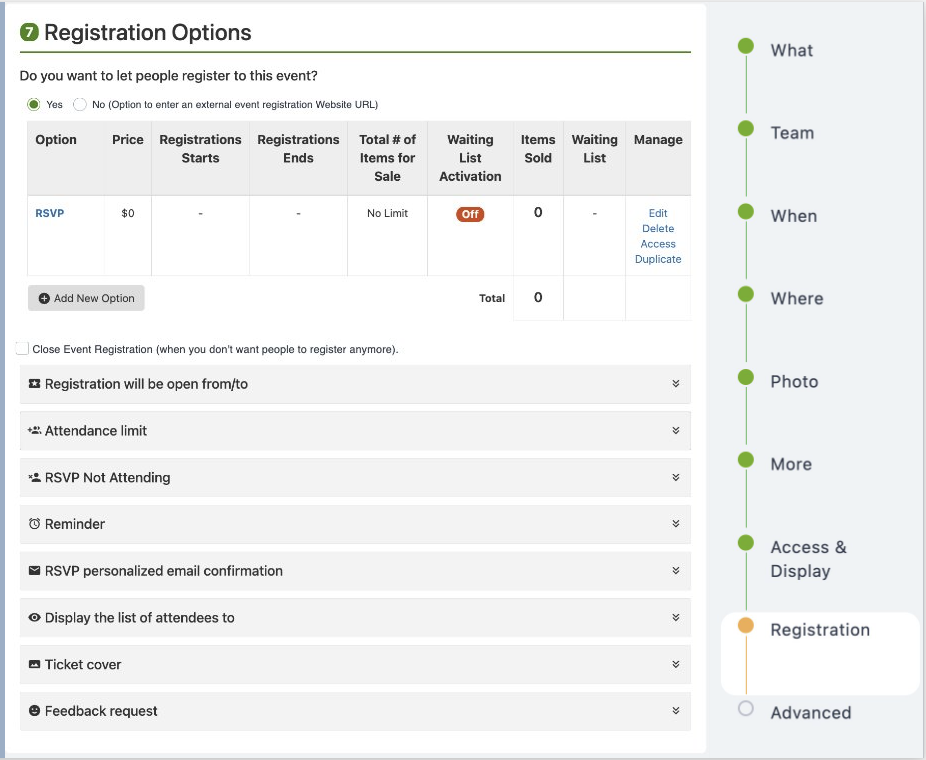
- Do you want to let people register to this event? This tool can help event organizer plan a head and give a good estimate of how many people will be attending the event.
- If you click Yes, it will allow users to register in Campus Groups. (More details about registration option go to next slide to learn more)
- If you click No, it will redirect users to the link of an external registration website.

- If you click Yes, it will allow users to register in Campus Groups for the event.
- Price option gives option if you want to sell tickets for event. If you want the event to be Free just set price to $0.
- Registration starts and end allows event organizer to set dates for when register will be opening and closing.
- Total # of items for sale are for the sold-out of tickets available.
- Waiting List Activation if you want to have a wait list for tickets or not. Yes or No question.
- Items sold is the total of tickets that were brought or given.
- Waiting List if you clicked yes to the waiting list activation it will allow users to go on a waiting list for a sold-out event. When a ticket becomes available it will allow users to get off the list.
- Manage is a tool that allows you to manage all these settings for registration.
- Manage edit dropdown - It gives you the ability to customize (Name, Price and other) the ticket options or each ticket option if using multiple options.
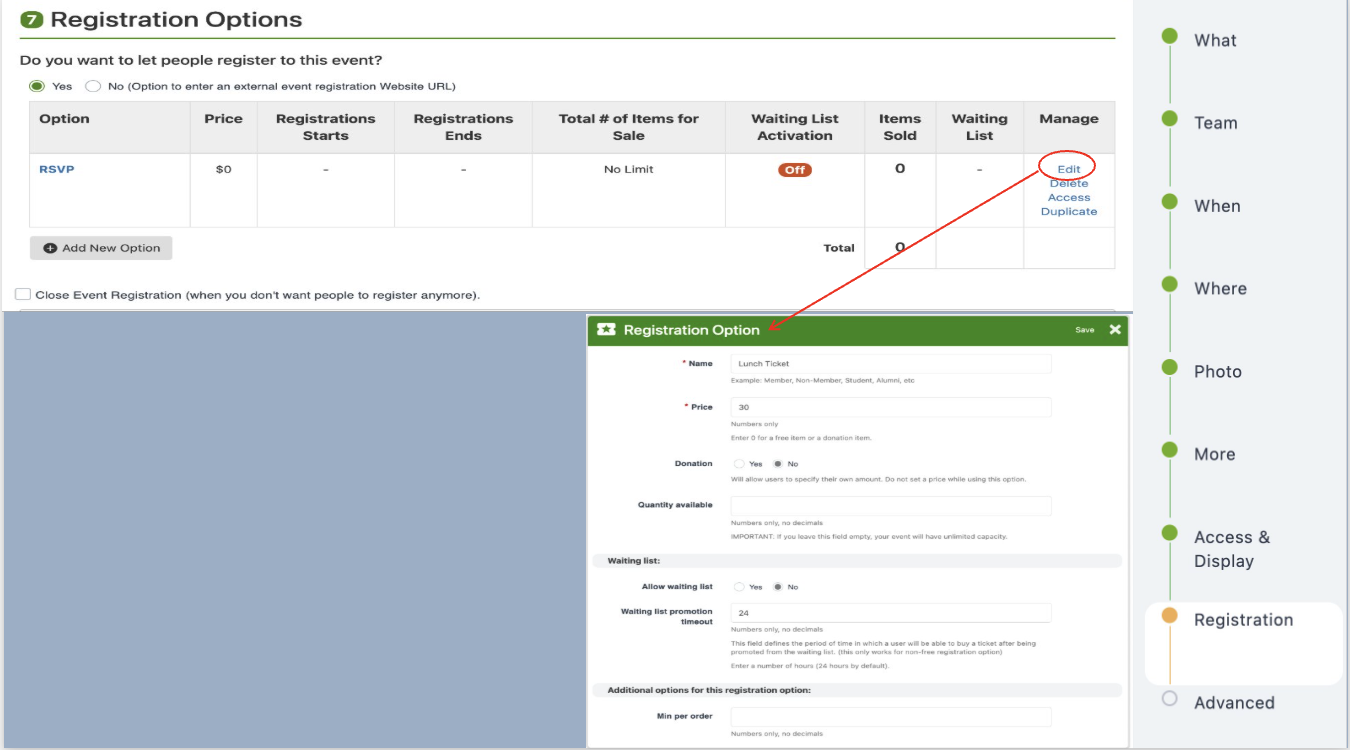
- Add New Option will allow to add another ticket option to edit and customize. As well if you have more then one date for an event. It allows for user to have the option to choose what date they would want to attend the event.
Close Event Registration will allow event organizer to close the registration link if you don't want users to register anymore.
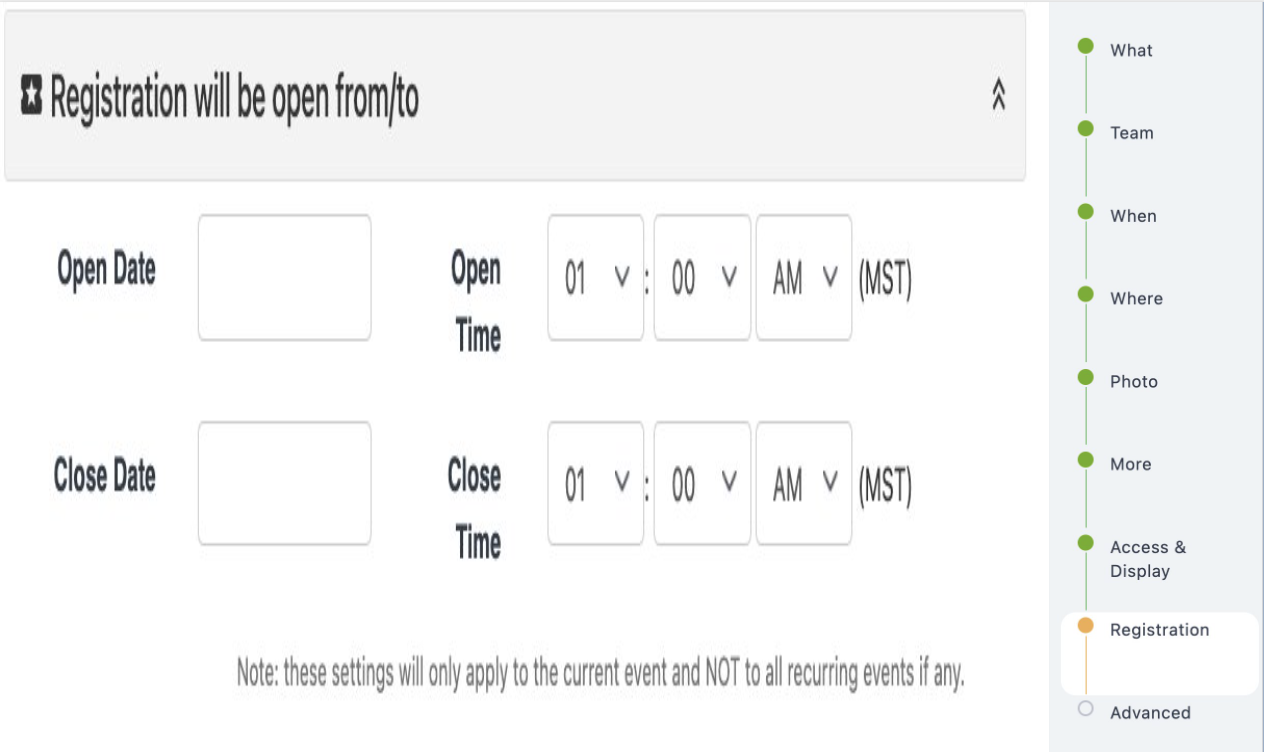
- Registration starts and end allows event organizer to set dates for when register will be opening and closing.
Event Organizer has the option to set an open time and close time for event registration to start and close.
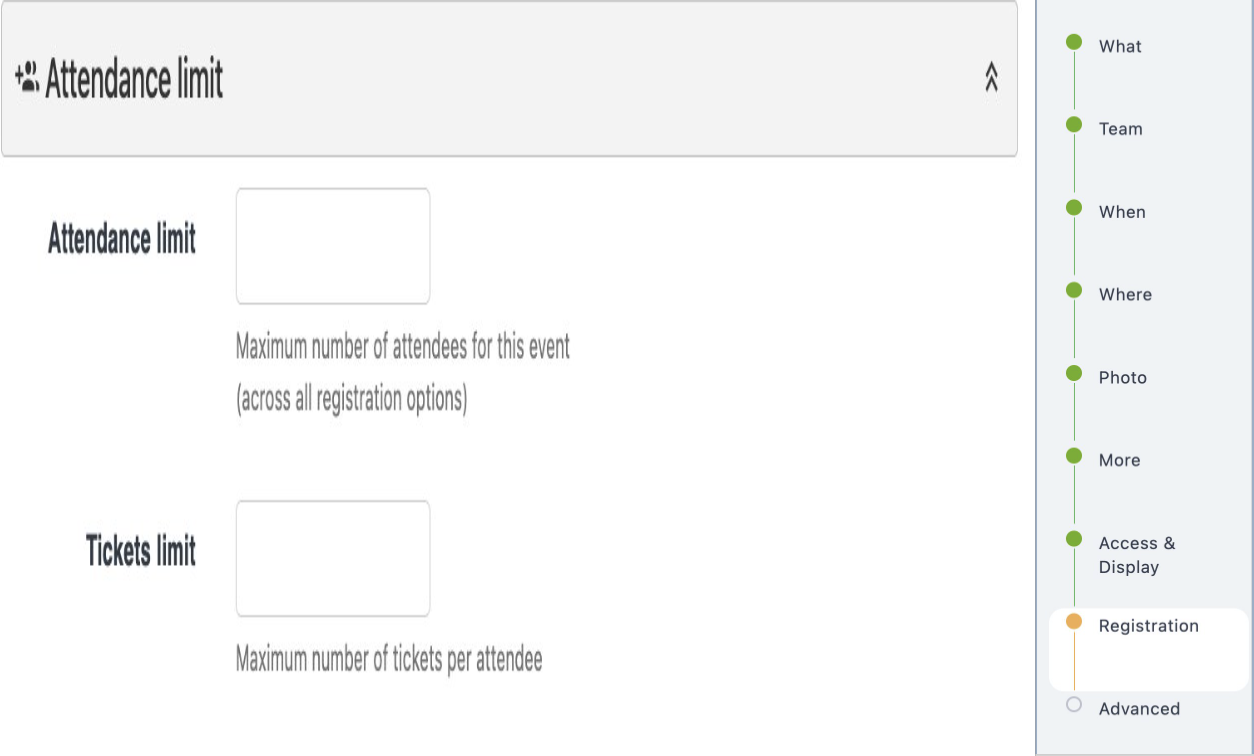
- Attendance Limit is for the max number of people that can attend the event.
Ticket Limit is the max number of tickets that a user is allowed to get while registering for the event.
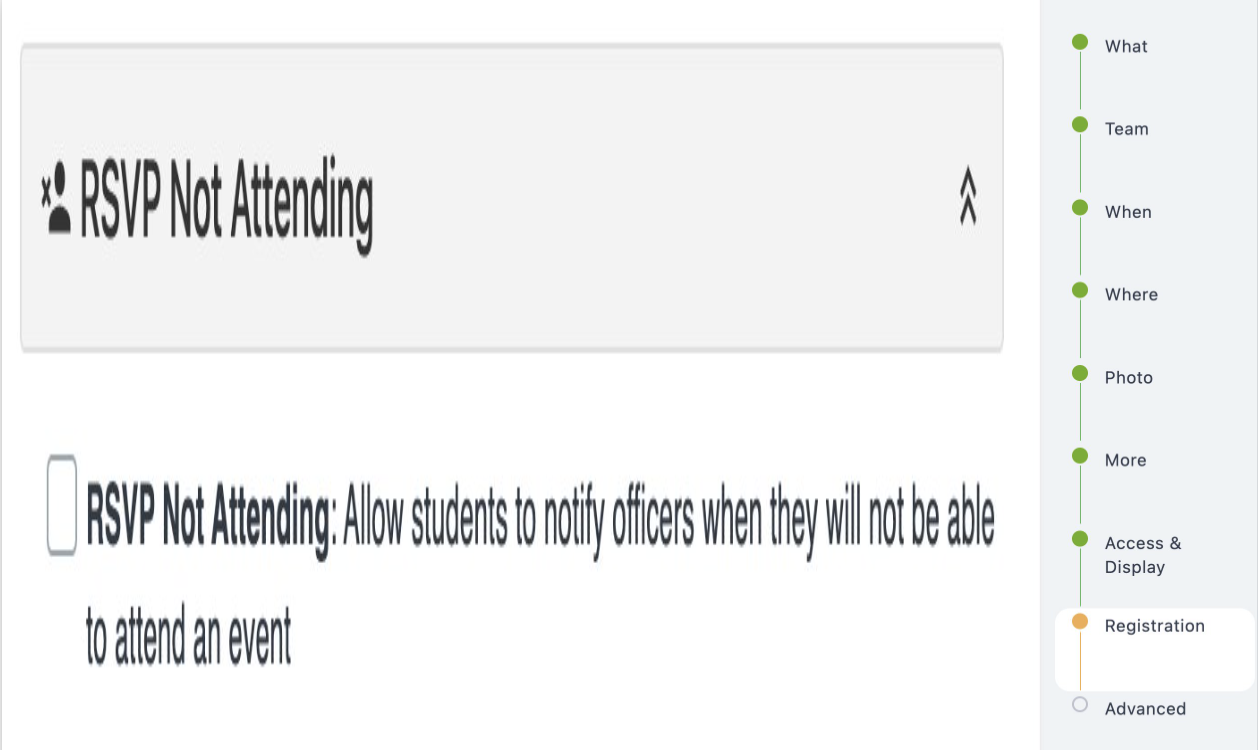
- RSVP NOT ATTENDING will allow user to notify event organizers that they will not be attending anymore. This tool helps organizers with getting people off the wait list if provided.
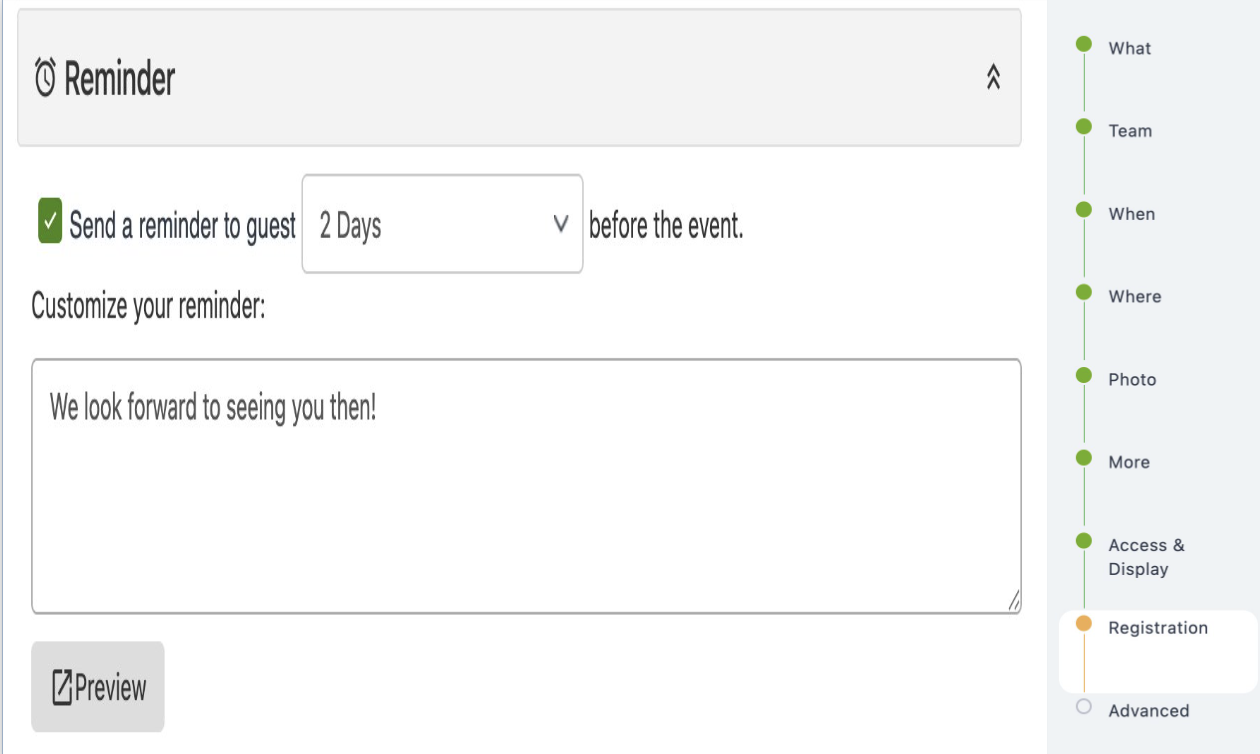
- Reminder - As event organizer you can set up a reminder to be sent out to those who have registered to your event.
- You can set a reminder to be sent out 1 hour before the event up to 7 days before the event.
- You can also customize your reminder message. In this selection you can add new information attendees might need to know or just a simple reminder.
- RSVP Personalized Email Confirmation
- As event Organizer you can customize a confirmation email after someone registers too the event.
- This is a good tool to use for attendees to know that they successfully registered to the event. Event organizer you have the option to add any other details an attendee may need to know.

- Display the list of attendees to - Event Organizer have the option to choose how to show the list of attendees to others.
- If selecting Everyone meaning that the list will be shown to anyone looking at the event.
- If selecting Logged-on users only, meaning only verified users of campus groups can see who's attending.
- If selecting nobody, meaning that overall, the event organizers can see who's attending the event.
- Lastly you have the option to also hide the numbers of people overall.

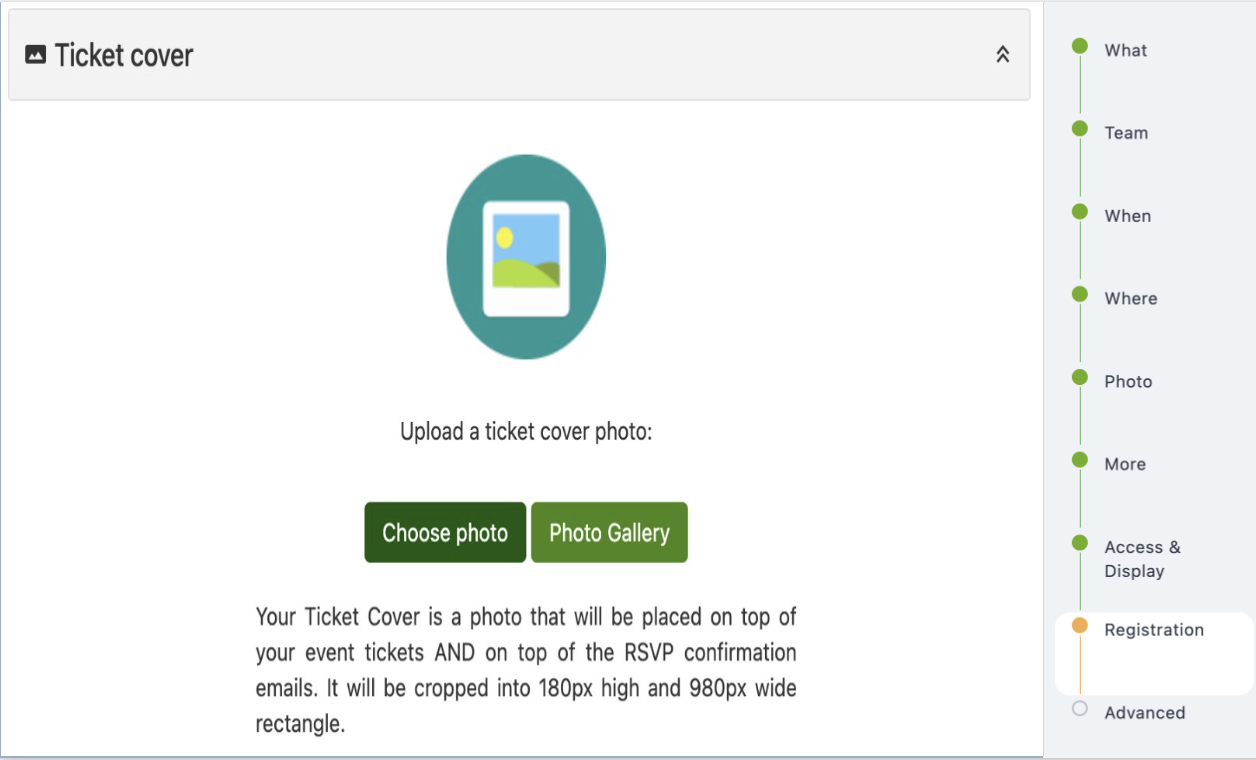
- Ticket Cover - As event organizer you have the choice to add a photo for ticket cover. This feature could help with customizing your marketing for the event with the added feature of customizing your ticket cover.
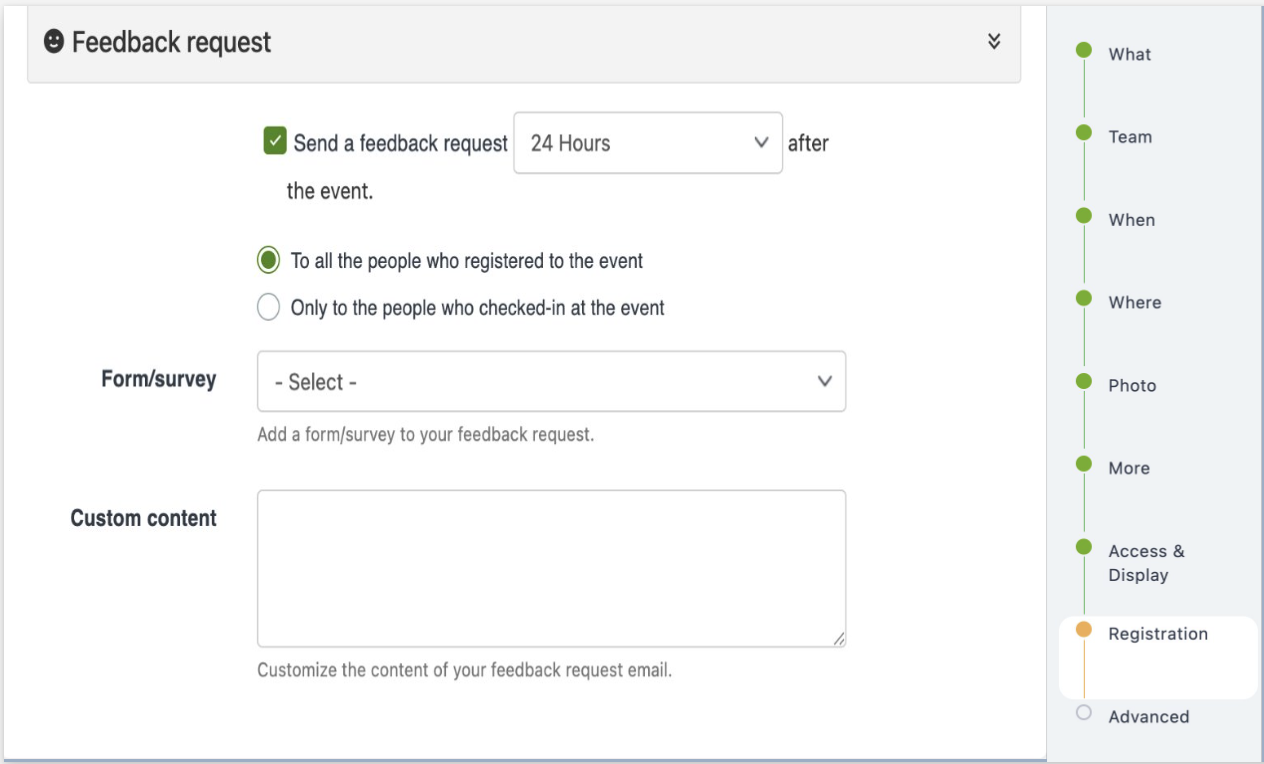
- Feedback Request dropdown
- If checking the send feedback request box as event organizer you can set it to how many hours after the event you would like the form/survey to be sent out.
- Then select the form/survey that you would like to send.
- With that you can custom content to customize the message sent in the feedback request email.
FINAL STEPS
If you're wanting to learn and/or add more information or features to your event head over to Create an event - advanced settings tutorial for more information. If you are done adding all necessary information for your event, click save and your event will be published!
These are all optional, but good tools to use to customize events.
- The Advanced Options section will allow Event Coordinators to customize various additional settings for the event.
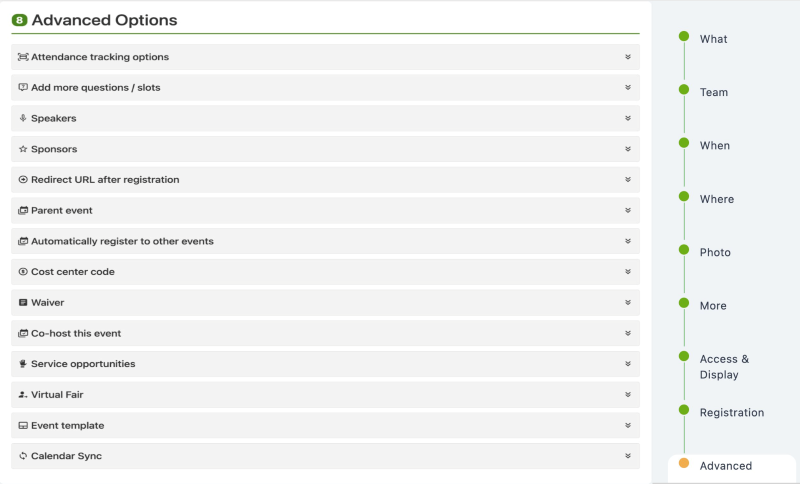
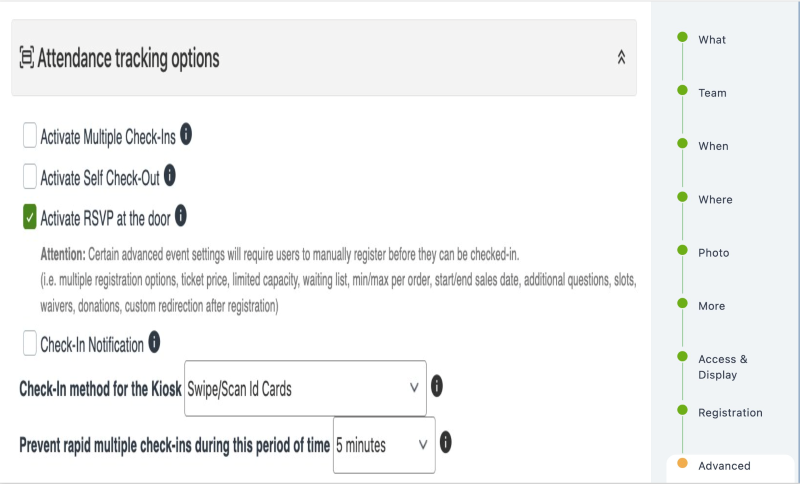
- Attendance Tracking options
This feature can help when you would like attendees to check in/out of the event.
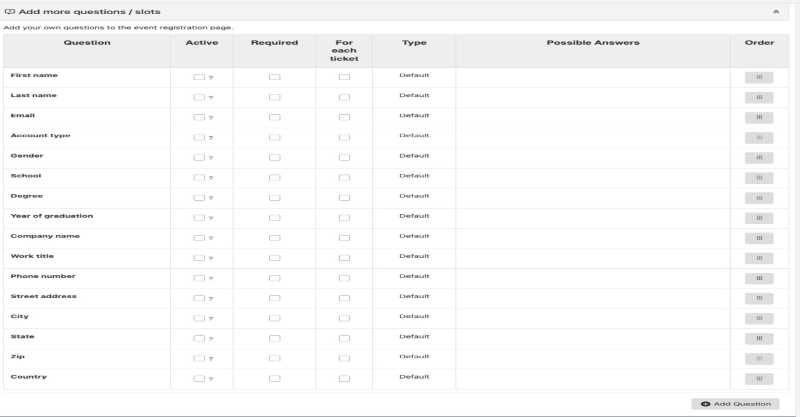
- Add more questions/slots
This feature allows Event Coordinators to create your own question/slot to the event registration page that was not provided but still need that information.
- Adding speakers to an event
This feature allows event organizers to showcase the speaker(s) that will be attending the event.
- Select add speaker
- Then select an existing speaker or create a speaker profile.
- If creating a new speaker, it will take you to a page where you can edit the speaker information.

- Adding Sponsors to an Event
This feature allows event organizers to highlight the sponsors that helped with the event.
- Select add a new sponsor
- Add the name, logo, logo size and sponsorship level.
- Then click save

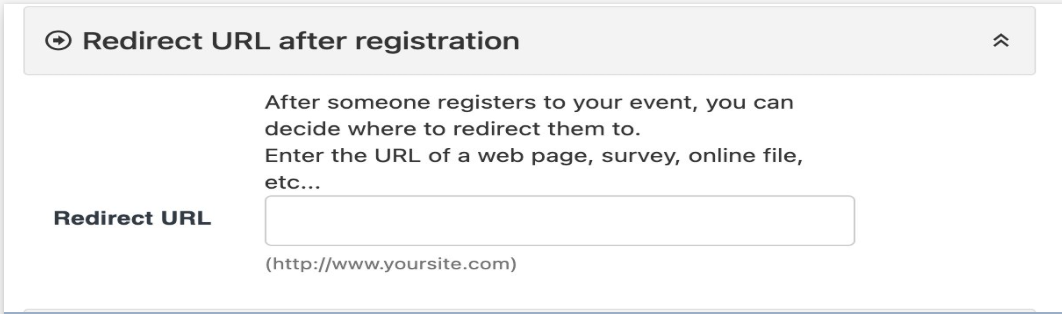
- Adding a Redirect URL after registration
This feature can be used by event organizers to add a link that can redirect users to a specific web page for example like the campus groups homepage or another external page.
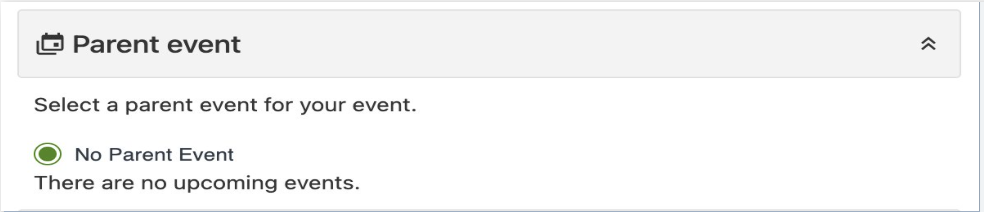
- Parent Event
For this feature, it will give you a list of events that you have already created and ask if they are parent event focus. Most/all the time events should be for students so you would most likely NOT have to use this feature.
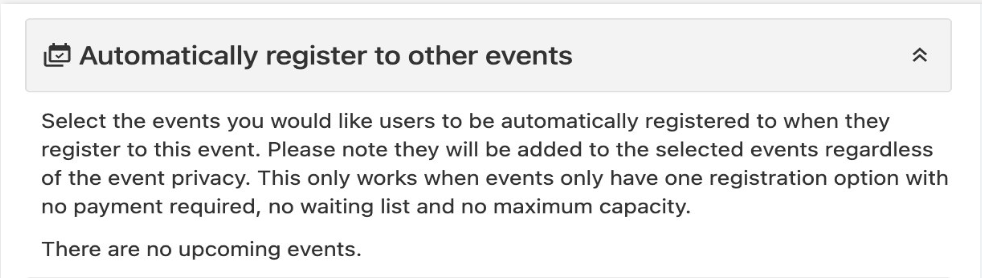
- Automatically Register to other event
This feature is for, Selecting the events you would like users to be automatically registered to when they register to this event. Please note they will be added to the selected events regardless of the event privacy. This only works when events only have one registration option with no payment required, no waiting list and no maximum capacity.
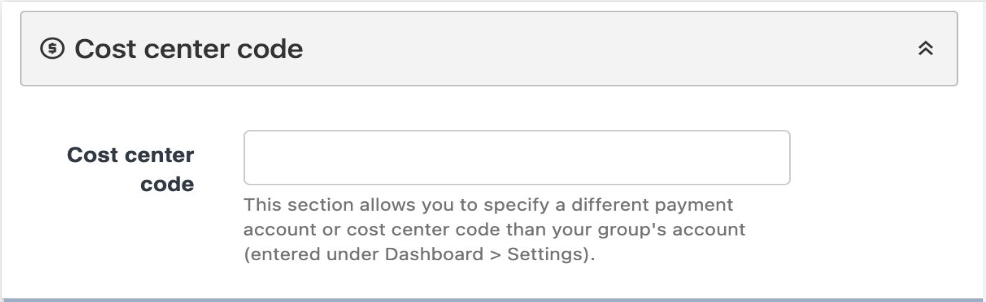
- Cost Center Code
For this feature, please keep in mind that you will have to talk to cashiering office, so you don't have to use this feature. This Feature basically allows you to specify a different payment account or cost center code than your group's account.
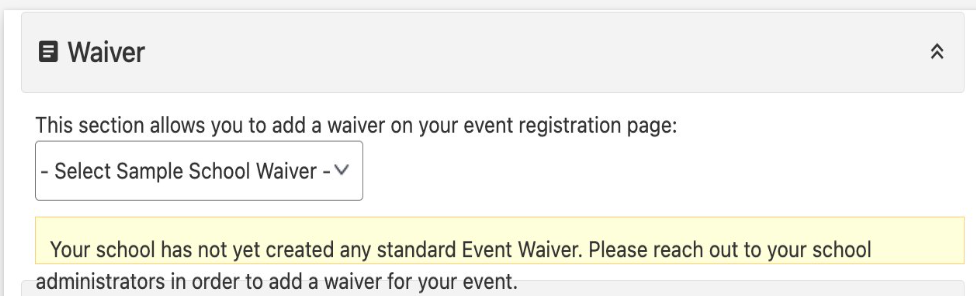
- Waiver
SLCC has not created an event wavier yet, so depending on the situation admins should were to search specific waivers.
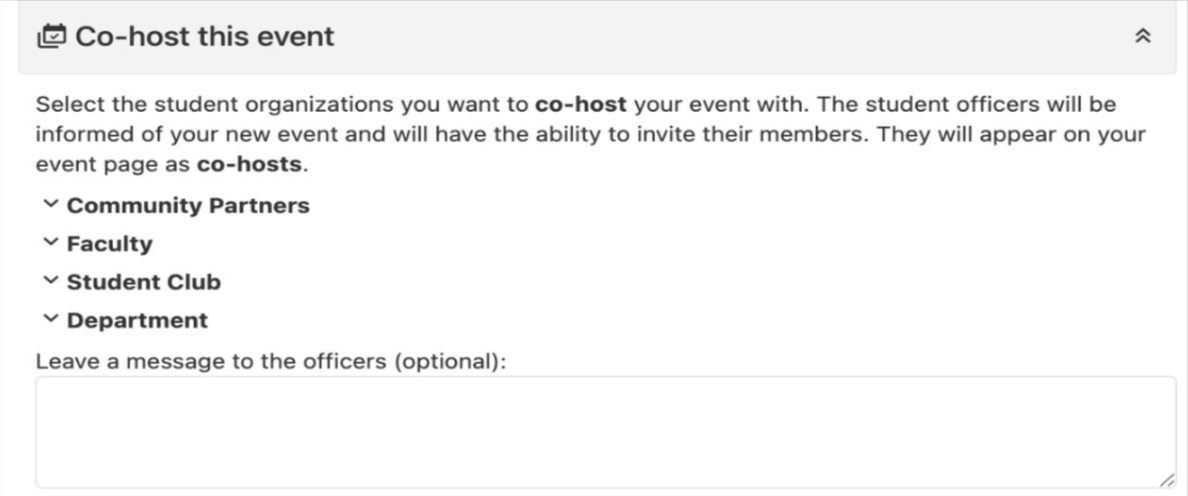
- Co-host this event
This feature, it will have you select the student organizations you want to co-host your event with. The student officers will be informed of your new event and will have the ability to invite their members. They will appear on your event page as co-hosts. That being Community Partners, Faculty, Student Club and Department they should all be available in this selection.
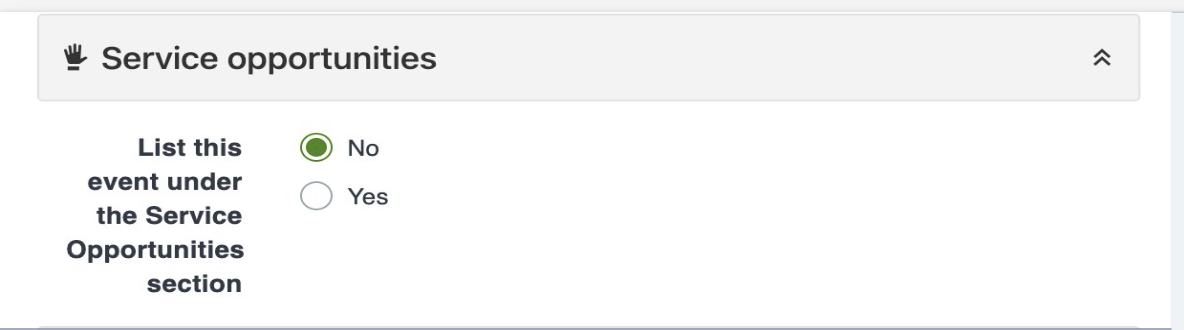
- Adding Event to Service opportunities
If an event is being created to be a service opportunity this option will allow it to be added to the list of service opportunities typically for students and staff.
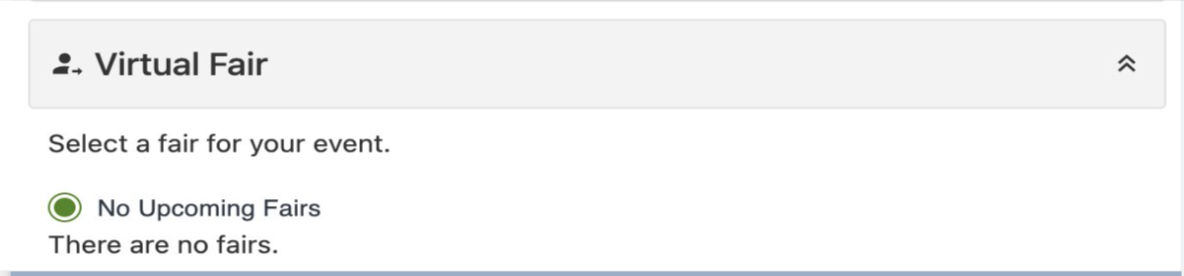
- Virtual Fair
Any virtual fair that an event coordinator would want to create.
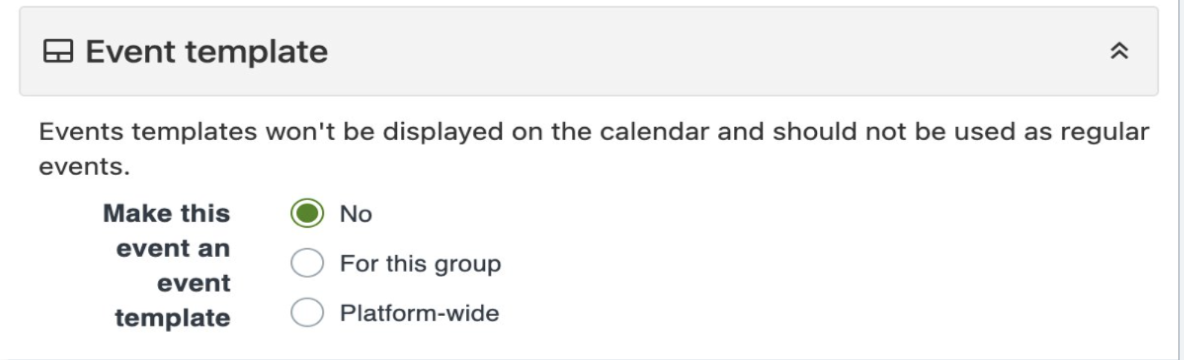
- Event template
Events templates won't be displayed on the calendar and should not be used as regular events.
- Calendar Sync
If you disable sync for this event, it will no longer be sent to the calendar of attendees that have synced their calendar with the platform.

- Create Event
Finally click create event when you are done using any/all advance settings.

- Welcome to the Home page. Now, navigate to the Events tab at the top of the page to view all upcoming events.
- Then click on the Event tab that can be found at the top of your home page.
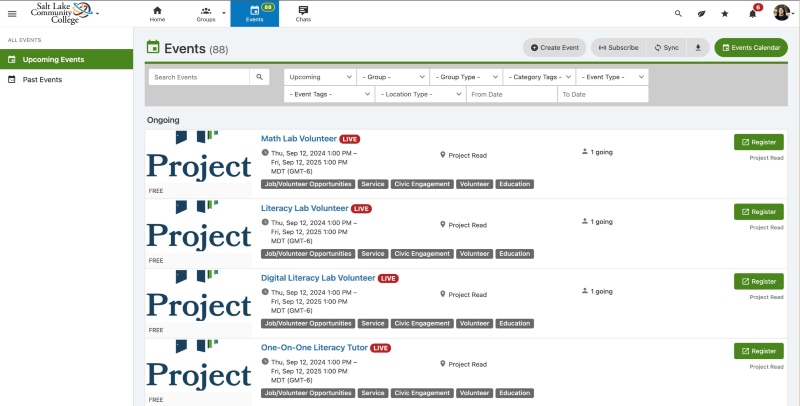
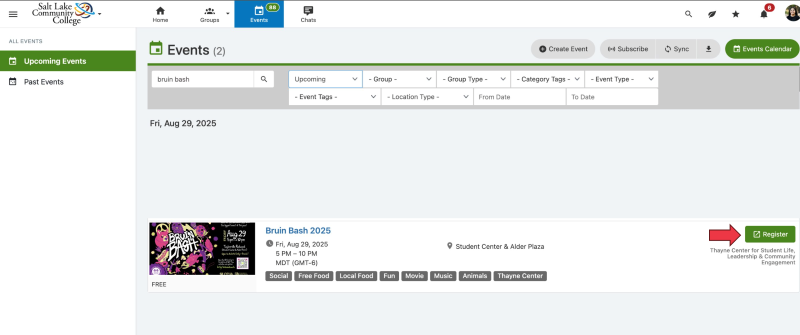
- It will take you to the event page, where you would be able to see all that are happening. You can even search for specific events that you are looking for to register.
- For this example, we will be searching up and registering for the Bruin bash. To show how to register for an event, this process would look similar when registering for any event in campus groups.
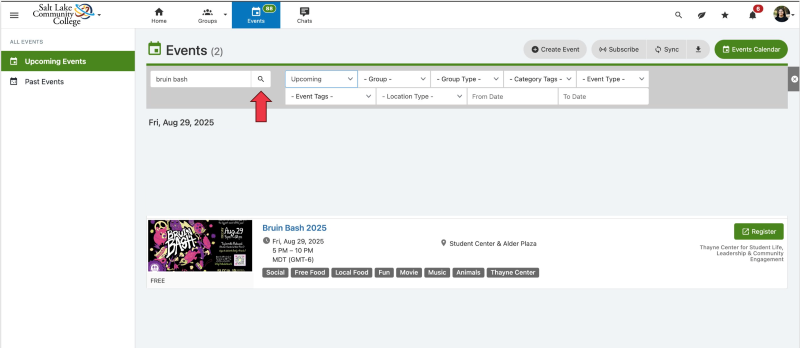
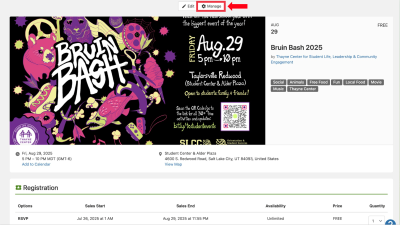
- After you have found the event, you are looking/interested in registering for, click on register icon on the right side of the event.
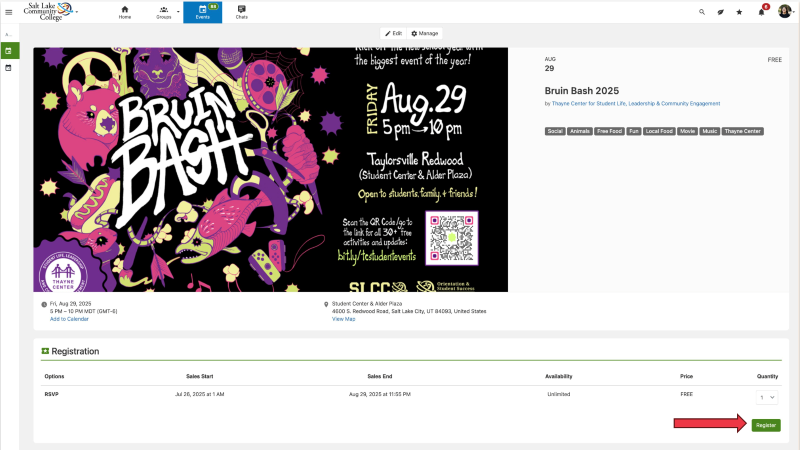
- After that it will take you the main page of the event where it will provide all the information you need to know about the event. If you want to register, click on the register icon on the right.
- Then it will take you to the registration page that will ask you to fill out some required information that would very on the type of event.
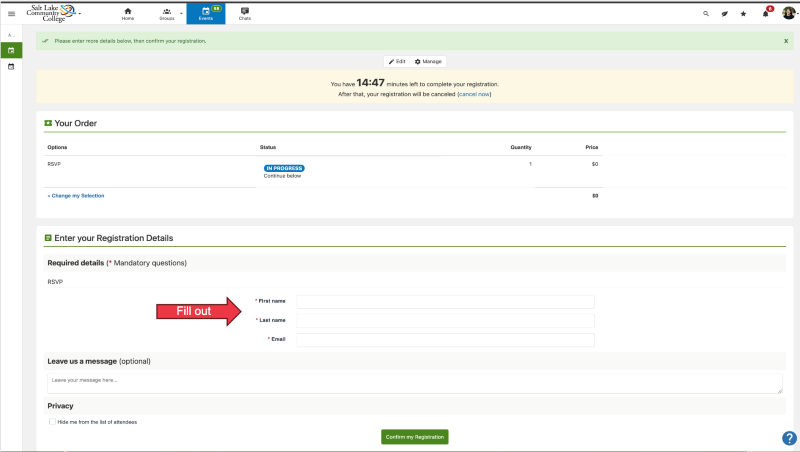
- After filling out all required information, click on the Confirm my registration icon.

- Finally, it will take you to the Thank you page that will confirm your registration to the event!
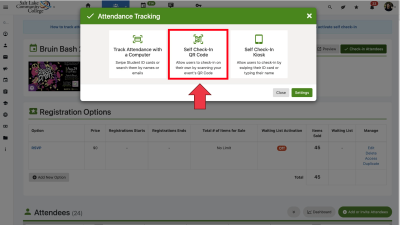
*Only Officers/admins can manage events check in!
Manage Check-in with three different methods you can use any of these check-in methods:
- Scan each attendee's QR code using SLCC Groups App
- Self-Check-in QR code
- Tracking attendance with a Computer
Tracking Attendance with SLCC Groups App
- Start by downloading the SLCC Groups App

- Find event to manage registration, Example: SLCC Chemistry Club @Pizza & Posters 2025 Event
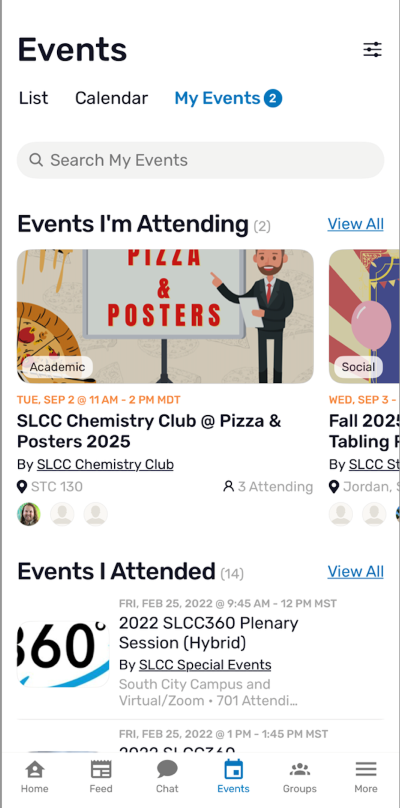
- After Finding event, Click on check-in attendees
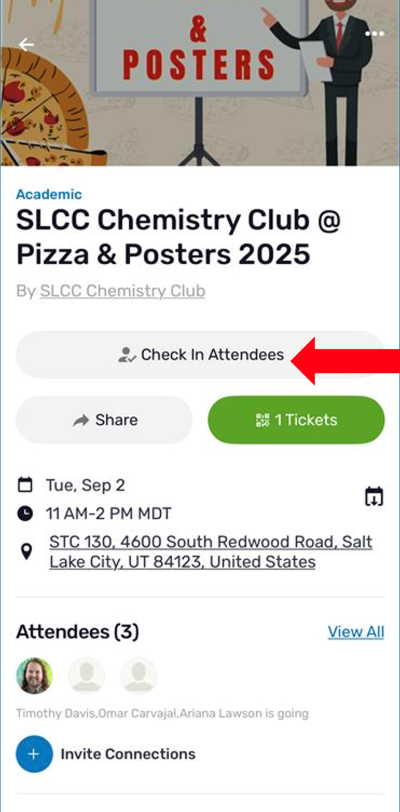
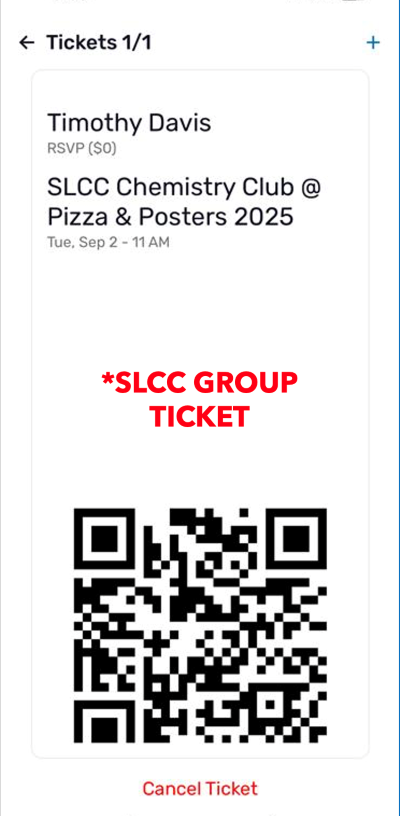
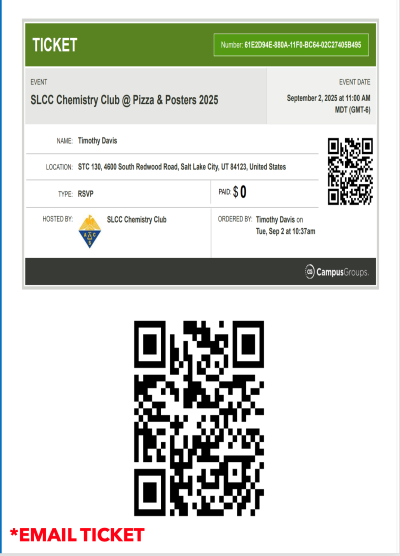
- Student's Point of View: If a student has registered for an event, it should bring up the ticket on their end. They should also receive one through email.
- After clicking on check in attendees, it should bring you to check in page. Click on the QR Code Scanner on the top right corner.
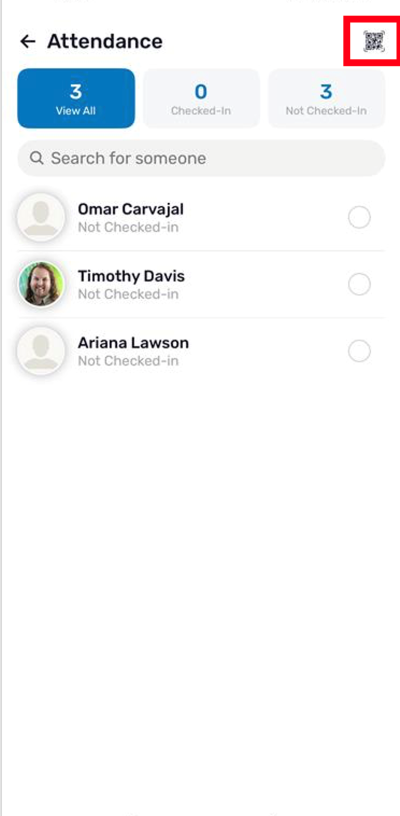
- Then it will open the Scanner up on your phone, you'll be ready to scan the tickets during the events using your phone.
Self Check-In QR Code
- Manage your event by selecting Check-in attendees. Start by opening the event that you're managing. For this example, we will be using Bruin Bash event to manage the check in process during an event.
- Select Check-in attendees
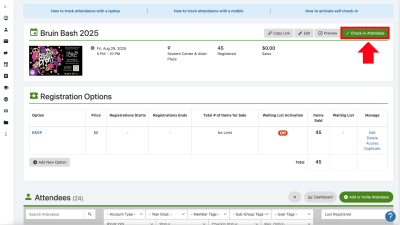
- Then it will take attendance tracking, where you will find all the options to track attendance.
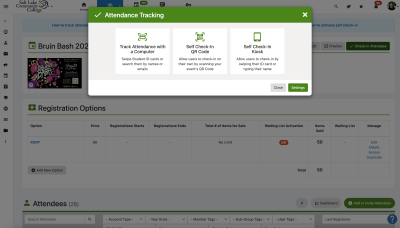
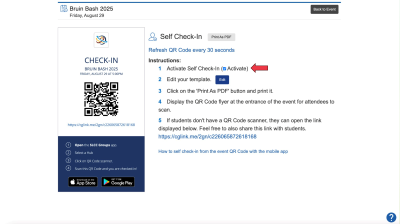
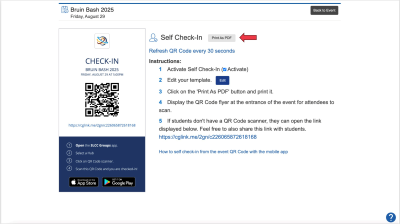
- It will take you to the Main Page with steps to check-in with QR.
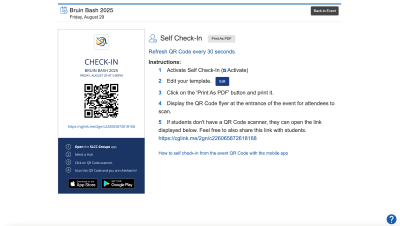
- Make sure the activate checkbox is selected for the QR code to be activated and NOT update every 30 seconds. This makes sure your QR code is working properly.
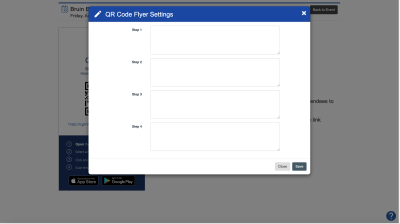
- Edit your template, if you want to customize the flyer template steps by clicking the edit icon.
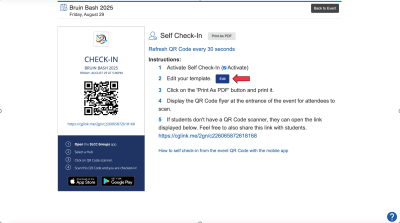
- QR Code Flyer setting look like, if you want to edit the template steps. You will be able to see the edit changes when you're ready to print as a PDF for display. If not, it will have set instructions for the QR code.
- Present the QR Code flyer prominently at your event, either on a printed flyer or on a screen allowing users to check-in. By clicking on the Print as PDF.
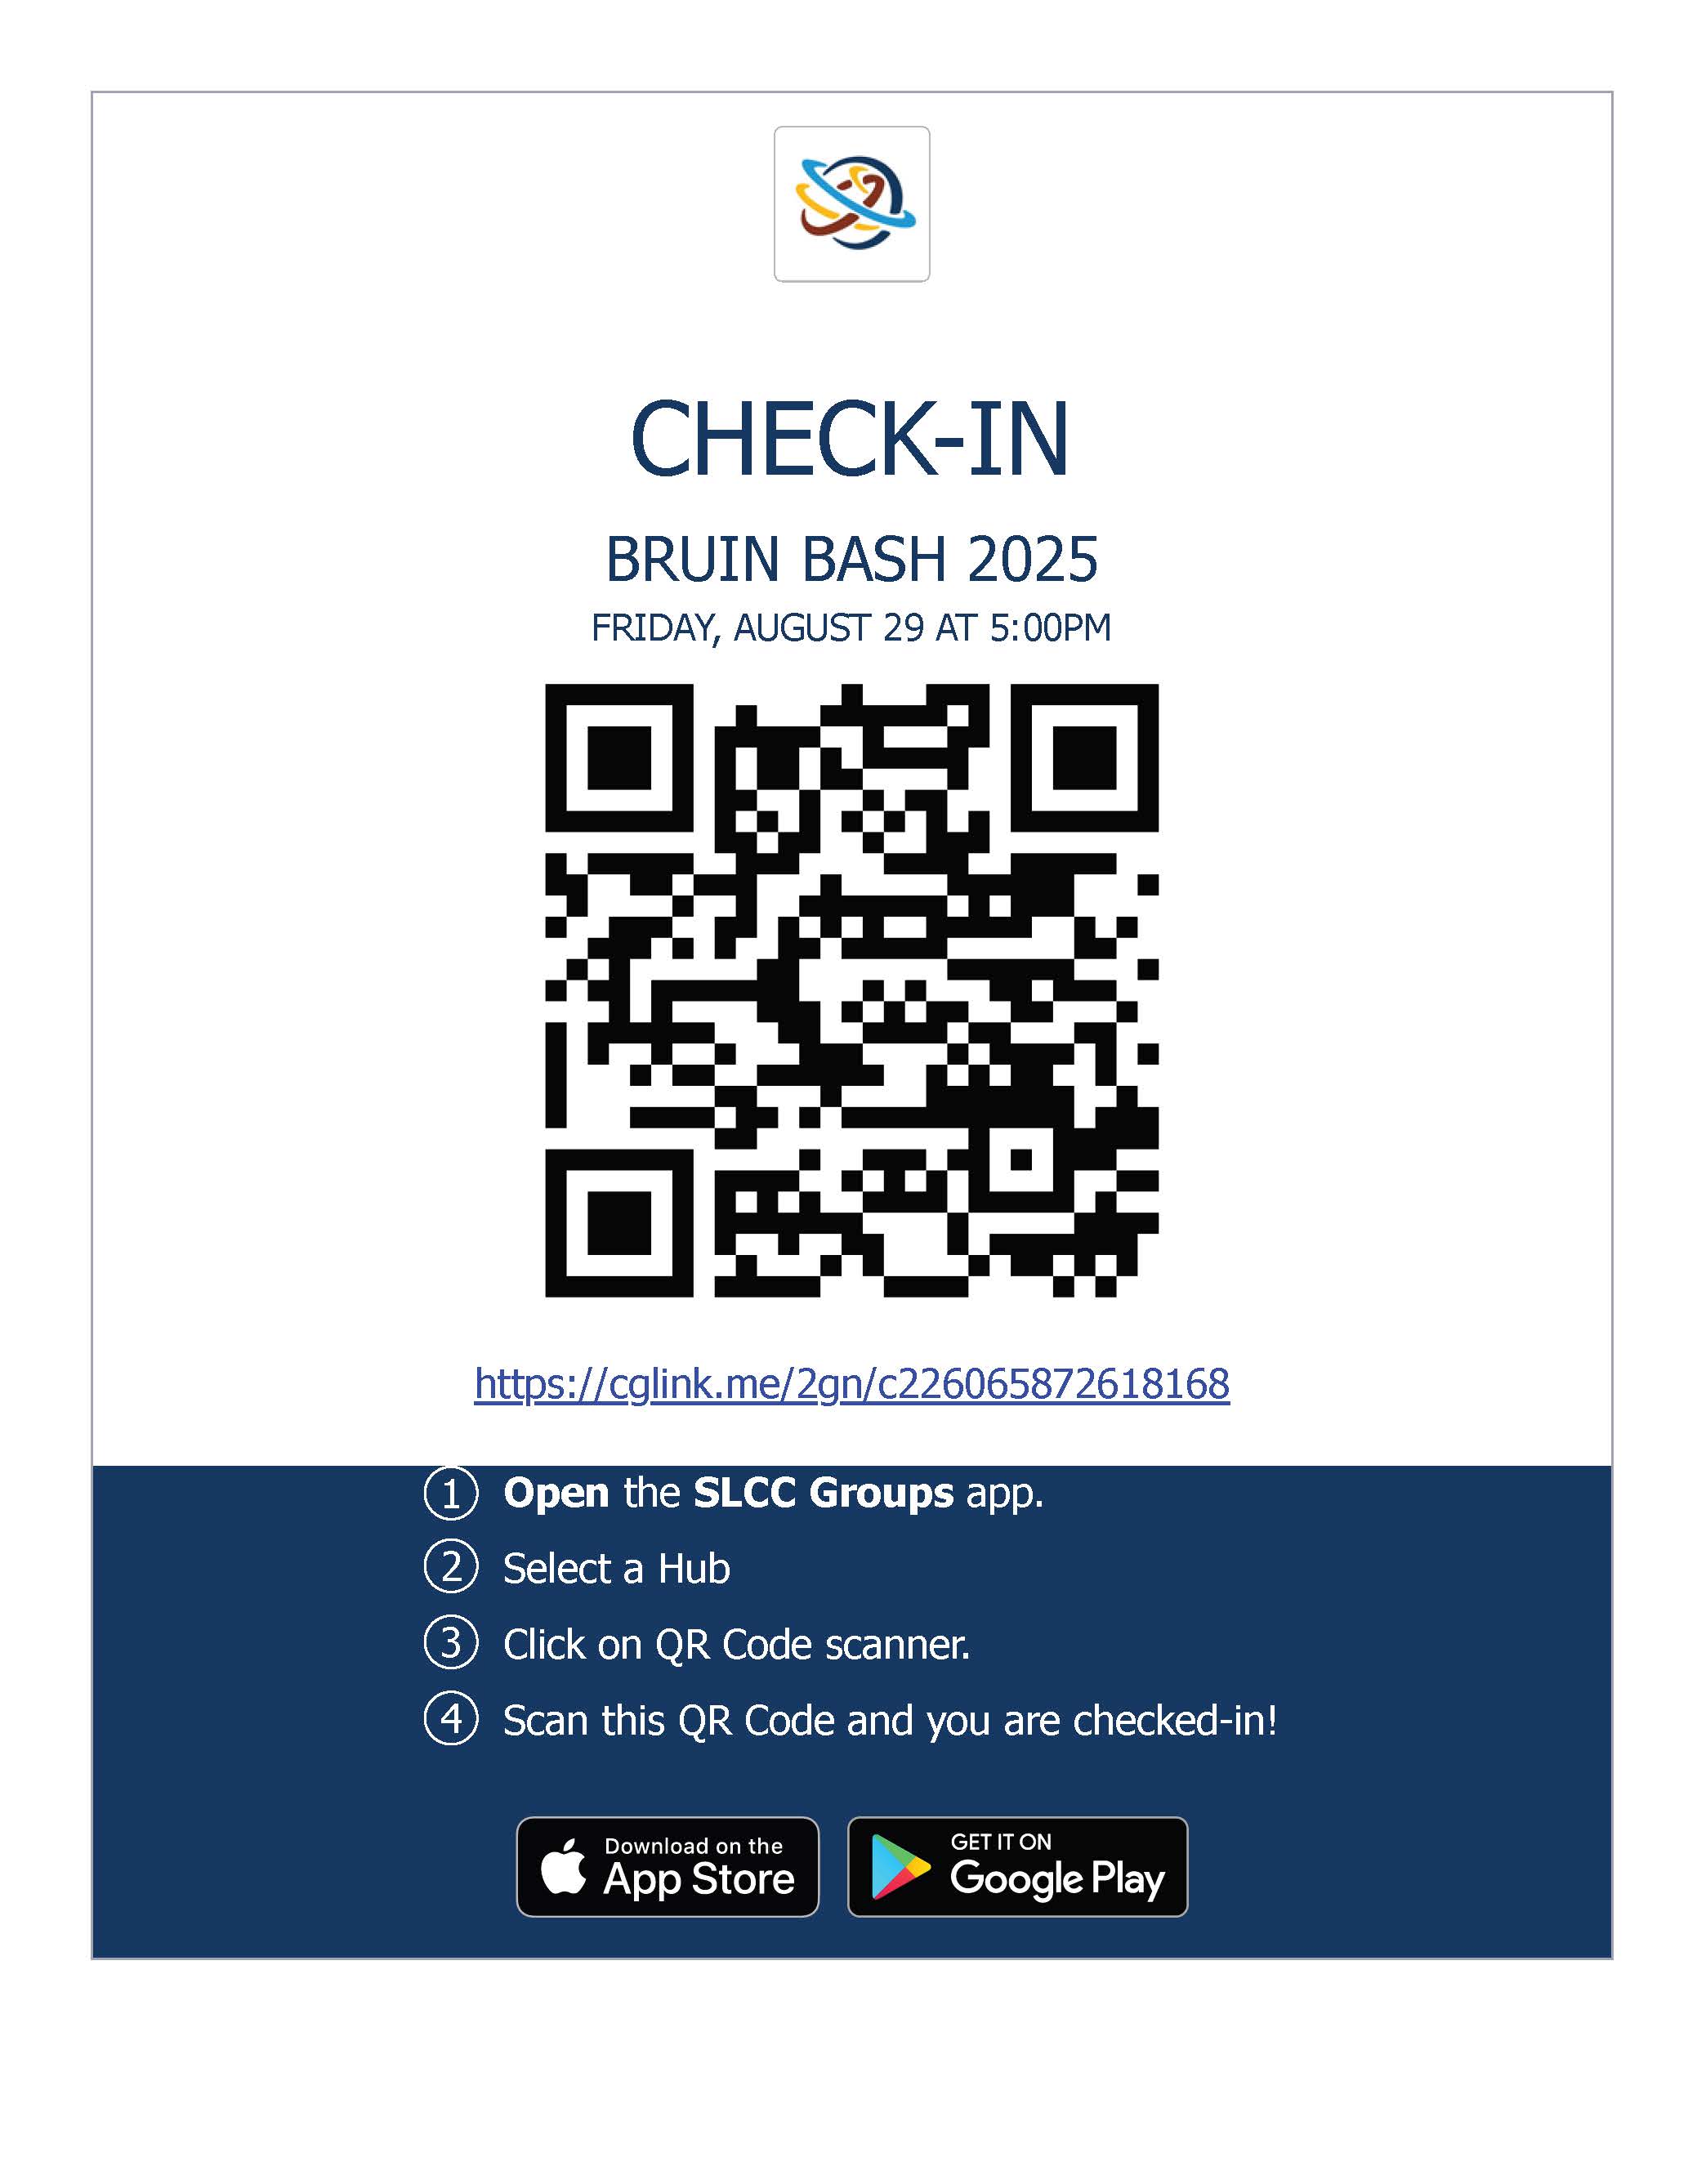
- Finally, this will be an example of how the printout of the PDF will look like.
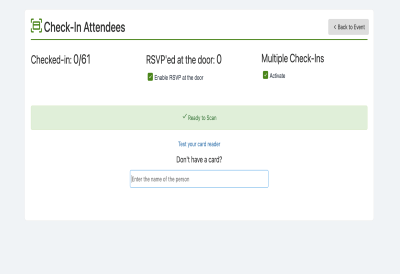
Tracking Attendance with a Computer
- Start by selecting, Tracking attendance with a Computer

- To Check in Attendees with a computer feature it can be used to search student name to check them in for the event.
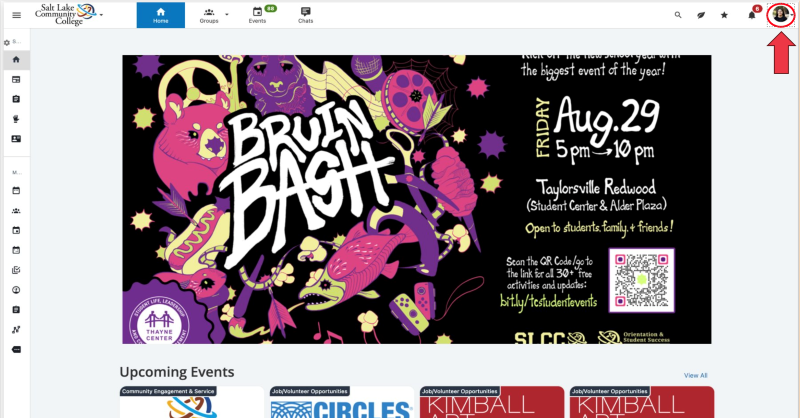
- Welcome to the Home page.

- Now, navigate to the profile picture at the top right corner of the home page. Click on the profile picture.
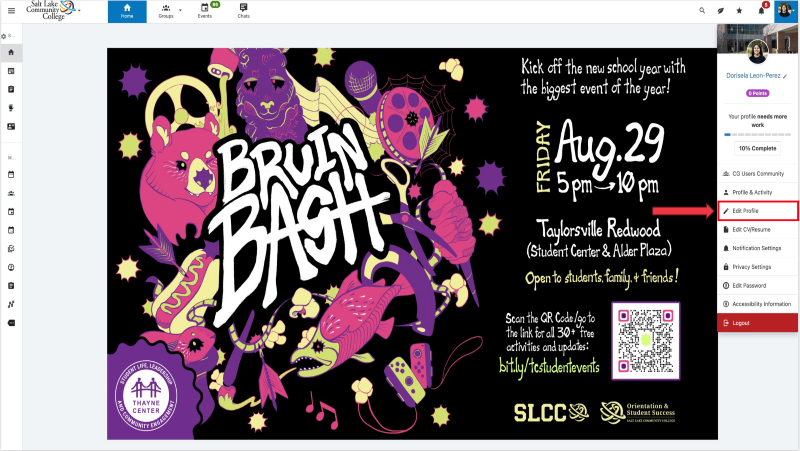
- After clicking on the profile picture, there will be a drop down that will show you the profile settings. After click on the Edit profile icon.
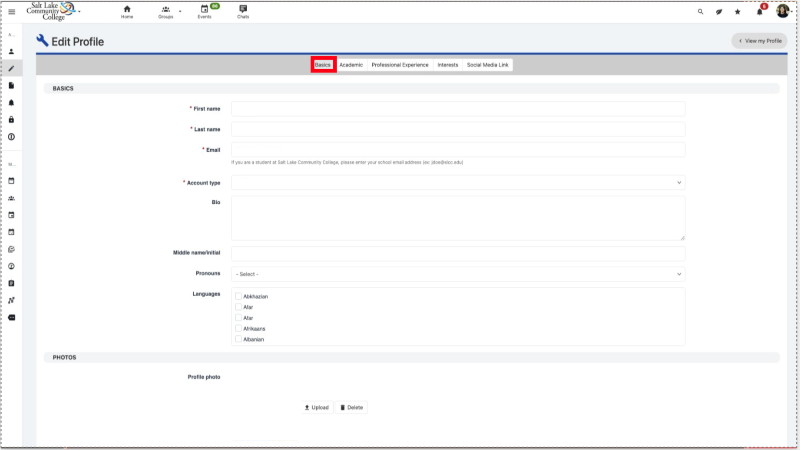
- It will take you to the editing profile pages. The first section will have you fill out all basic information you'll need to start your profile. After you fill out all necessary information, make sure to hit save to make sure it is updating the information to your profile pages.
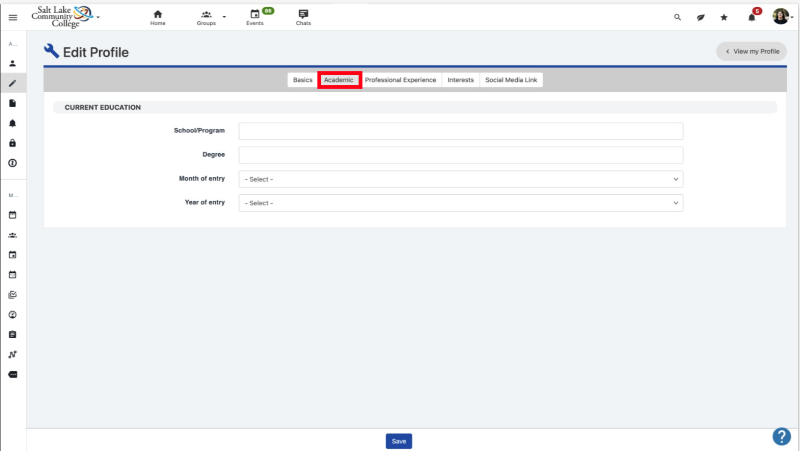
- The second section will be the Academic section that will have you fill out all current education information to your profile.
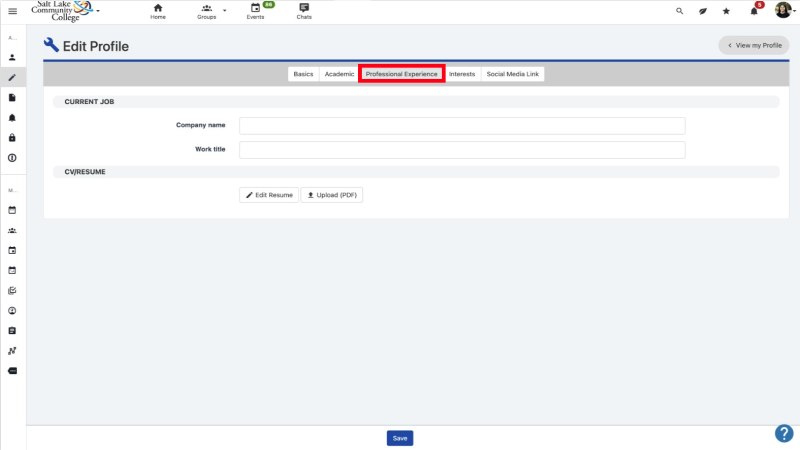
- The third section will have you fill out all current Professional Experience information. Like current job and it has a place for your resume as well.
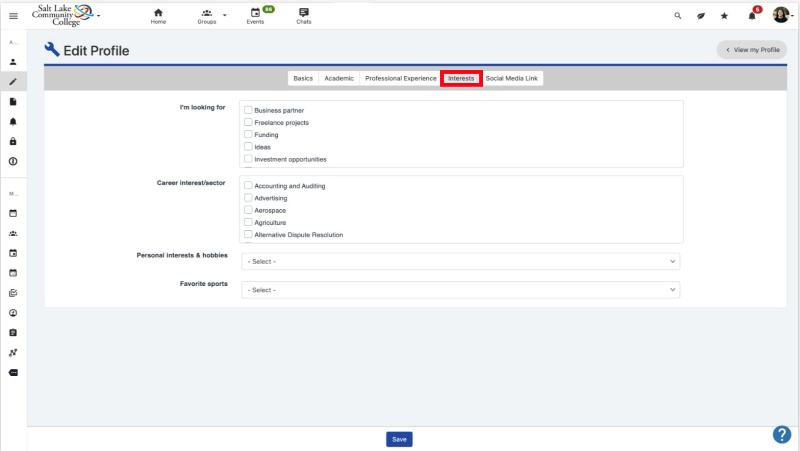
- The fourth section will have you fill out all current interest information. Where it will have you fill out what you're looking for, any career interests, hobbies, and/or any sports you're interested in.
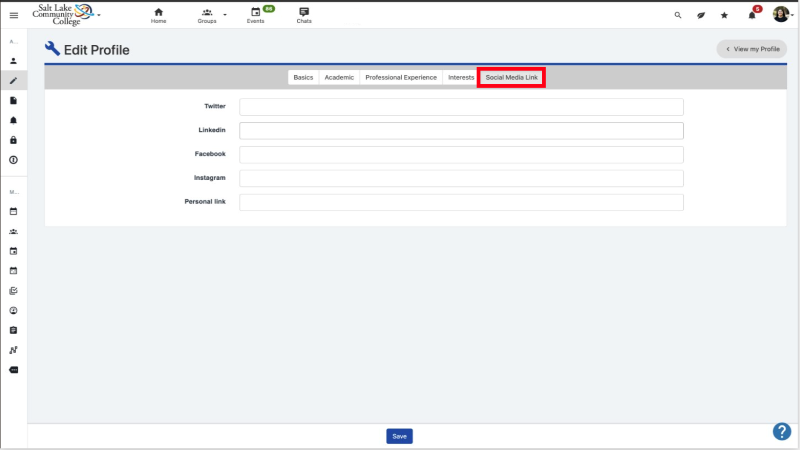
- The fifth section will have a place to add your Social Media Links.
- After going through all the sections, you are ready to fill out and customize your profile to your liking. Remember you can provide as much information as you want, this is your profile.
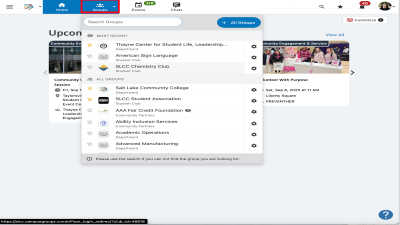
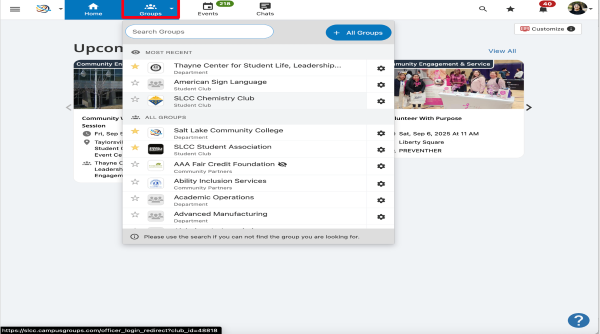
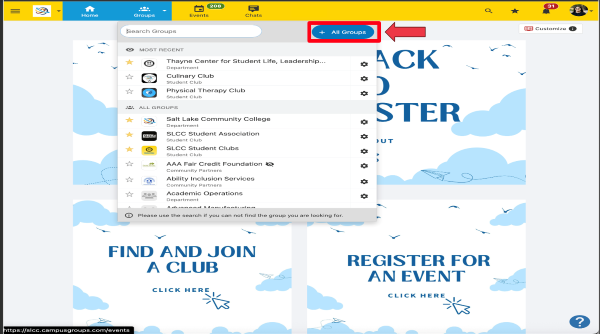
- Welcome to the Home page. Now, navigate to the Groups Tab at the top of the page to view all groups that are available on campus.

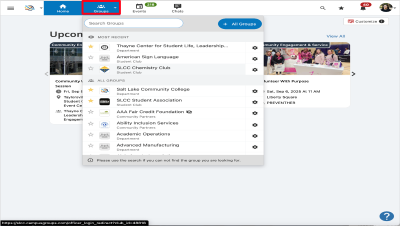
- After clicking on the Groups tab, it will bring a dropdown, where you will be able to view all the groups that are active on campus. Click on + All Groups icon on the top right corner.

- Then it will take you to the Groups page, where you to view all the active groups that are available on campus to get involved in. To find clubs click on the Student Clubs icon.

- After it will take you to the main page where it will list all the clubs that are available on campus.

- Now to learn to register for a club, for this example we will be locating the SLCC chemistry club. After that click on the club.

- Then it will take you to the club page. You will be able to see all the club information like the mission statement of the club what they stand for. The officers that oversee the club. Any upcoming events that get updated every semester. As well as the time and location of club meetings.

- After taking a moment to look at all the information. Hit the JOIN GROUP tab.

- It will take you to the main JOIN tab.

- After clicking JOIN it will take you to the page Thanks for Joining. After you have successful joined a club!
- After joining, please make sure to reach out to the club president to confirm club involvement.

Update your group – Groups Page
- On the home page, start by search up your group page.
- Now go to your group, click on the Dashboard dropdown and select Settings.
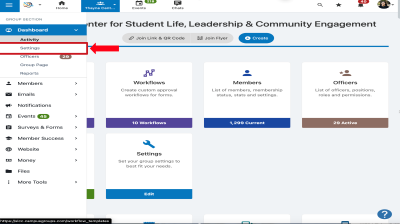
- After clicking on setting it will take you to the group page settings where you'll be able to update your group page.

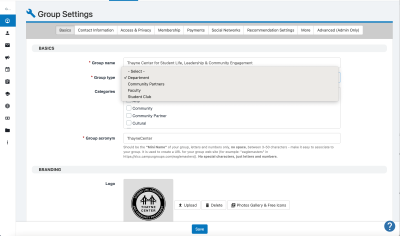
Group page Settings
Basics
- Edit your group information, branding, and other basic settings.
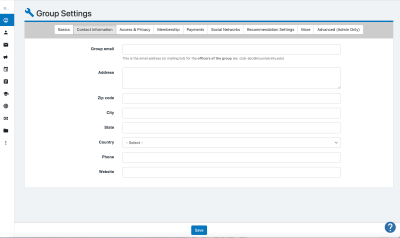
Contact Information
- Customize and edit your groups contact information
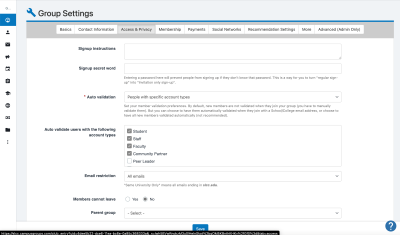
Access & Privacy
- Customize who can have access to see and join your group
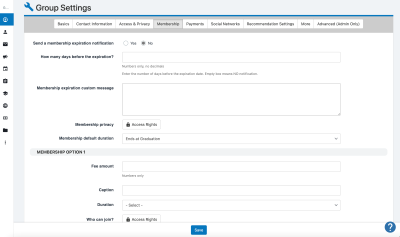
Membership
- Manage membership tiers and expiration dates
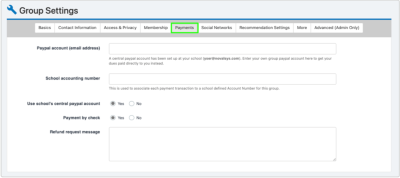
Payments
- Not using this feature please skip.
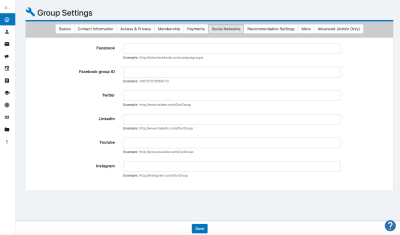
Social Networks
- Feature all your social links for your group members to access on your group page
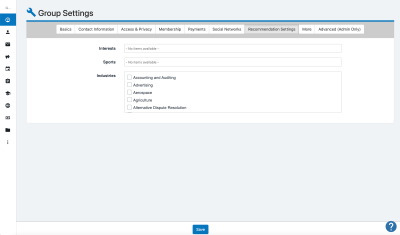
Recommendation Settings
- All the setting you can use that your club will be recommended to if the audience is trying you find your group page.
More
- Access a variety of additional settings for your group
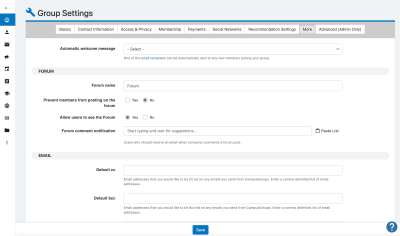
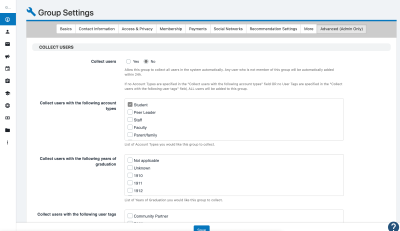
Advanced (Admin Only)
- Accessible only to Platform Admins, these advanced settings give you even more control over your group
Update your group – adding officers
- Start by finding your group
- After you have selected your group, then click on the Dashboard dropdown and select Officers.
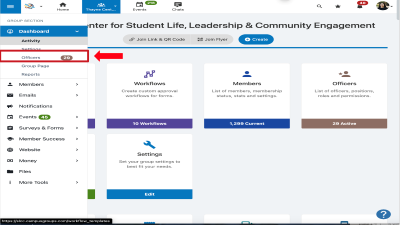
- Now that you are in the page of the officers, you'll be able to manage all the officers on this page.
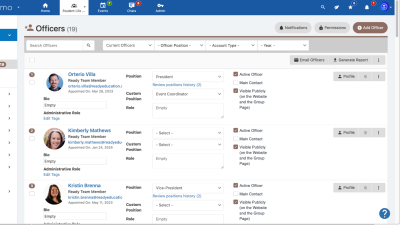
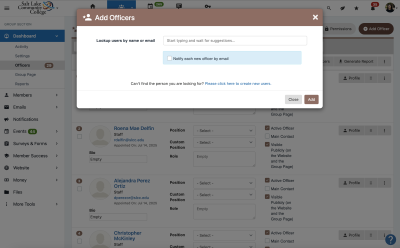
- Click Add Officer if you want to add new officer to your group.
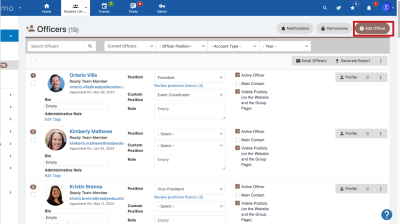
- Search for the User and click Add
- Once added, you can give the Officer a Position and a Custom Position.
Update your group – Adding/managing/deleting members
*Only officer(s) can add/manage members
Adding/Managing Members
As an officer of your group page, you can add new member to your group. You can manually add new members.
- Start by finding your group.
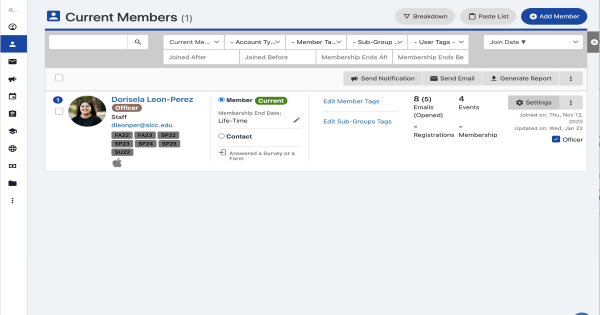
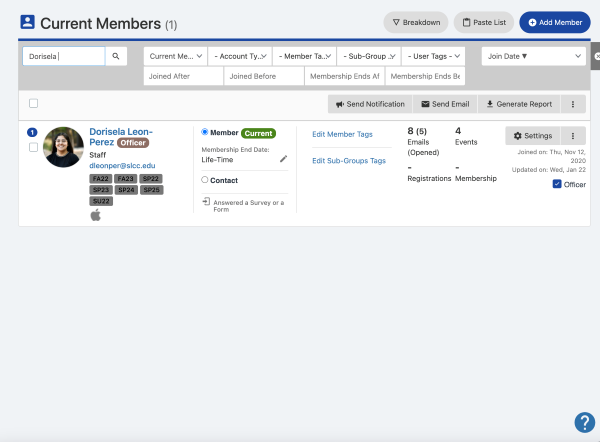
- Select the Members tab to get started.
- After selecting Current Members tab, you will be on the main page with all the current members in the group.
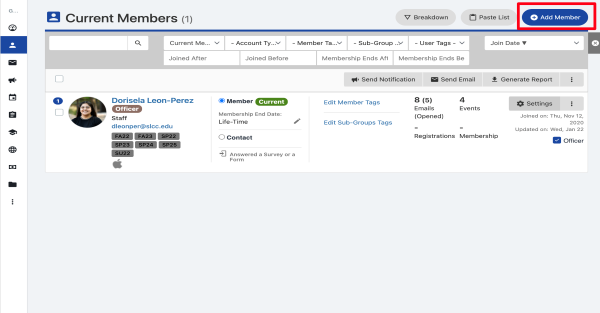
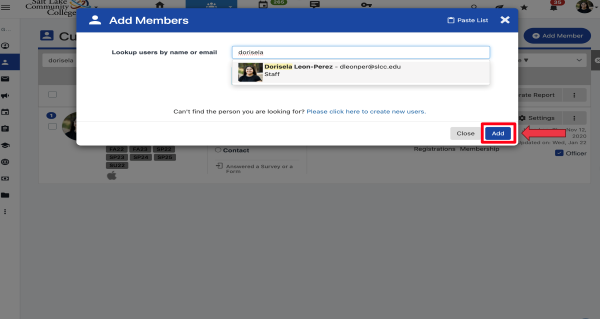
- Now, click on Add Member
- It helps to know the member(s) name and Bruin mail.
- After you can search for any Users that have a campus groups account, if you would like to add to your group or select the Paste List option if you would like to add members in bulk
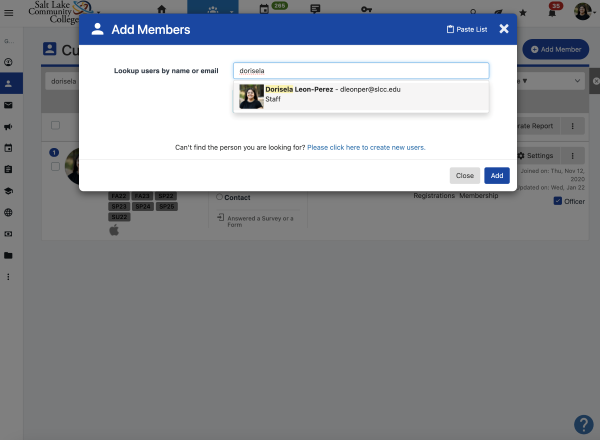
- Click Add, when you're ready to add them to the list of current members.
Deleting Members
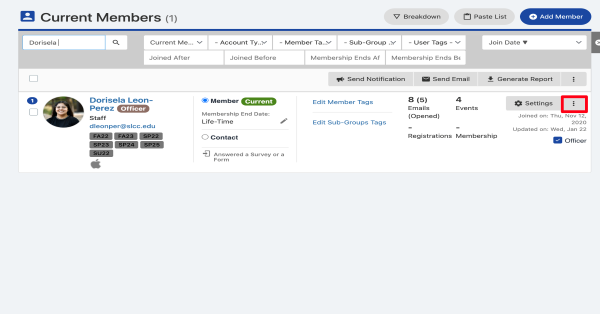
- If you want to manage members in the group, start by searching for the member(s) name.
- To delete a member that is no longer in the group, locate the three little dots on the side of settings.
- After, it will take you to a dropdown. Locate the delete tab.
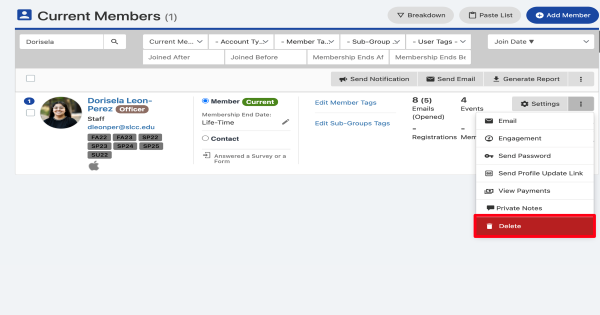
- Finally, it will ask if you want to delete the member. If you do, click ok. If not, click cancel.
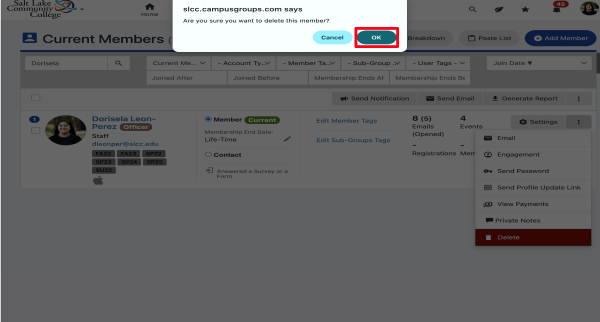
- You have access to delete/add member(s) of your group; make sure to make updates as needed.
*I would recommend deleting your members at the beginning and end of the semester if you're a club.
Other features:
Paste list, is to add a list of emails to add multiple members into your group.
Break down, will allow you see all the members that are in your group. Breaking them down into member type.

Finding Community Partners & Service Opportunities
Finding Community Partners
- Welcome to the Home page. Now, navigate to the Groups Tab at the top of the page to view all groups that are available on campus.
- After clicking on the Groups tab, it will bring a dropdown, where you will be able to view all the groups that are active on campus. Click on + All Groups icon on the top right corner.
- Then it will take you to the Groups page, where you to view all the active groups that are available on campus to get involved in. To find clubs click on the Community Partners icon.
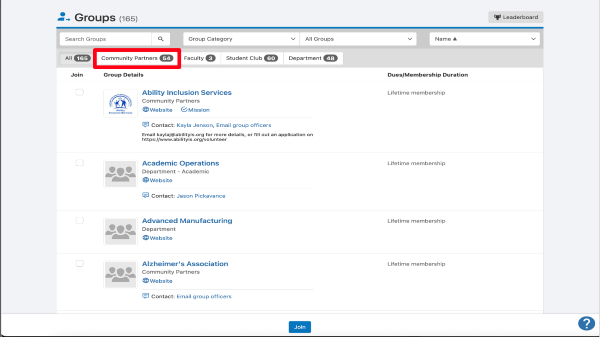
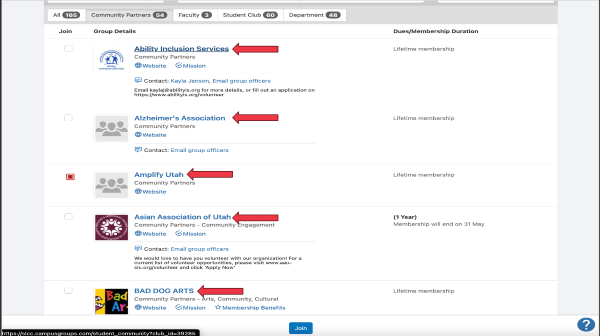
- After it will take you to the main page where it will list all the Community Partners that are available.
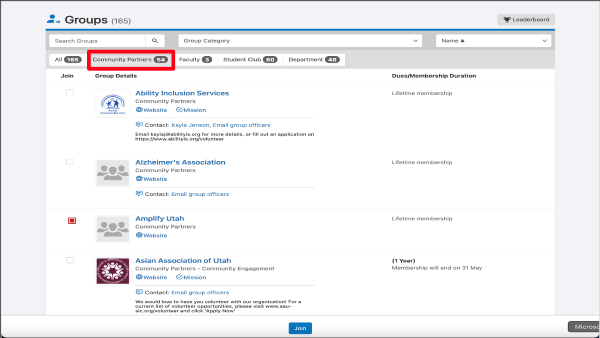
- If you want to learn about any community partner, if you click on the name of any community partner it will take you to the website, where you will be able to learn more about the organization. It can also take you to the information on who to contact, depending on the organization.
Finding Service Opportunities
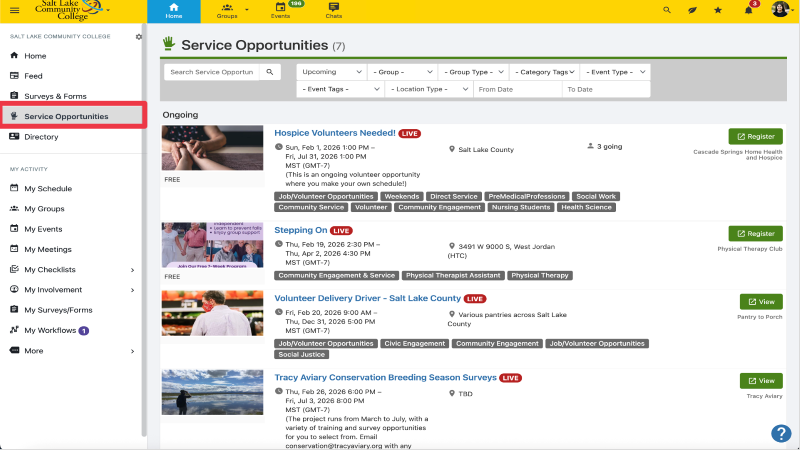
- In the home page, find the side bar on top on the page. Find and click on service opportunities.
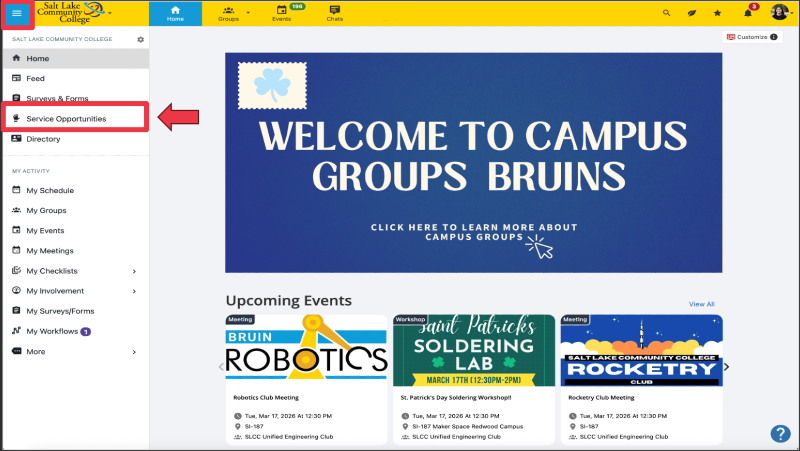
- It will take you to the service opportunities main page. Where you'll be able to see all the available service opportunities.
- You'll be able to view and register to different service opportunities happening on campus or off campus.